
Adding multiple SOAP Resources
Procedure
-
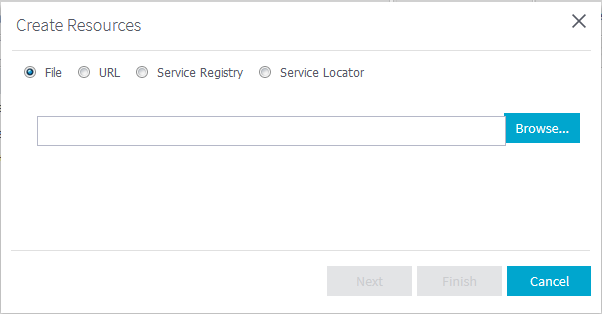
From the toolbar on the Resource panel, click
Add > SOAP Resource to show
the Create Resources wizard.
Example
-
Select to create the Resource from a File,
URL, Service Registry, or
Service Locator. You can create multiple Resources
from these options.
-
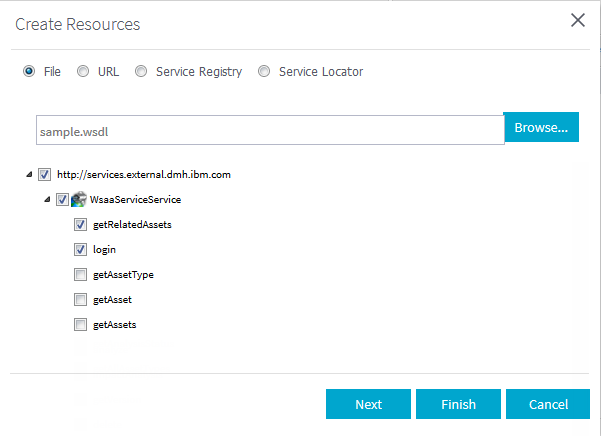
Select File to add a Resource from a WSDL file. Click Browse to browse to the WSDL file. Its WSDL tree structure appears in the wizard. Select one or more operations in the WSDL tree structure that you want to add.
-
Select URL to add a Resource from a URL. Enter the URL of a SOAP service and click Upload. The WSDL tree structure appears in the wizard. Select one or more operations in the WSDL tree structure that you want to add.

-
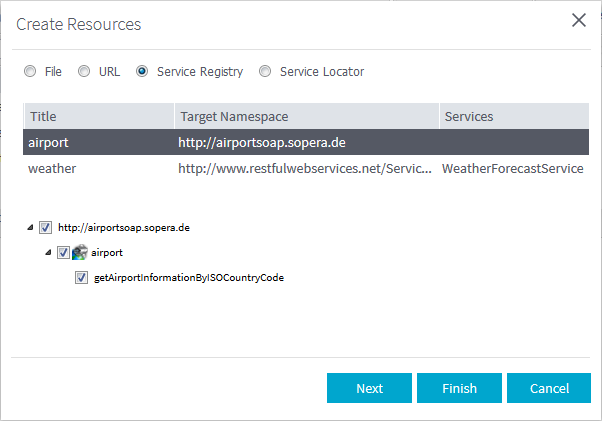
Select Service Registry to add a Resource from the Service Registry. The services that are registered in the Service Registry are listed in the wizard. Select the one you want to add. Its WSDL tree structure appears in the wizard. Select one or more operations in the WSDL tree structure that you want to add.
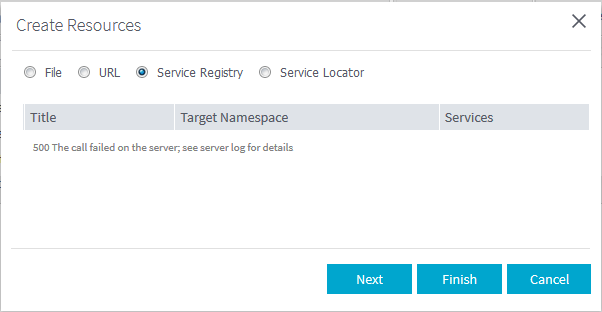
If the Service Registry is not available, you will get an error message in the wizard.
-
Select Service Locator to add a Resource from the Service Locator. The services that are monitored in the Service Locator are listed in the wizard. Select the SOAP service you want to add. Its WSDL tree structure appears in the wizard. Select one or more operations in the WSDL tree structure that you want to add. Note that REST services and unavailable SOAP services are greyed out in the list and cannot be selected. To refresh the list, click the
 button.
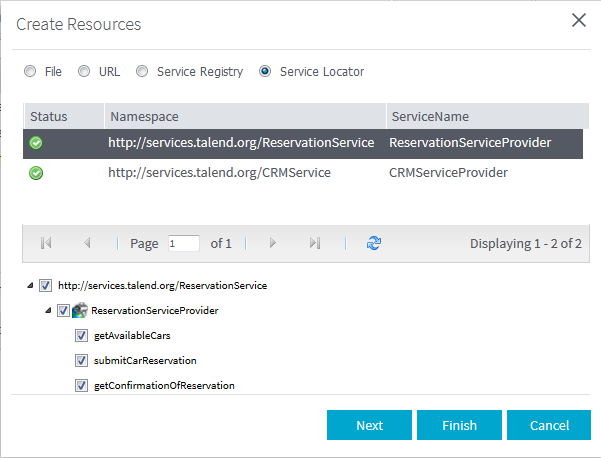
If the Service Locator is not available, you will get an error message in the wizard.

-
-
The operations that you have selected from File,
URL, Service R, or
SL are listed in the wizard.
Example
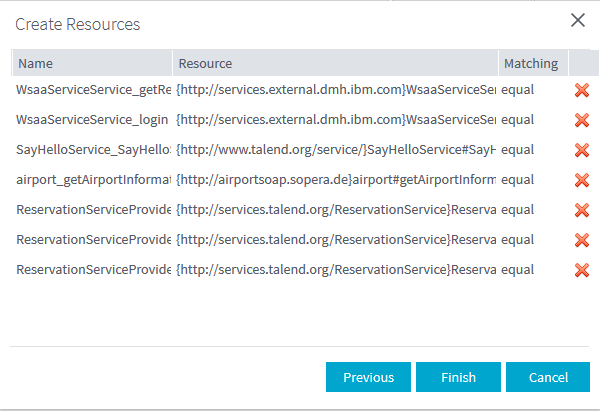 You can edit the name and the URL of the Resources.The matching criteria is equal default. You can change it to regexp in the Matching list. When you do this change, a dialog box appears prompting if you would like to change the URL of the Resource to a regular expression \{\w*\}<ServiceName>#\{\w*\}<OperationName> to be used to delimit the Resource. Click Yes to accept it or No to ignore it.Click the
 button to remove a
Resource.
button to remove a
Resource.
Did this page help you?
If you find any issues with this page or its content – a typo, a missing step, or a technical error – let us know how we can improve!