Skip to main content Skip to complementary content
Close announcements banner

Adding external synonym directories in Talend Management Console

Before you begin

You must have the Manage permission enabled for the workspace where the connection is stored.

Procedure

  1. Go to Management.
  2. Select the environment from the Environment drop-down list at the top of the page.
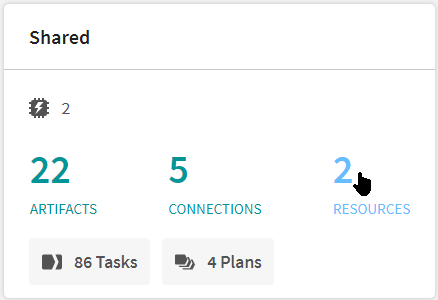
  3. Click Resources in the appropriate workspace.

    Example

  4. On the Resources page, click Add Resource and select Directory.
  5. In the Add Resource wizard, select the workspace in which to create the connection.
  6. Optional: Enter a description for the resource.
  7. Enter the resource name.
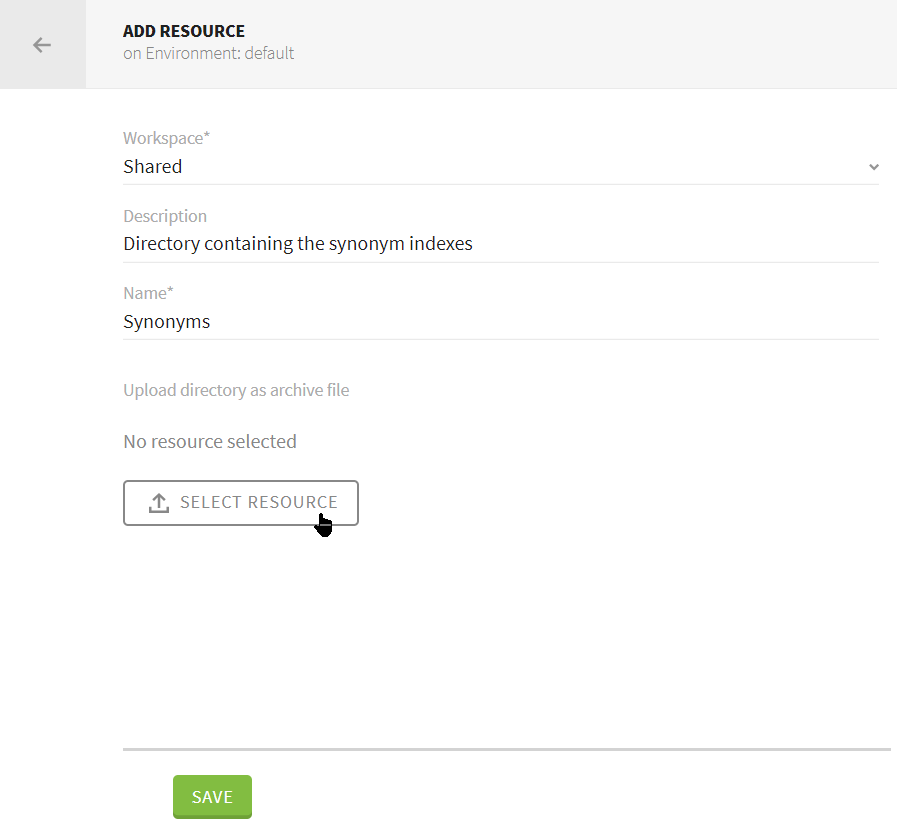
  8. Click Select Resource and select the file to upload.

    Example

    Add Resource wizard.
  9. Click Save.
  10. Open the task you want to use the resource in.
  11. Click the Edit icon next to Configuration.
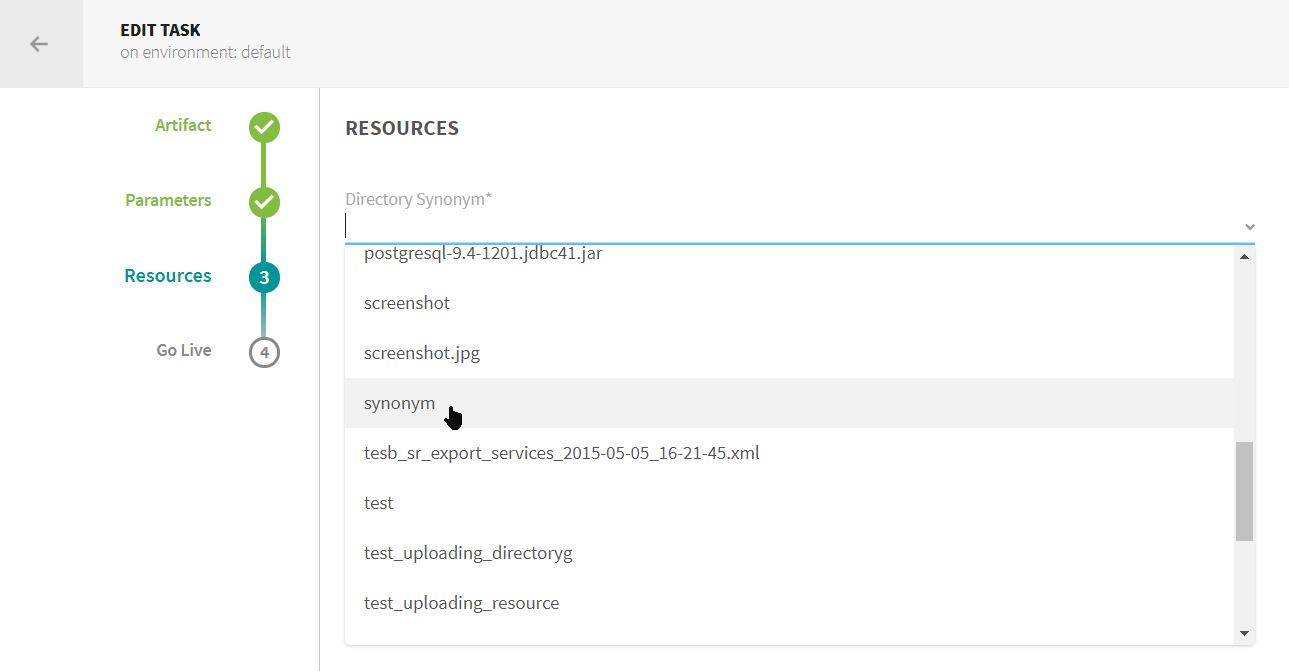
  12. At the Resources step, select the synonym directory from the list.

    Example

    Edit task wizard.
  13. Select the Runtime and Trigger, then click Go Live.

Did this page help you?

If you find any issues with this page or its content – a typo, a missing step, or a technical error – let us know how we can improve!