
Defining the schema
About this task
In this step, the schema parameters are set.
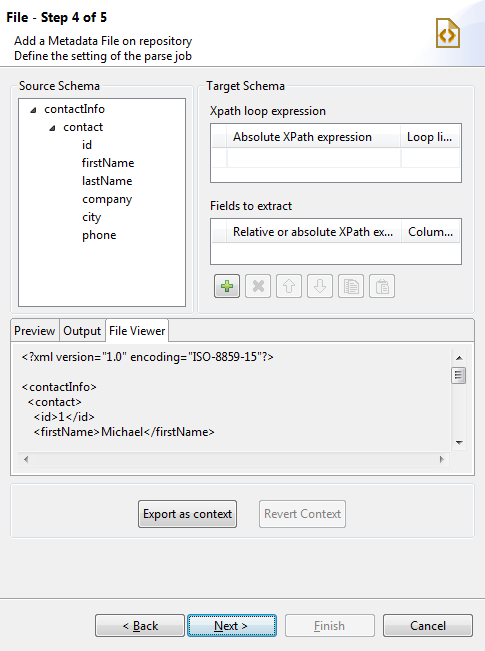
The schema definition window is composed of four views:
- Source Schema displays a tree view of the XML file.
- Target Schema displays extraction and iteration information.
- Preview displays a preview of the target schema, together
with the input data of the selected columns displayed in the defined order.Information noteNote: The preview functionality is not available if you loaded an XSD file.
- File Viewer displays a preview of the raw data.
First define an Xpath loop and the maximum number of times the loop can run. To do so:
Procedure
-
Populate the XPath loop expression field with
the absolute XPath expression for the node to be iterated upon. There are two
ways to do this, either:
-
enter the absolute XPath expression for the node to be iterated upon (Enter the full expression or press Ctrl+Space to use the autocompletion list),
-
drop a node from the tree view under Source schema onto the Absolute XPath expression field.
An orange arrow links the node to the corresponding expression.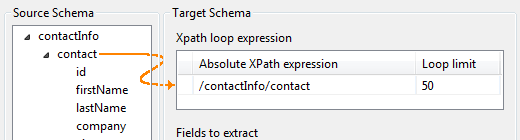
Information noteNote: The Xpath loop expression field is mandatory. -
-
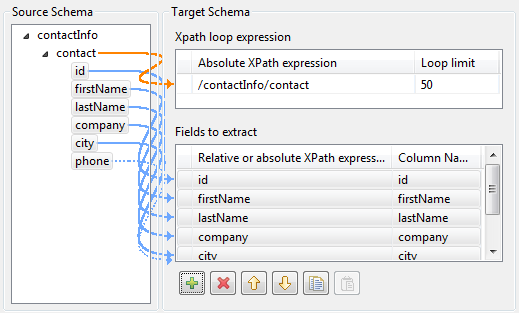
Define the fields to be extracted dragging the node(s) of interest from the
Source Schema tree into the Relative or absolute XPath expression fields.
Information noteNote: You can select several nodes to drop on the table by pressing Ctrl or Shift and clicking the nodes of interest. The arrow linking an individual node selected on the Source Schema to the Fields to extract table are blue in color. The other ones are gray.
-
If needed, you can add as many columns to be extracted as necessary, delete
columns or change the column order using the toolbar:
-
Add or delete a column using the
 and
and  buttons.
 -
Change the order of the columns using the
 and
and  buttons.
-
-
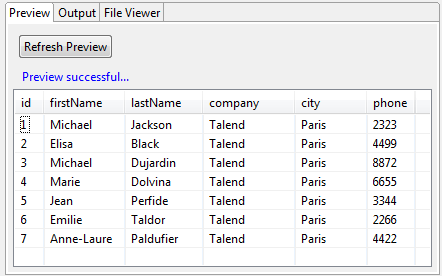
Click Refresh Preview to display a preview of
the target schema. The fields are consequently displayed in the schema according
to the defined order.
Information noteNote: The preview functionality is not available if you loaded an XSD file.
Did this page help you?
If you find any issues with this page or its content – a typo, a missing step, or a technical error – let us know how we can improve!