
Creating a validation rule
About this task
You can create validation rules to define constraints between elements in an entity so that the data records that pertain to the entity will be checked against the validation rules when you save these data records from Talend MDM Web UI.
The following example shows how to create a validation rule for the Agent entity to ensure that the year specified for the TermDate element is larger than that for the StartDate element.
Procedure
-
Click the
 button on the left to open the Add a
Validation Rule dialog box.
button on the left to open the Add a
Validation Rule dialog box.
-
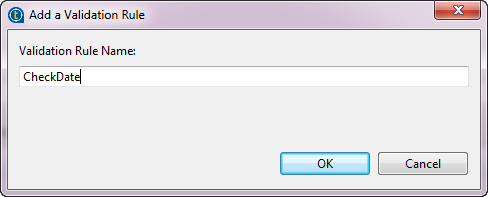
Enter a name for the new validation rule, CheckDate in
this example, and click OK.
-
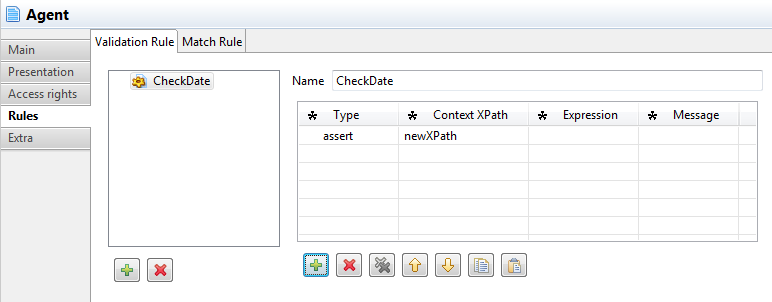
Click the button under the table to add a new line.
-
Click in the Type column and select from the list
assert or report according to
what type of rule you want to set.
The assert elements are instantiated if the XPath expression evaluates to false and are used to detect errors, while the report elements are instantiated if the expression evaluates to true and are used to report the existence of an instance.In this example, select assert.
-
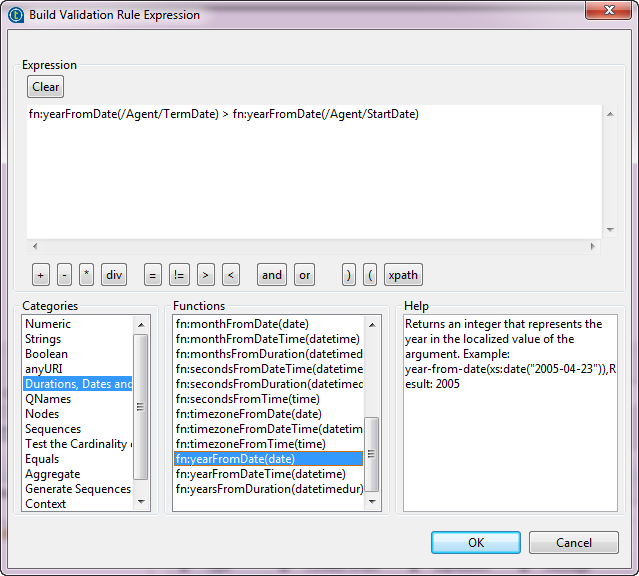
Click in the Expression column and then click the
... button to open the Build Validation
Rule Expression dialog box, where you can set the criteria for
the validation rule.
In this example, use the expression editor to create an expression fn:yearFromDate(/Agent/TermDate) > fn:yearFromDate(/Agent/StartDate) so that whenever the year specified in TermDate is not larger than that in StartDate, an error will be reported.
-
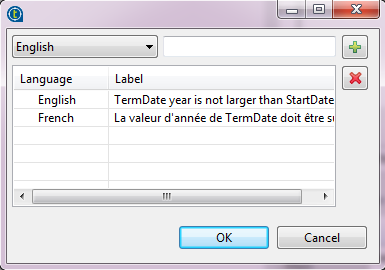
Click in the Message column, then click the
... button to open a dialog box, where you can define
multilingual messages to be displayed when the criteria set for the validation
rule fail to be met, and click OK.
In this example, the English and French messages are added.
Results
Deploy the modified data model to the MDM server, and then go to Talend MDM Web UI to verify that the validation rule takes effect.
Did this page help you?
If you find any issues with this page or its content – a typo, a missing step, or a technical error – let us know how we can improve!