
Creating a test case
To create a test case for a Job, do the following:
Procedure
-
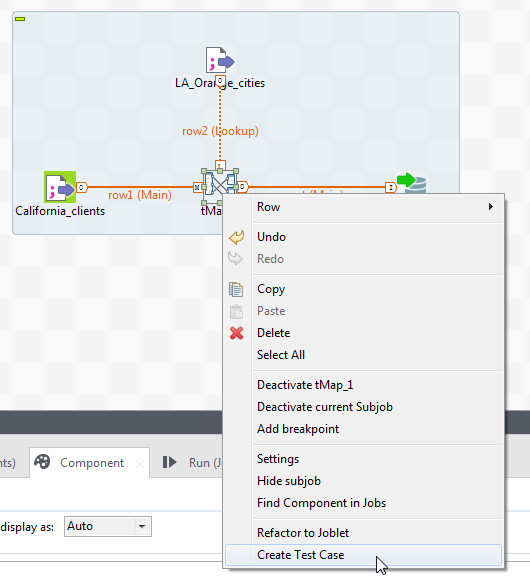
Right-click the functional part of the Job you want to test, which is the
tMap component in this example, and select
Create Test Case from the contextual menu.
 Information noteNote: It is not supported to create test cases for tRESTRequest, tRESTResponse, tESBProviderRequest, and tESBProviderResponse in Talend Studio.
 -
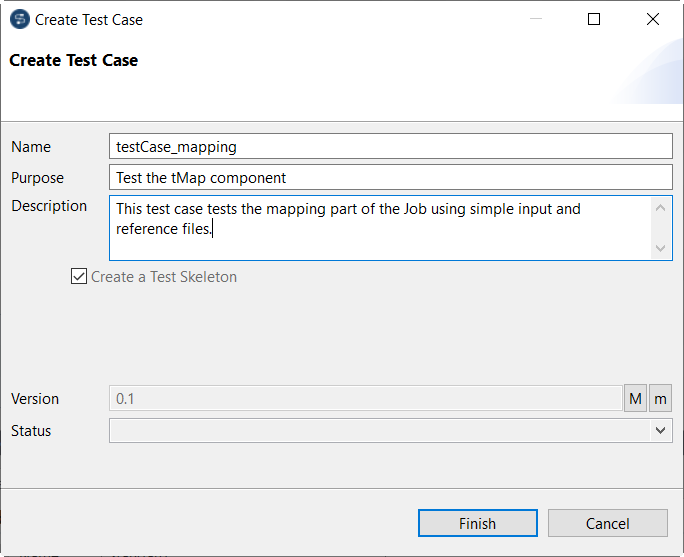
In the Create Test Case dialog box, enter
a name for the test case in the Name field, and the
optional information, if needed, such as purpose and description in the corresponding
fields.
-
Select the Create a Test Skeleton check box so that the
components required for the test case to work are automatically added, and click
Finish.
Information noteNote:
If you clear this check box, you will need to complete the test case by adding components of your choice manually.
The test case is then created and opened in the design workspace, with all the required components automatically added. In the Repository tree view, the newly created test case appears under your Job.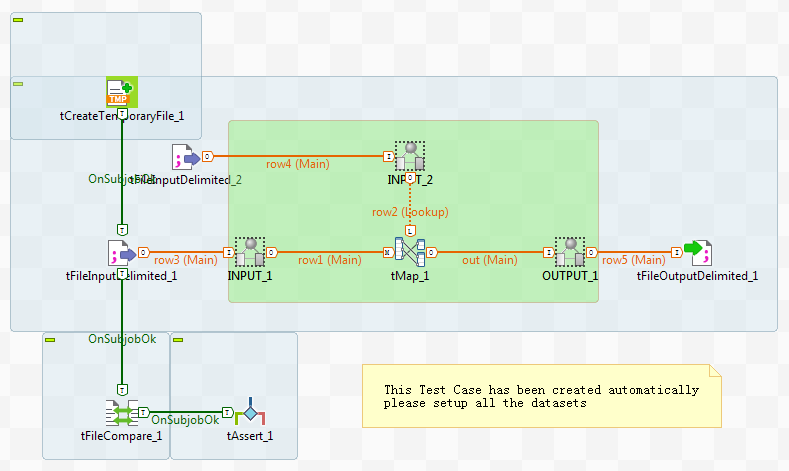 By default, a Test Skeleton includes:
- one or more tFileInputDelimited components, depending on the number of input flows in the Job, to load the input file(s),
- one or more tCreateTemporaryFile components, depending on the number of output flows in the Job, to create one or more temporary files to hold the output data,
- one or more tFileOutputDelimited components, depending on the number of output flows in the Job, to write data from the output flow(s) to the previously created temporary file(s),
- one or more tFileCompare components, depending on the number of output flows in the Job, to compare the temporary output file(s) with the reference file(s). The test is considered successful if the compared pair of files are identical.
- one or more tAssert components, depending on the number of output flows in the Job, to provide an alert message if the compared pair of files are different, indicating a failure of the test.
In addition, depending on the number of input and output flows, a variable number of context variables are automatically created to specify the input and reference files.In this example, when executed, the test case will:- read the source data for the testing from two input files, one main input and one lookup input,
- process the data in the tMap component, which is the part under test,
- write the processing result to a local temporary file,
- compare the temporary output file with a reference file, which contains the expected result of data processing.
Did this page help you?
If you find any issues with this page or its content – a typo, a missing step, or a technical error – let us know how we can improve!