
Installing and configuring a supported version of Nexus
If you do not use Talend Artifact Repository
embedded with your Talend
product but a supported version of Nexus, you need to create and configure the required
repositories in Nexus.
Before you begin
Nexus is launched.
Procedure
-
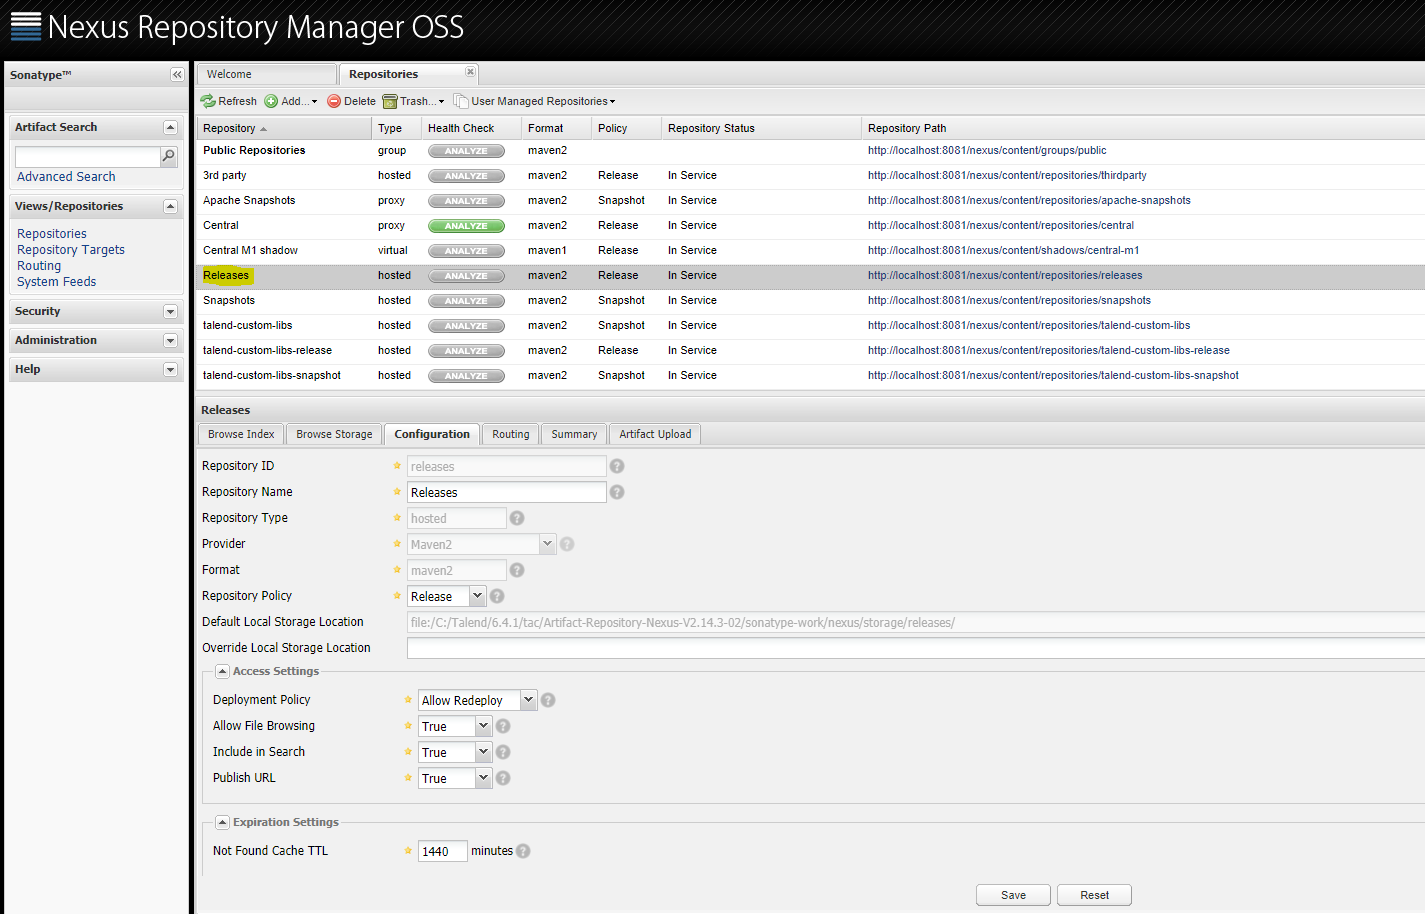
Configure the created repositories.
Example
For example:
-
Create the following users in Nexus:
- admin with all privileges
- talend-custom-libs-admin with the talend-custom-libs-admin and talend-custom-libs-deploy user roles
- talend-updates-libs-admin with the talend-updates-libs-admin and talend-updates-libs-deploy user roles
At least, the create, delete, and update privileges must be granted to the user associated to the repository.Information noteTip: With Nexus 3, if you are using another user than the admin one, it is recommended to enable the delete privilege for Talend Administration Center user in Nexus. Otherwise the maven-metadata.xml file in Nexus containing information about artifact versions can not be updated and when executing an artifact from the Talend Administration Center, the wrong version of the artifact might be used. For more information, see the Nexus documentation.To test that users created in Nexus have access to the adequate artifacts:- From Talend Studio, run Jobs and publish them to Nexus repository.
- Go to and expand the Job folder to access
maven-metadata.xml file.
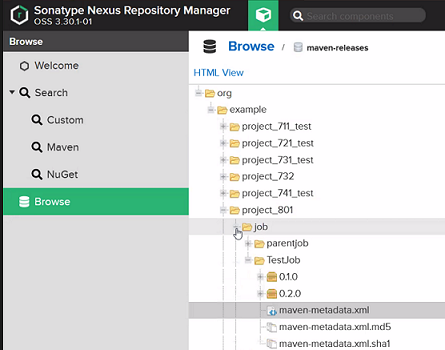
- Open maven-metadata.xml file and check that listed versions are adequate with the Jobs published from Talend Studio.
What to do next
Go to the Configuration page of Talend Administration Center and add the configuration settings for the created repositories.
For more information, see Configuring the Software Update repository in Talend Administration Center, Configuring Talend Artifact Repository in Talend Administration Center and Setting up the user library location in Talend Administration Center User Guide.
Did this page help you?
If you find any issues with this page or its content – a typo, a missing step, or a technical error – let us know how we can improve!