Skip to main content Skip to complementary content

Configuring the tPersonator component

Procedure

  1. Double-click the tPersonator component to open its Basic settings view.
  2. Select Built-in as Schema.
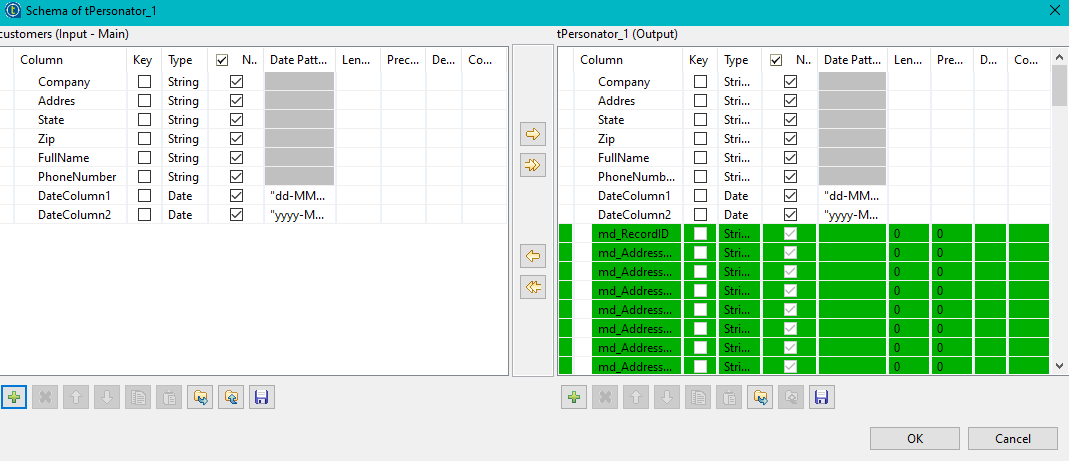
  3. To check the schema, click the […] button next to Edit schema.
  4. In Input mapping, click the [+] button to associate the tPersonator fields with the input data:
    1. CompanyName with Company
    2. AdressLine1 with Address
    3. State with State
    4. PostalCode/ZipCode with Zip
    5. FullName with FullName
    6. PhoneNumber with PhoneNumber
  5. Select Check action, Append action, Verify action and Move action.
  6. In Centric hint, select Auto.
  7. In Append options, select Always.
  8. In Address options:
    1. Diacritics: Select auto.
    2. Select the Advanced address correction and Use preferred city check boxes.
  9. In Name options, select the following options:
    1. Name hint:Varying
    2. Middle name logic: Parse logic
    3. Salutation format: Formal
    4. Gender population: Mixed
    5. Genderization policy: Neutral
    6. Correct first name and Standardize company check boxes
  10. Select all the check boxes in Email options, Address outputs, Geographics outputs and Miscellaneous outputs.
    You have the following configuration:
  11. Click the Advanced settings tab:
    1. Clear the tStatCatcher statistics check box.
    2. Enter a License key.
    3. Enter the Number of retries: 5.
    4. Enter the Timeout in seconds: 100 .
    5. Browse the Cache directory.
    6. Enter the Batch request size (1-100): 2.
    7. Select the Multithreading check box.
    8. Enter the Thread count: 3.
    9. Select the Show debug console output check box.

Did this page help you?

If you find any issues with this page or its content – a typo, a missing step, or a technical error – let us know how we can improve!