
Configuring the components
Procedure
-
Double-click tFileInputMSDelimited to
open the Multi Schema Editor.
-
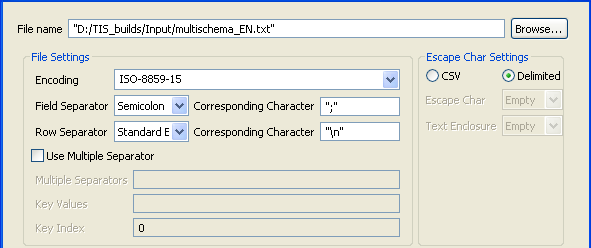
In the File Settings area:
-Select from the list the encoding type the source file is encoded in. This setting is meant to ensure encoding consistency throughout all input and output files.-Select the field and row separators used in the source file.Information noteNote:
Select the Use Multiple Separator check box and define the fields that follow accordingly if different field separators are used to separate schemas in the source file.
A preview of the source file data displays automatically in the Preview panel.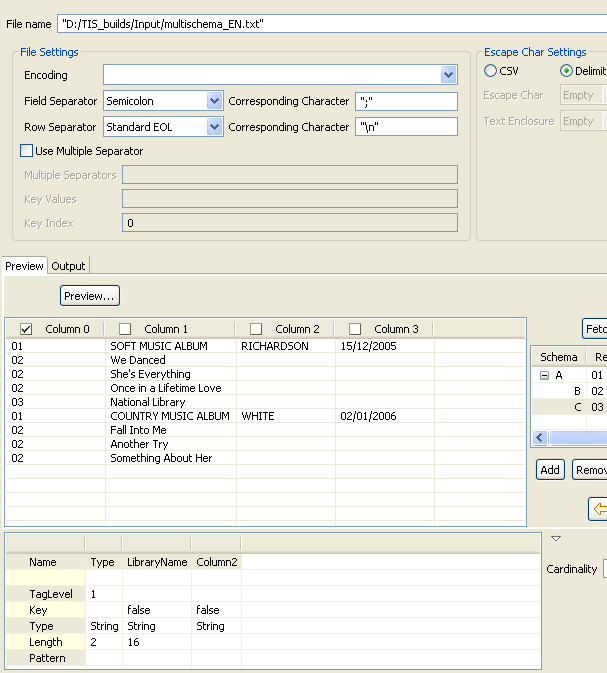 Information noteNote:
Column 0 that usually holds the record type indicator is selected by default. However, you can select the check box of any of the other columns to define it as a primary key.
-
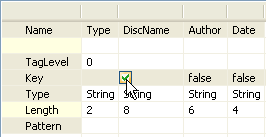
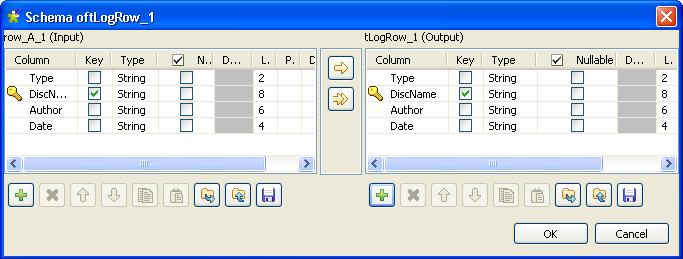
Click in the Key cell that corresponds to the
DiscName column and select the check box that
appears.
-
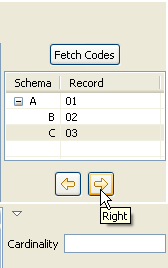
In the Fetch Codes panel, select schema
B and click the right arrow button to move it to
the right. Then, do the same with schema C.
 Information noteNote:
The Cardinality field is not compulsory. It helps you to define the number (or range) of fields in "children" schemas attached to the parent schema. However, if you set the wrong number or range and try to execute the Job, an error message will display.
-
In the Multi Schema Editor, click
OK to validate all the changes you did
and close the editor.
The three defined schemas along with the corresponding record types and field separators display automatically in the Basic settings view of tFileInputMSDelimited.
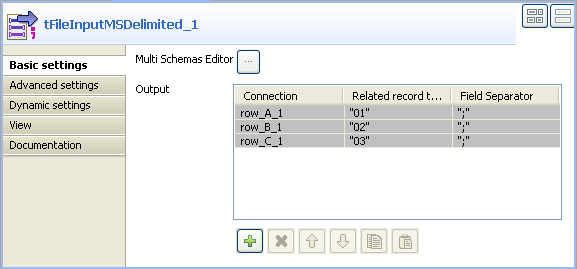 The three schemas you defined in the Multi Schema Editor are automatically passed to the three tLogRow components.
 -
If needed, click the Edit schema button
in the Basic settings view of each of the
tLogRow components to view the input
and output data structures you defined in the Multi
Schema Editor or to modify them.
Did this page help you?
If you find any issues with this page or its content – a typo, a missing step, or a technical error – let us know how we can improve!