
Granting permissions to the application
Procedure
-
In the Azure Active Directory page, click App
registrations.
The App registrations page appears. The application you registered (App for POP and IMAP in this example) is listed in the Owned applications tab.

-
Click App for POP and IMAP to enter the application
configuration page and then click API permissions.
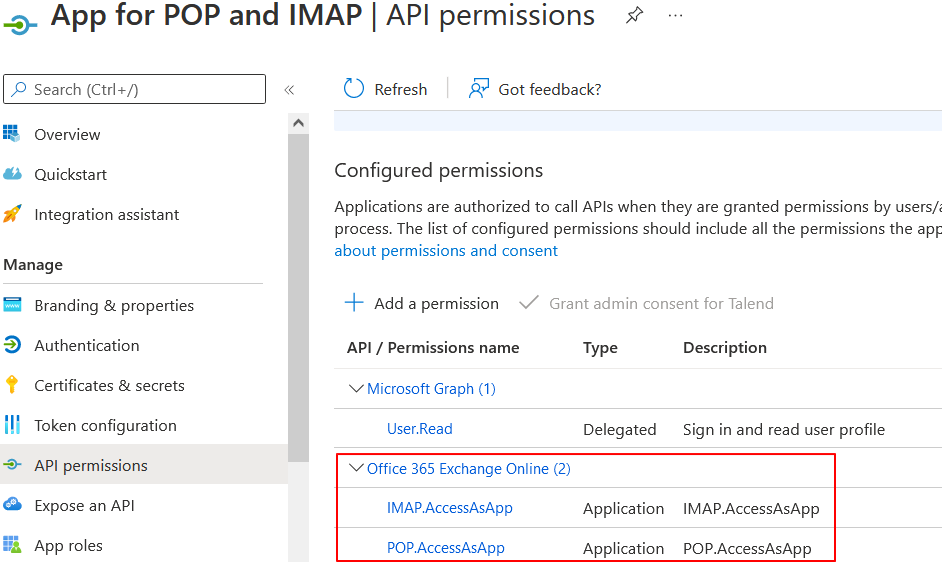
The App for POP and IMAP | API permissions page appears.

-
Click Add a permission in the App for POP and
IMAP | API permissions page.
The Request API permissions page appears.

-
Select the APIs my organization uses tab, enter
Office 365 in the search field, and select
Office 365 Exchange Online in the search result list
area.
The Office 365 Exchange Online page appears.

-
In the Office 365 Exchange Online page, select Application
permissions.

- To allow IMAP accesses, locate and expand the IMAP node in the permission list, select IMAP.AccessAsAPP, and click Add permissions.
- To allow POP accesses, locate and expand the POP node in the permission list, select POP.AccessAsAPP, and click Add permissions.
The App for POP and IMAP | API permissions page appears again, with the permission just added listed in the Configured permissions section.

-
In the application configuration page for App for POP and
IMAP (shown in step2), click Certificates &
secrets.
The App for POP and IMAP | Certificates & secrets page appears.

-
Click New client secret, enter a name in the description
field (Mail secret in this example), and click
Add.
A secret ID/value pair is created for the application. Be sure to store the secret ID and secret value in a safe place because they will not be visible the next time you navigate to the keys list. You can copy them by clicking the corresponding copy buttons (the red frames in the following figure).

Did this page help you?
If you find any issues with this page or its content – a typo, a missing step, or a technical error – let us know how we can improve!