
Configuring how the message is processed
Procedure
-
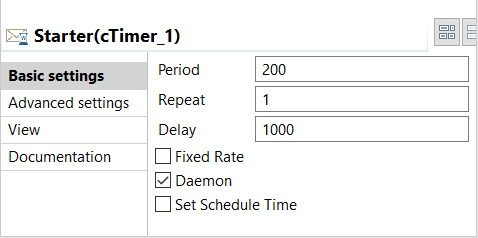
Double-click the cTimer component to
open its Basic settings view in the
Component tab.
-
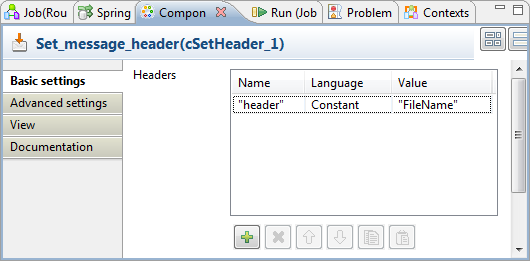
Double-click the cSetHeader component
to display its Basic settings view in
the Component tab.
-
Double-click the cTalendJob component
to display its Basic settings view in
the Component tab.

-
In the Repository Job area, select
Use Selected Context.
Click [...] next to the Job field to open the Assign Job wizard. Select Assign an existing Job to this cTalendJob component and click Next.
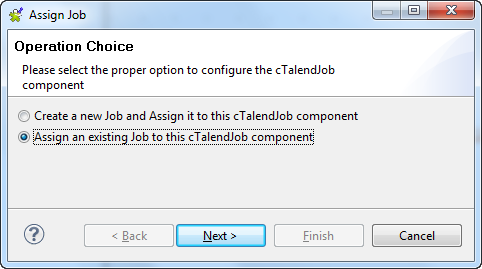 In the Job selection view, select RouteCommunication that we just created in the Job designs tree view and click Finish.
 RouteCommunication is now displayed in the Job field. By default, the latest version and the default context of it is selected.
 -
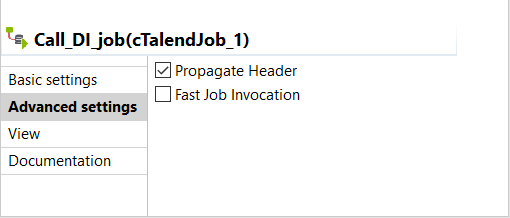
Click the Advanced settings view.
Select the Propagate Header check box
to pass the header that is defined in cSetHeader to the Job as a context variable.
Did this page help you?
If you find any issues with this page or its content – a typo, a missing step, or a technical error – let us know how we can improve!