Skip to main content Skip to complementary content
Close announcements banner

Creating your first Job

This procedure describes how to create a Job folder named getting_started and a Job named movies in the folder.

Information noteWarning: If you are working on a Git-managed project, do not use any of the following reserved key words to name your Job or Job folder:
  • tests
  • target
  • src
If any of the above-mentioned key words is used in the name of a Job, a Job folder or any level of its parent folders, changes to your Job or your Jobs in the folder will not get pushed to Git.

Procedure

  1. In the Repository tree view, expand the Job Designs node, right-click the Standard node, and select Create folder from the contextual menu.
  2. In the New Folder wizard, name your Job folder getting_started and click Finish to create your folder.
  3. Right-click the getting_started folder and select Create Standard Job from the contextual menu.
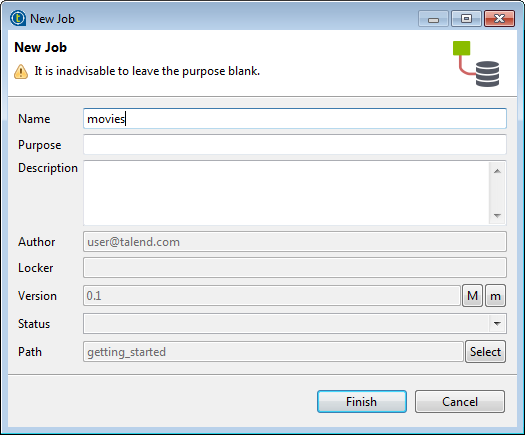
  4. In the New Job wizard, give a name to the Job you are going to create and provide other useful information if needed.

    In this example, enter movies in the the Name field.

    In this step of the wizard, Name is the only mandatory field. The information you provide in the Description field will appear as hover text when you move your mouse pointer over the Job in the Repository tree view.

  5. Click Finish to create your Job.

    An empty Job is opened in the Studio.

Did this page help you?

If you find any issues with this page or its content – a typo, a missing step, or a technical error – let us know how we can improve!