
Centralizing Snowflake metadata
About this task
You can use the Snowflake metadata wizard provided by Talend Studio to set up quickly a connection to Snowflake and retrieve the schema of your interested tables.
Procedure
-
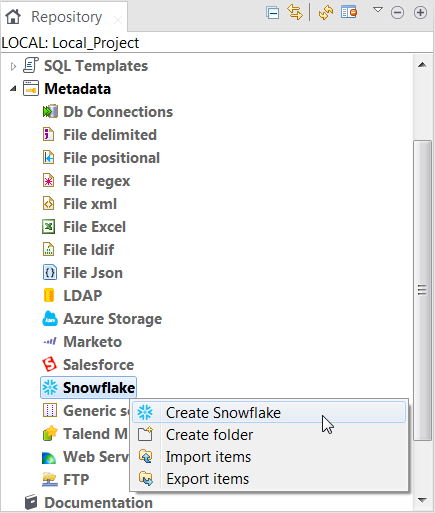
In the Repository tree view, expand the
Metadata node, right-click the
Snowflake tree node, and select Create
Snowflake from the contextual menu to open the
Snowflake wizard.
-
In the Snowflake Connection Settings dialog box, specify
the values for the properties listed in the following table.
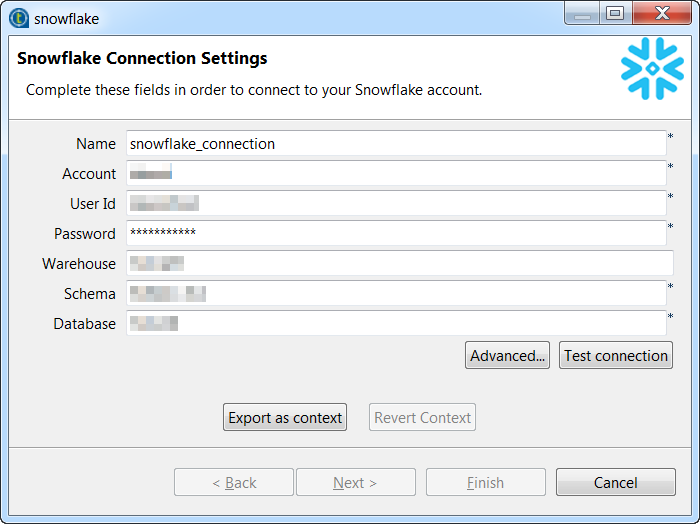
Property Description Name
Enter the name for the connection to be created.
Account
Enter the account name that has been assigned to you by Snowflake.
User Id
Enter your login name that has been defined in Snowflake using the LOGIN_NAME parameter of Snowflake. For details, ask the administrator of your Snowflake system.
Password
Enter the password associated with the user ID.
Warehouse
Enter the name of the Snowflake warehouse to be used. This name is case-sensitive and is normally upper case in Snowflake.
Schema
Enter the name of the database schema to be used. This name is case-sensitive and is normally upper case in Snowflake.
Database
Enter the name of the Snowflake database to be used. This name is case-sensitive and is normally upper case in Snowflake.
-
Click Advanced... and in the Snowflake
Advanced Connection Settings dialog box displayed, specify or
update the values for the advanced properties listed in the following table and
click OK to close the dialog box.
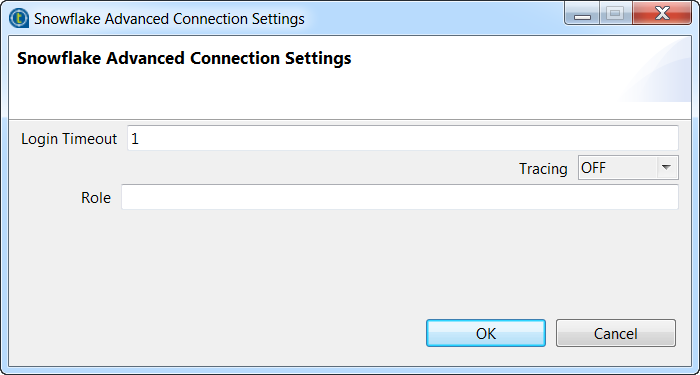
Property Description Login Timeout
Specify how long to wait for a response when connecting to Snowflake before returning an error.
Tracing
Select the log level for the Snowflake JDBC driver. If enabled, a standard Java log is generated.
Role
Enter the default access control role to use to initiate the Snowflake session.
This role must already exist and has been granted to the user ID you are using to connect to Snowflake. If this field is left empty, the PUBLIC role is automatically granted. For further information about the Snowflake access control model, see Snowflake documentation at Understanding the Access Control Model.
-
Click Next to go to the next step to select your
interested tables.

-
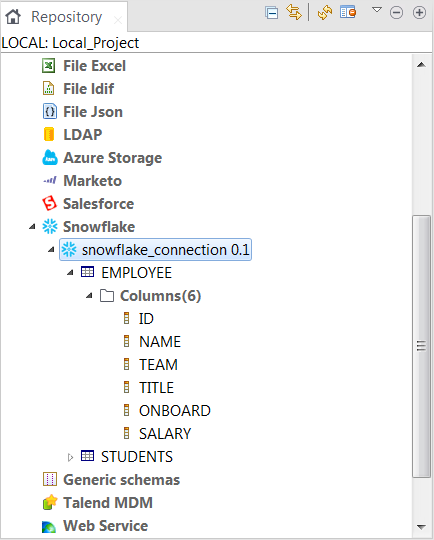
Select the tables whose schema you want to retrieve, and then click
Finish.
The newly created Snowflake connection is displayed under the Snowflake node in the Repository tree view, along with the schema of your interested tables.
 You can now add a Snowflake component onto the design workspace by dragging and dropping the Snowflake connection created or any table retrieved from the Repository view to reuse the connection and/or schema information. For more information about dropping component metadata in the design workspace, see Using centralized metadata in a Job. For more information about the usage of the Snowflake components, see the related documentation for the Snowflake components.To modify the Snowflake connection metadata created, right-click the connection node in the Repository tree view and select Edit Snowflake from the contextual menu to open the metadata setup wizard.To edit the schema of an interested table, right-click the table node in the Repository tree view and select Edit Schema from the contextual menu to open the update schema wizard.
Did this page help you?
If you find any issues with this page or its content – a typo, a missing step, or a technical error – let us know how we can improve!