
Creating a Job to match data
You can generate a Job to match data in a specific file in the Talend Studio metadata against data in another data source.
Using the settings of the components of this automatically-generated Job, you can choose to output the exact match and non-match values in separate files or in a database. However, you can choose to output possible matches in a file or a database.
About this task
The sequence of matching data against a lookup file involves the following steps:
- Selecting the file that holds the data you want to match.
- Choosing the columns on which to run the match Job.
- If required, defining a blocking key to partition the data to be processed. A blocking key is usually needed when there is a lot of data in the file.
- Choosing where to write the exact match, possible match and nonmatch records.
- Running the generated Job.
Procedure
-
Click OK to close the dialog
box.
The Cheat Sheet panel is displayed in Talend Studio.
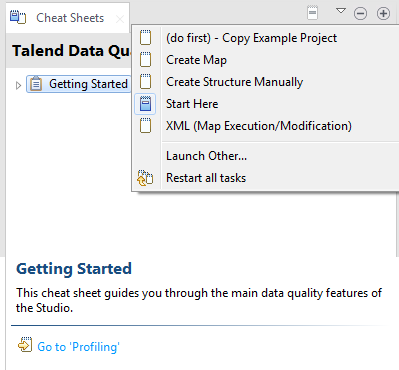
-
On the cheat sheet icon bar, click the drop-down
arrow, and from the menu select Launch
Other....
The Cheat Sheet Selection dialog box is displayed.
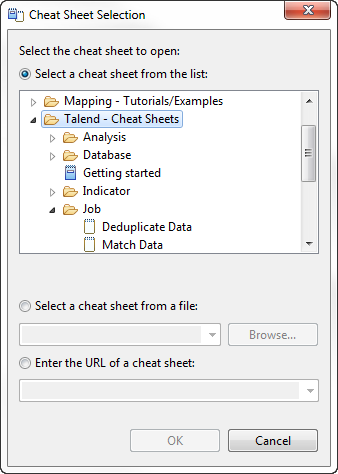
-
Expand , select Match Data, and then click
OK to close the dialog box.
The corresponding page is displayed in the Cheat Sheet panel. This page guides you through the steps on how to create a ready-to-use Job on certain columns in a specific file.
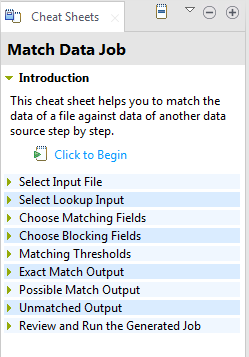
-
Read the introduction and then click Click to
Begin.
This will expand the first step in the procedure: Select Input File.
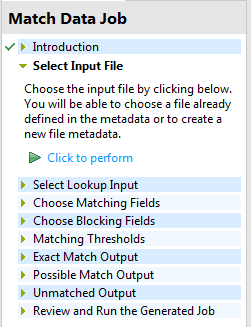
-
Select the file to cleanse from the metadata connection and click
OK.
The next step in the cheat sheet is expanded.

-
Continue following the instructions and switching between the wizard and the
steps in the cheat sheet page till you come to the last step: Review
and Run the Generated Job.
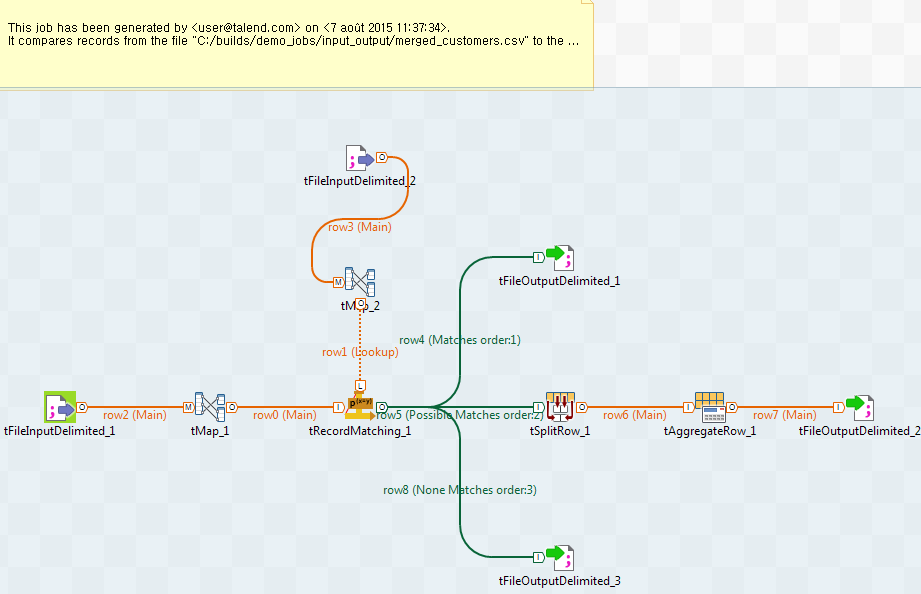
The wizard configures all the components and the metadata in the repository according to the settings you defined in the wizard different views and generates the Job. Talend Studio switches to the Integration perspective. The result Job should look something like the following:
Results
The exact match, possible match and non-match values in the file are identified and stored in the defined output files or database. The generated Job is saved under the Job Designs node in the Repository tree view
Did this page help you?
If you find any issues with this page or its content – a typo, a missing step, or a technical error – let us know how we can improve!