Creating a Joblet from a Job - Cloud - 7.3

Talend Studio User Guide

Version
Cloud
7.3
Language
English
Product
Talend Big Data
Talend Big Data Platform
Talend Cloud
Talend Data Fabric
Talend Data Integration
Talend Data Management Platform
Talend Data Services Platform
Talend ESB
Talend MDM Platform
Talend Real-Time Big Data Platform
Module
Talend Studio
Content
Design and Development
Last publication date
2024-02-13

About this task

You can create a Joblet directly from an existing Job. To do so:

Procedure

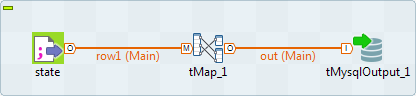
  1. Open the Job in Talend Studio.
  2. Right-click the component(s) you want to transform to a Joblet and select Refactor to Joblet from the contextual menu to open the New Joblet dialog box. In this example, we want to transform tMap to a Joblet.
  3. In the New Joblet dialog box, fill in at least the Name field to designate the Joblet. You can also add information to ease the Joblet management, such as: Description, Version, Author and Status.

    Field

    Description

    Name

    Enter a name for your new Joblet. A message comes up if you enter prohibited characters.

    Purpose

    Enter the Joblet purpose or any useful information regarding the job in use.

    Description

    Enter a description if need.

    Author

    This field is read-only as it shows by default the current user login.

    Locker

    This field is read-only as it shows by default the current user login.

    Version

    The version is read-only. You can manually increment the version using the M and m buttons.

    Status

    Select a status from the list. By default, the status you can select is development, testing, or production. To define more statuses, see Status settings.

    Path

    This field is read-only. It refers to the item access path in the repository. This field is empty when the item is created in the root folder.

    Icon

    Select the icon you want to use for your Joblet. It will show next to the Joblet name in the Repository tree view and in the Palette as well.

  4. In the Icon area, click the [...] button to open a window where you can browse to an icon of your choice and add it to your Joblet, if needed.
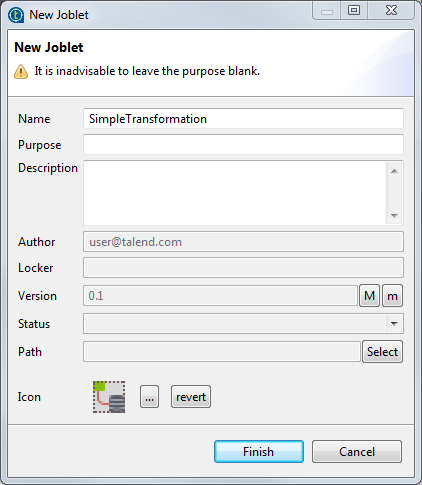
  5. Select the icon and click Open. The window closes and the selected icon displays in the Icon area in the New Joblet dialog box.
    Note:

    The icon must have the dimensions 32 x 32. You will have an image-size related error if you try to use icons with other dimensions.

  6. If necessary, click revert to go back and use the by-default icon.
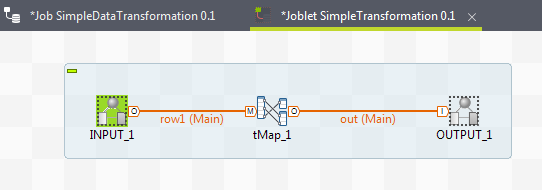
  7. Click Finish to validate your settings and close the dialog box.
    The design workspace opens showing the Joblet name as tab label. The input and output Joblet components are automatically included in the Joblet during its creation and the transformation component selected for creating the Joblet, tMap in this example.

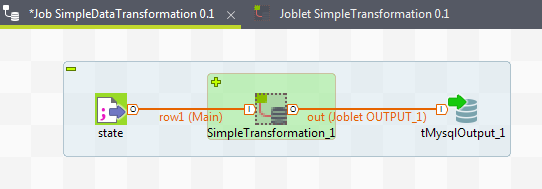
    The tMap component is then automatically replaced by the Joblet component in the Job.

  8. Save your Job and press F6 to execute it.

Results

You can as well include other transformation steps after your Joblet, if necessary. For more information about modifying a Joblet, see Editing a Joblet.