
Designing a custom layout
Before you begin
You have already created data models, business entities and attributes in the data model. For further information, see Creating a data model, Creating business entities in a data model and Adding attributes to the business entity.
About this task
To design a custom layout for a specific business entity, do the following:
Procedure
-
In the MDM Repository tree view, right-click
Custom Layout.
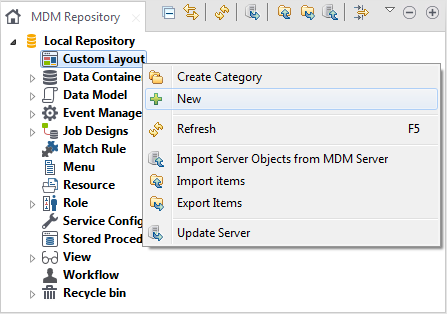
-
Select New to display the New Custom
Layout wizard. This wizard guides you through the steps
necessary to design a layout for a specific business entity.

-
Click the three-dot button to open a dialog box.
-
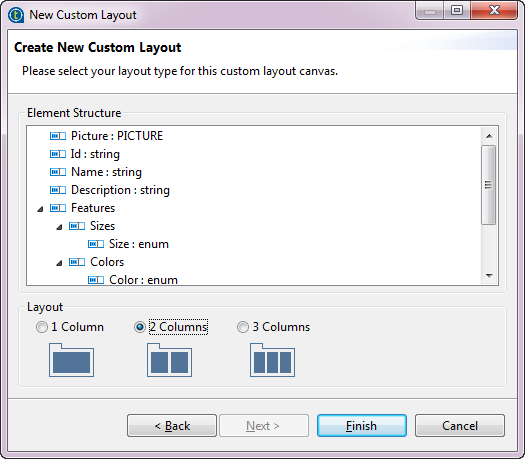
In the New Custom Layout wizard, click
Next to proceed to the next step.
Results
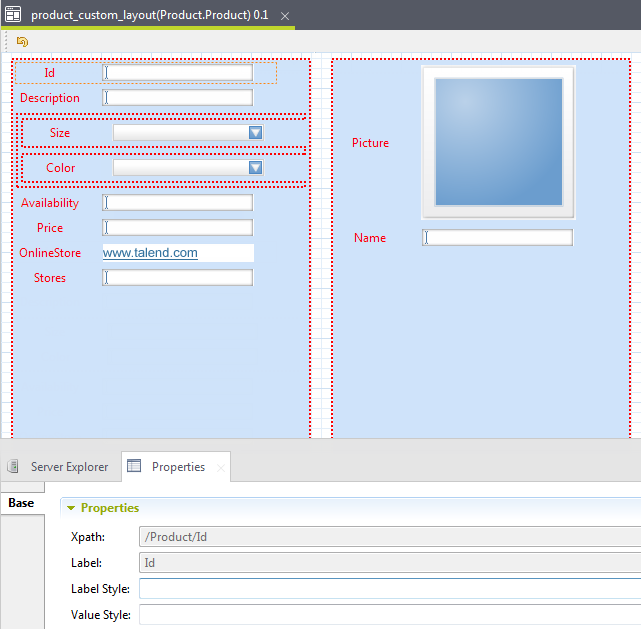
A custom layout appears in the Studio workspace, a Properties panel opens in the lower part of the workspace and a node for the new custom layout displays under Custom Layout in the MDM Repository tree view.
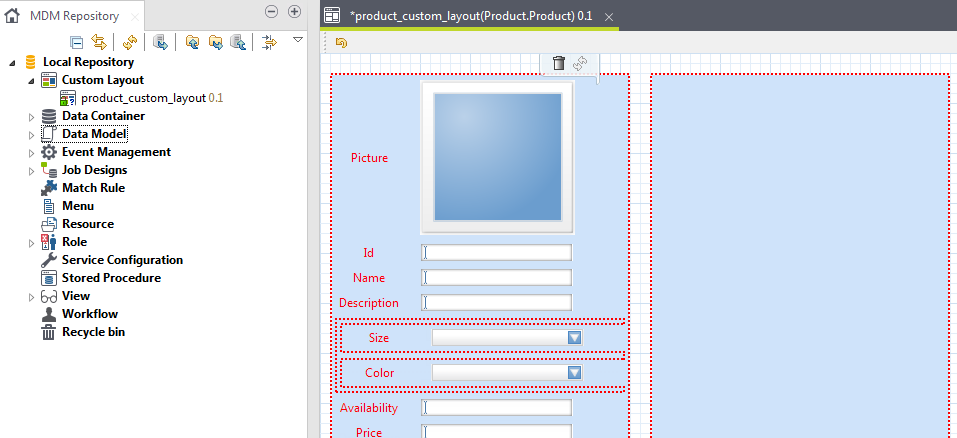
The custom layout shows two columns as selected in the previous step. The first column lists all the elements (attributes) defined in the selected business entity. Simple-type elements are represented as fields while complex-type elements are represented as panels.
The Properties panel below the form displays the properties of any of the elements you select in the form. If the data model has any foreign keys, they don't show in the custom layout.
What to do next
After creating the custom layout, you can now proceed to distribute the elements between the columns in the custom layout in order to finalize its design.
-
Use a drag & drop operation in order to distribute the fields and panels between the columns.
 Information noteNote: If you want to move a panel, make sure to click on its border first to select the panel and then drop it in the desired column.
 -
From the Palette, you can also drag a Filler element into your layout which can either be left blank, to allow you to insert spaces in your layout, or can be used as a placeholder for custom HTML code such as images and horizontal lines.
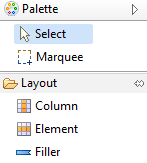
To add custom HTML code, select the Filler element and type the code you want to add in the Properties panel.
-
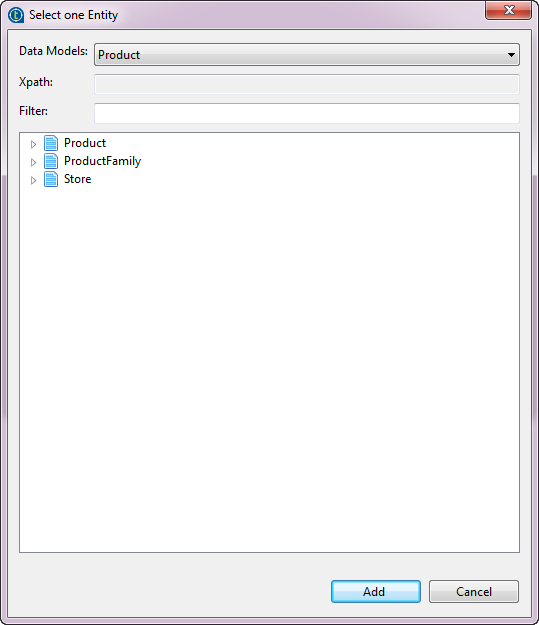
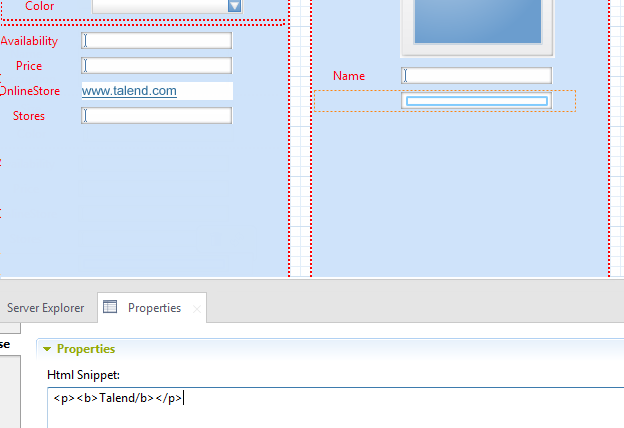
You can also drag an Element element from the Palette into your layout. A dialog box appears, allowing you to choose the desired element.
The Data Models list and the Filter field are automatically populated with your selection. The Xpath field varies with the element you are choosing.
After selecting the desired element, click Add to add the element to the layout.
 Note that not all elements can be added. Specifically:
-
Only the elements which belong to the current entity but are not available in the current layout can be added.
-
After you add a parent element to the current layout, which is displayed as a panel in the layout, only its child element(s) can be added within the panel.
The elements which can be added are shown in bold while others are grayed out. Sometimes, even if a node is grayed out, you need to expand it to check whether it has some elements to be added.
-
-
Save your layout.Information noteNote: After you create a layout for a specific business entity in the MDM Repository tree view, you must deploy it to one of the MDM servers defined in your MDM environment. This will enable Talend MDM Web UI to render master data in a web page according to the deployed layout. For further information on deploying items to the MDM server, see Deploying repository items to the MDM Server.
Did this page help you?
If you find any issues with this page or its content – a typo, a missing step, or a technical error – let us know how we can improve!