Edit the configuration of a dynamic distribution - Cloud - 7.3

Talend Studio User Guide

Version
Cloud
7.3
Language
English
Product
Talend Big Data
Talend Big Data Platform
Talend Cloud
Talend Data Fabric
Talend Data Integration
Talend Data Management Platform
Talend Data Services Platform
Talend ESB
Talend MDM Platform
Talend Real-Time Big Data Platform
Module
Talend Studio
Content
Design and Development
Last publication date
2024-02-13
Available in...

Big Data

Big Data Platform

Cloud Big Data

Cloud Big Data Platform

Cloud Data Fabric

Data Fabric

Real-Time Big Data Platform

Once a dynamic Big Data platform distribution has been added to the Studio, you can easily edit its configuration.

This is particularly useful when you need to use a customized distribution for which some custom JAR files are required or when you need to debug a dynamic configuration.

As implied above, the procedure to be explained below is applicable only on a Big Data platform distribution added in such a way as described in Adding the latest Big Data Platform dynamically (Dynamic Distributions).

Before you begin

Make sure to have sufficient knowledge about your distribution to understand the changes you are making to the configuration.

Procedure

  1. In the Integration perspective, click File > Edit project properties to open the Project settings dialog box.
  2. Expand the General node and click Dynamic distribution settings to open its view.
  3. Click the Dynamic distribution setup button to open the dynamic distribution configuration wizard.
  4. Select the Edit an existing dynamic configuration radio button and from the Version drop-down list, select the configuration to be edited.
  5. Click Next to open the list of the configuration module groups of the selected distribution.
  6. In the Distribution name field, enter a new name for the distribution you are customizing, in order to distinguish it from the one generated by the Studio.
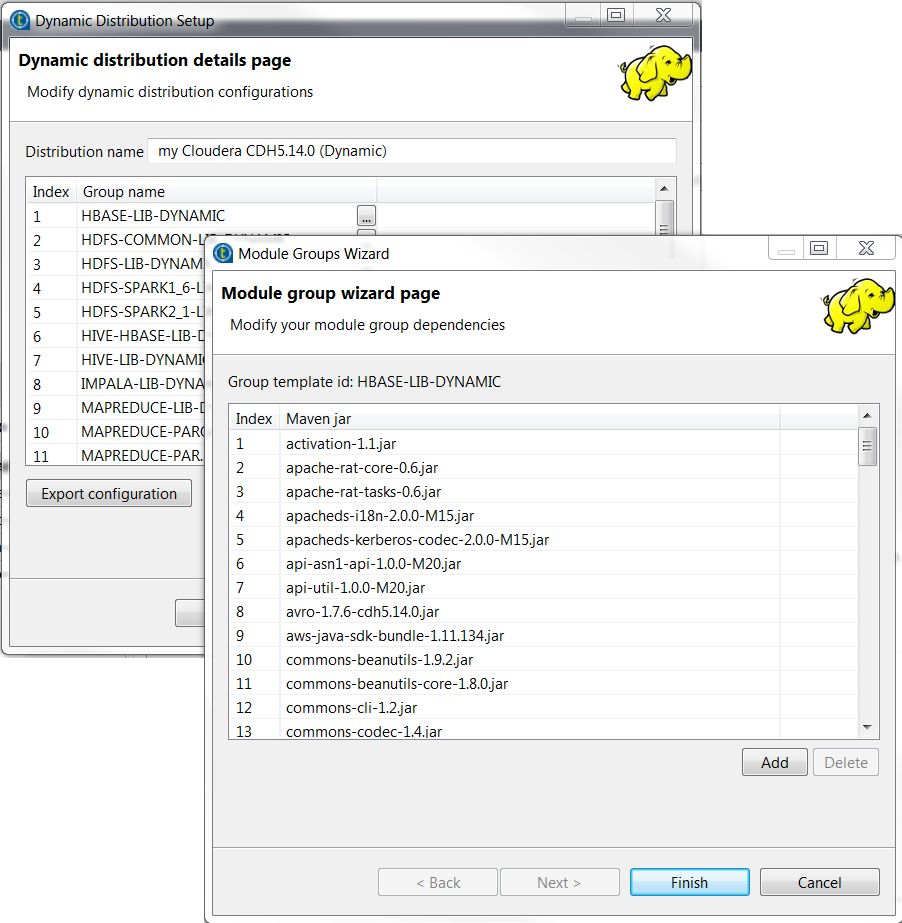
  7. Select the module you need to edit and click the [...] button next to it to open Module Groups Wizard.
  8. In Module Groups Wizard, use the Add and the Delete button to add or remove the JAR files so as to change the configuration of your distribution.
  9. Once done, click Finish to validate your changes and close Module Groups Wizard.
  10. Click Finish again to close the Dynamic distribution setup wizard.

    This custom distribution appears on the Version drop-down list in the Dynamic distribution settings view in the Project settings dialog box.

  11. Click Apply and then OK to validate the new configuration and close the Project settings dialog box.

Results

Your custom distribution is available in the Studio.