Skip to main content Skip to complementary content
Close announcements banner

Setting conditions for the Trigger

After selecting a pre-configured service to run on the selected business entity and defining the service parameters, you must set conditions on the content of the selected business entity.

About this task

To configure the conditions for this Trigger, do the following:

Procedure

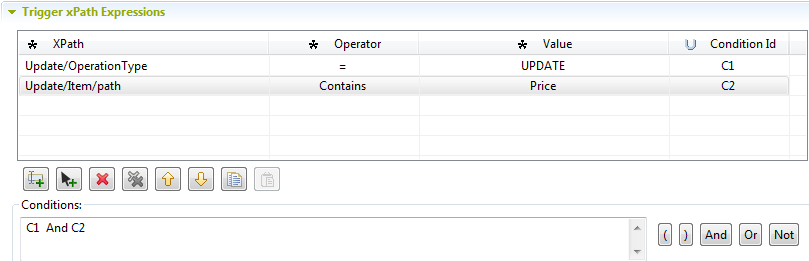
  1. In the Trigger xPath Expressions area, click the button to add a new XPath line to the table where you can set the first condition.
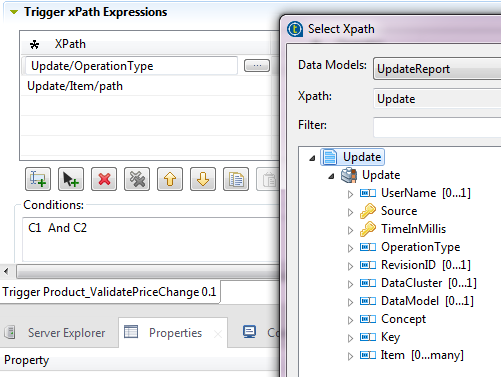
  2. Click in the new line, and then click the three-dot button to open a dialog box where you can select the entity and/or element on which you want to define conditions, Update/OperationType in this example.
  3. Click in the Operator column and select an operator from the list.
  4. In the Value column, enter a value for each of the selected business entities/elements, the value is usually the name of the entity or element. Enter the UPDATE value in this example (case sensitive).
  5. In the Condition Id column, enter a unique identifier for the condition you want to set on the selected business entity/element, C1 in this example.
    This first condition means that the Trigger will be executed only on the records in the Update entity when there is an update operation. You may want to activate this Trigger only if the update operation is done on the Price attribute. So, follow the same steps to define this second condition on the Item/path attribute using the Price value and C2 condition.
  6. In the Conditions area, enter the query you want to undertake on the data record using the condition IDs you set earlier, C1 And C2 in this example.
    The Trigger created in the above procedure means that you want the Trigger to be executed on a record in the Update entity only when the Price attribute has been changed.
    Information noteNote: When the conditions match the content of the data record, the selected service is triggered on the content of the data records that match the set conditions.
  7. Click the save icon on the toolbar or press Ctrl + S on your keyboard to save your changes.

Results

This newly created trigger is listed under the Trigger node in the MDM Repository tree view.

Did this page help you?

If you find any issues with this page or its content – a typo, a missing step, or a technical error – let us know how we can improve!