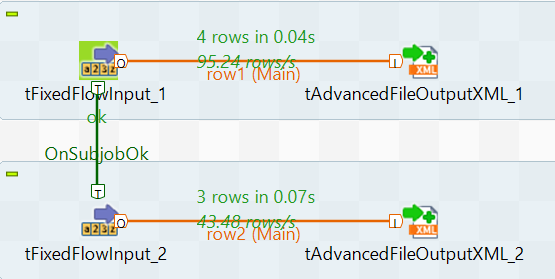
Setting up the Job for generating an XML file - 7.3

XML connectors

Version
7.3
Language
English
Product
Talend Big Data
Talend Big Data Platform
Talend Data Fabric
Talend Data Integration
Talend Data Management Platform
Talend Data Services Platform
Talend ESB
Talend MDM Platform
Talend Open Studio for Big Data
Talend Open Studio for Data Integration
Talend Open Studio for ESB
Talend Real-Time Big Data Platform
Module
Talend Studio
Content
Data Governance > Third-party systems > XML components > XML connectors
Data Quality and Preparation > Third-party systems > XML components > XML connectors
Design and Development > Third-party systems > XML components > XML connectors
Last publication date
2023-06-12

This Job uses the following components.

  • two tFixedFlowInput components to generate the person and the item data from a text file;
  • two tAdvancedFileOutpuXML components to generate an XML file and append records to the XML file.

Procedure

  1. Drop a tFixedFlowInput and a tAdvancedFileOutputXML (named as tFixedFlwInput_1 and tAdvancedFileOutputXML_1 by default) from the palette onto the design workspace. Connect the two components using a Row > Main link.
  2. Double-click tFixedFlowInput_1 to display its Basic settings view and select the Use Inline Content (delimited file). In the Content field, add the following information.
    1;1;Shong
    1;2;Elisa
    2;1;Sabrina
    2;2;Patrick
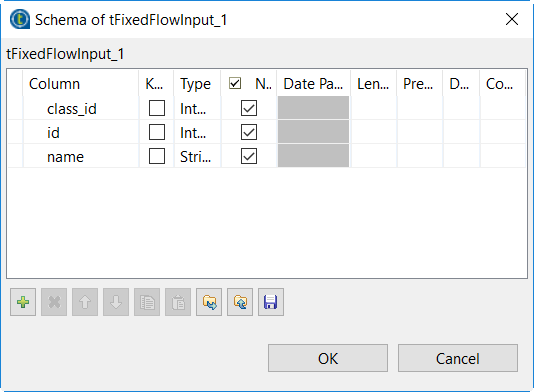
  3. Click the Edit Schema button and create the three columns shown in the following figure.
  4. When prompted, click OK to propagate the schema to the subsequent component (that is, the tAdvancedFileOutputXML_1 component). You can also achieve this by clicking the Sync columns button in the Basic settings view of the tAdvancedFileOutputXML component.
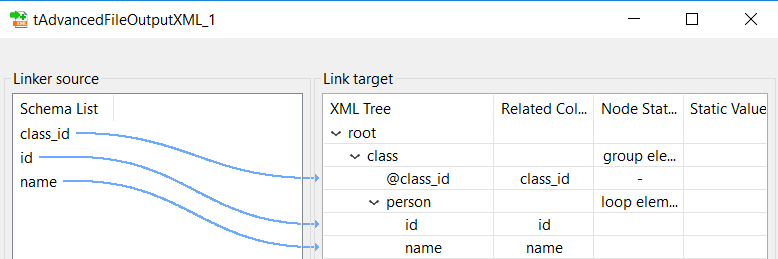
  5. In the Basic settings view of the tAdvancedFileOutputXML_1 component, click the Configure XML tree button to open the XML tree editor (as shown below). We need to set person as a loop element and set class as a group element.
    Note: This feature requires the presence of a group element in the XML tree, otherwise an error will be prompted below the name of the component in this window.
  6. Click root and then, click the plus button to add the sub-element class by selecting Create as sub-element.
  7. Repeat the procedure to add the sub-element person to class and to add the sub-elements id and name to person.
  8. Right-click class to open its contextual menu and click Add attribute to add the attribute class_id.
  9. Click the Auto map! button to link the input schema to the XML Tree.
  10. In the File Name field of the Basic settings view, enter the file path to the XML file to generate, for example: "D:/out.xml".