Skip to main content Skip to complementary content

Creating a Job to move data from ADLS Gen1 to Gen2

Before you begin

  • A Talend Studio with Big Data is started and the Integration perspective is active.
  • You Databricks cluster is running.

Procedure

  1. Right-click the Big Data Batch node under Job Designs and select Create Big Data Batch Job from the contextual menu.
  2. In the New Job wizard, give a name to the Job you are going to create and provide other useful information if needed.
  3. Click Finish to create your Job.
    An empty Job is opened in Talend Studio.
  4. In the workspace, enter the name of the component to be used and select this component from the list that appears. In this scenario, the components are tAzureFSConfiguration, tFileInputDelimited and tFileOutputDelimited.
  5. Connect tFileInputDelimited to tFileOutputDelimited using the Row > Main link.
    In this example, the data to be migrated is assumed to be delimited data. For this reason, the components specific to delimited data are used.
  6. Leave tAzureFSConfiguration alone without any connection.
  7. Double-click tAzureFSConfiguration to open its Component view.
    Spark uses this component to connect to your ADLS Gen1 storage account from which you migrate data to the mounted ADLS Gen2 filesystem.
  8. From the Azure FileSystem drop-down list, select Azure Datalake Storage.
  9. In the Datalake storage account field, enter the name of the Data Lake Storage account you need to access.
  10. In the Client ID and the Client key fields, enter, respectively, the authentication ID and the authentication key generated upon the registration of the application used to access ADLS Gen1.

    Ensure that the application to be used has appropriate permissions to access Azure Data Lake. You can check this on the Required permissions view of this application on Azure. For further information, see Azure documentation Assign the Azure AD application to the Azure Data Lake Storage account file or folder.

  11. In the Token endpoint field, copy-paste the OAuth 2.0 token endpoint that you can obtain from the Endpoints list accessible on the App registrations page on your Azure portal.
  12. Double-click tFileInputDelimited to open its Component view.

    Example

  13. Select the Define a storage configuration component check box to use the ADLS Gen1 connection configuration from tAzureFSConfiguration.
  14. In the Folder/File field, enter the directory in which the data to be migrated is stored in your ADLS Gen1 folder.
  15. Click the [...] button next to Edit schema to define the schema of the data to be migrated and accept the propagation of the schema to the component that follows, that is to say, tFileOutputDelimited.

    Example

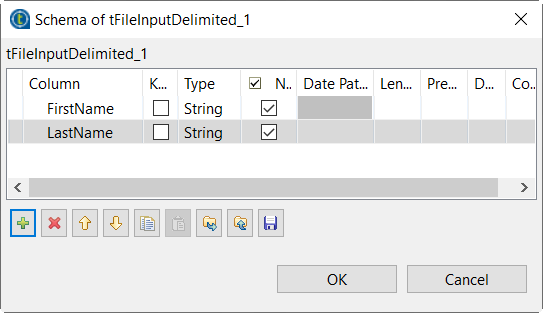
    This image is for demonstration purposes only. In this example schema, the data has only two columns: FirstName and LastName.

  16. In Row separator and Field separator, enter the separators used in your data, respectively.
  17. Double-click tFileOutputDelimited to open its Component view.

    Example

  18. Clear the Define a storage configuration component check box to use the DBFS system of your Databricks cluster.
  19. In the Folder field, enter the directory to be used to store the migrated data in the mounted ADLS Gen2 filesystem. For example, in this /mnt/adlsgen2/fromgen1 directory, adlsgen2 is the mount name specified when the filesystem was mounted and fromgen1 is the folder to be used to store the migrated data.
  20. From the Action drop-down list, select Create if the folder to be used does not exist yet on Azure Data Lake Storage; if this folder already exists, select Overwrite.

Did this page help you?

If you find any issues with this page or its content – a typo, a missing step, or a technical error – let us know how we can improve!