
Procedure
Procedure
-
Double-click it to display its Component
view.
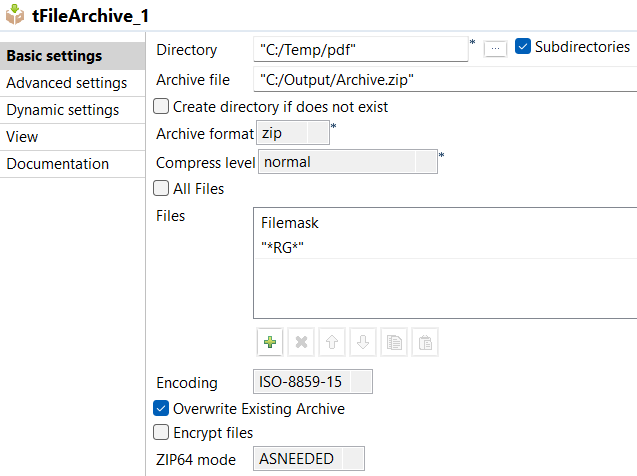
Results
The tFileArchive has compressed the selected file(s) and created the folder in the selected directory.
Did this page help you?
If you find any issues with this page or its content – a typo, a missing step, or a technical error – let us know how we can improve!