
Creating and configuring the flattening map
Generate a multi-ouptut flattening map from your input
structure.
For more information about flattening maps, see Creating a flattening map.
Procedure
-
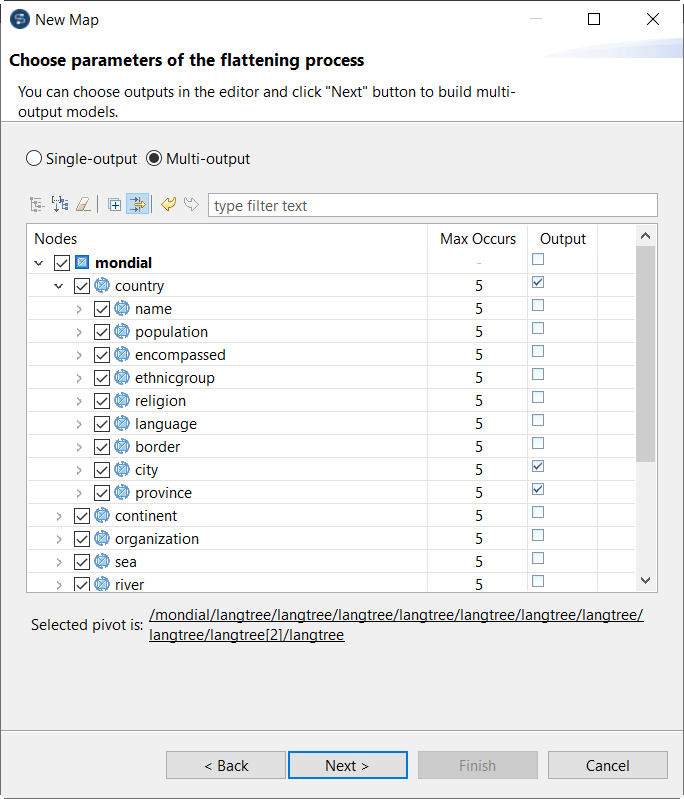
Expand the country node and select the check box in the
Output column for the country,
city and province nodes, then click
Next.
-
Configure the country output:
-
Clear the check boxes for the nodes that you want to remove from the
output.
By default, only loops are displayed. You can display other nodes by clicking the Filter primitive nodes button.

-
If needed, update the Max Occurs for the
elements that you want to keep.

-
Clear the check boxes for the nodes that you want to remove from the
output.
-
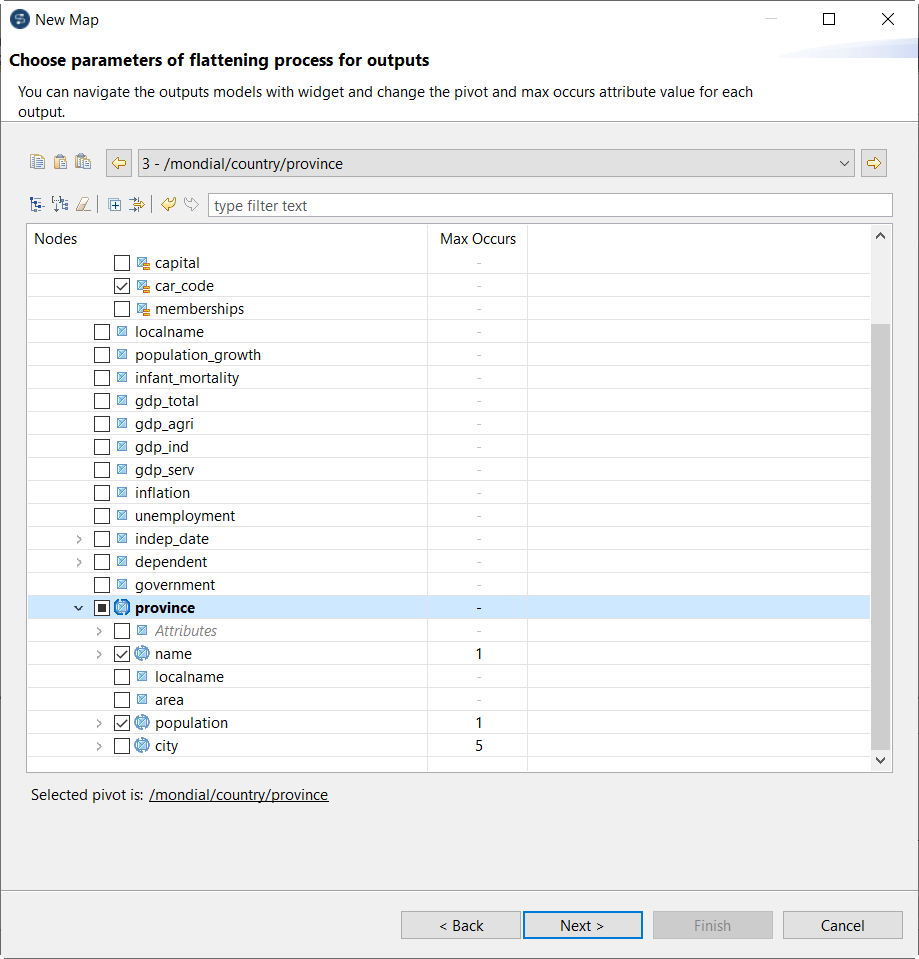
Use the drop-down list to switch to the city output and
configure it as follows:
-
Clear the check boxes for all primitive fields under
country, except for
country/Attributes/car_code, then click the
 button to apply this
selection to the next output.
This data is already available in the first output so it can be removed from the others. The car_code can be used to identify the country in all outputs.
button to apply this
selection to the next output.
This data is already available in the first output so it can be removed from the others. The car_code can be used to identify the country in all outputs. -
If needed, update the Max Occurs for the
elements that you want to keep.

-
Clear the check boxes for all primitive fields under
country, except for
country/Attributes/car_code, then click the
-
Switch to the province output and configure it as
follows:
-
If needed, update the Max Occurs for the
elements that you want to keep.
-
If needed, update the Max Occurs for the
elements that you want to keep.
Results

Did this page help you?
If you find any issues with this page or its content – a typo, a missing step, or a technical error – let us know how we can improve!