Skip to main content Skip to complementary content
Close announcements banner

Inserting Salesforce Account records with external IDs

Procedure

  1. Double-click the second tSalesforceOutput component to open its Basic settings view on the Component tab.
  2. Select the component that will create the Salesforce connection from the Connection Component drop-down list, tSalesforceConnection_1 in this example.
  3. Click the [...] button next to the Module Name field and in the pop-up dialog box, select the object into which data will be inserted, Account in this example. The schema of the Account object will be automatically filled.
  4. Click the [...] button next to Edit schema and in the pop-up dialog box, remove all schema columns 
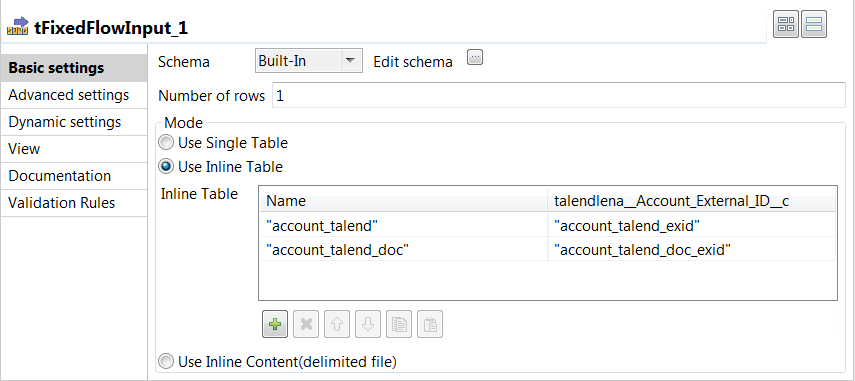
except the two columns Name and talendlena__Account_External_ID__c. Then click to copy these two columns to the first tFixedFlowInput component. When done, click OK to close the dialog box.
  5. Select INSERT from the Output Action drop-down list.
  6. Double-click the first tFixedFlowInput component to open its Basic settings view on the Component tab.
  7. In the Mode area, select Use Inline Table and in the table displayed, enter the data to be inserted into the Salesforce Accout object. In this example, the following two records will be inserted.
    account_talend;account_talend_exid
    account_talend_doc;account_talend_doc_exid

    You can also select Use Inline Content, and then copy and paste the input data into the Content field displayed.

Did this page help you?

If you find any issues with this page or its content – a typo, a missing step, or a technical error – let us know how we can improve!