
Exporting and Configuring the Certificate
Procedure
-
Request a new certification.
-
Select the server and double-click Server
Certificates.

-
Click Create Self-Signed Certificate link
located on the right part of the screen.

-
Enter ADFS or a name of your choice in the dedicated field and click
OK.

-
Select the issued certificate and click Create Certificate
Request link located on the right part of the
screen.

-
Enter the certificate information and click
Next.

-
Select the path to generate the certification and click
Next to finish.

-
Right-click it and select .

-
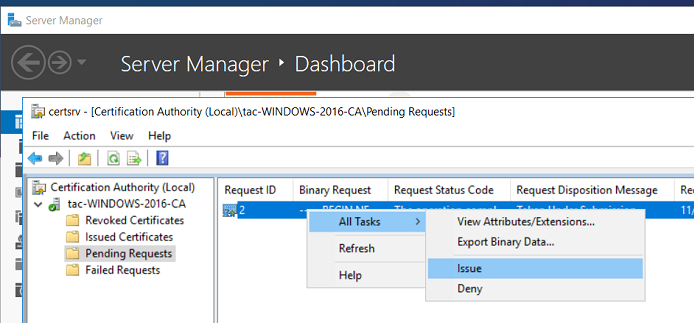
Select Pending Requests from the left panel.
Right-click the request and select .
-
Select the server and double-click Server
Certificates.
-
Export the certificate:
-
Right-click the certificate line and select .

-
Right-click the certificate line and select .
Did this page help you?
If you find any issues with this page or its content – a typo, a missing step, or a technical error – let us know how we can improve!