
Defining output MDM schema
About this task
This section describes how to define and download an output MDM XML schema. To define and download an input MDM XML schema, see Setting up the connection.
To set the values to be written in one or more entities linked to a specific MDM connection, complete the following:
Procedure
-
Click Next to proceed to the next step.
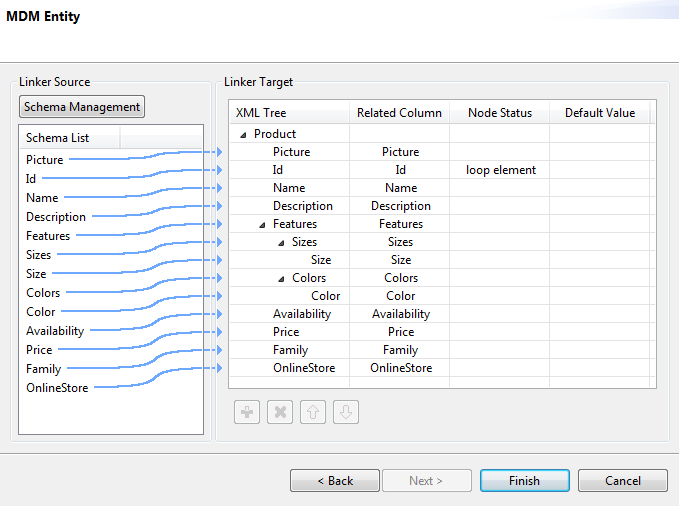
Identical schema of the entity you selected is automatically created in the Linker Target panel, and columns are automatically mapped from the source to the target panels. The wizard automatically defines the item Id as the looping element. You can always select to loop on another element. Here, you can set the parameters to be taken into account for the XML schema definition.
Example
-
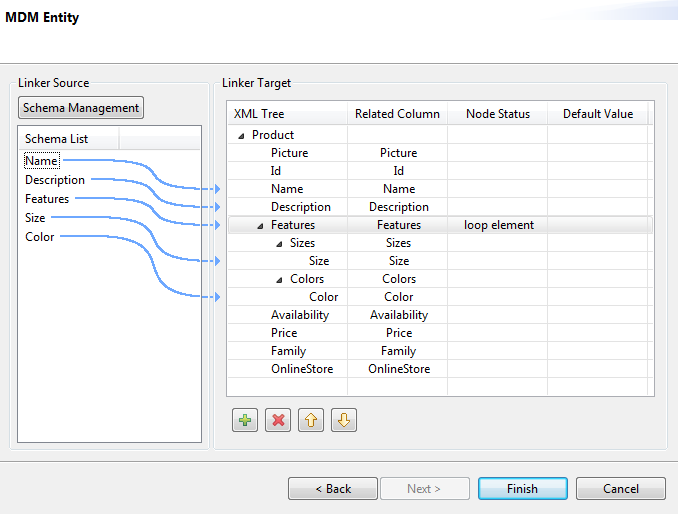
In the Linker Target panel, right-click the element you
want to define as a loop element and select Set as loop
element. This will restrict the iteration to one or more nodes.
By doing so, the tMDMOutput component that uses this MDM connection will create a new row for every item with different feature.
Example
 Information noteTip: You can prioritize the order of the fields to write by selecting the field and using the up and down arrows.
Results
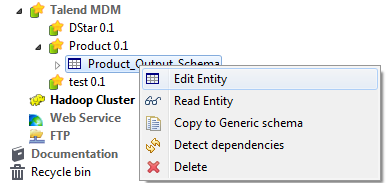
The newly created schema is listed under the corresponding MDM connection in the Repository tree view. You can modify the created schema according to your needs and drop the connection as a tMDMOutput in any of your Jobs.
For more information on how to modify the schema, see Modifying the created schema.
Did this page help you?
If you find any issues with this page or its content – a typo, a missing step, or a technical error – let us know how we can improve!