Skip to main content Skip to complementary content
Close announcements banner

Selecting the database columns and setting sample data

Procedure

  1. Expand DB connections and in the desired database, browse to the columns you want to analyze.
    Information noteNote: When profiling a DB2 database, if double quotes exist in the column names of a table, the double quotation marks cannot be retrieved when retrieving the column. Therefore, it is recommended not to use double quotes in column names in a DB2 database table.
  2. Select the columns and then click Finish to close the wizard.
    A file for the newly created column analysis is listed under the Analysis node in the DQ Repository tree view, and the analysis editor opens with the analysis metadata.
    Overview of the Data Preview and Analyzed Columns sections.
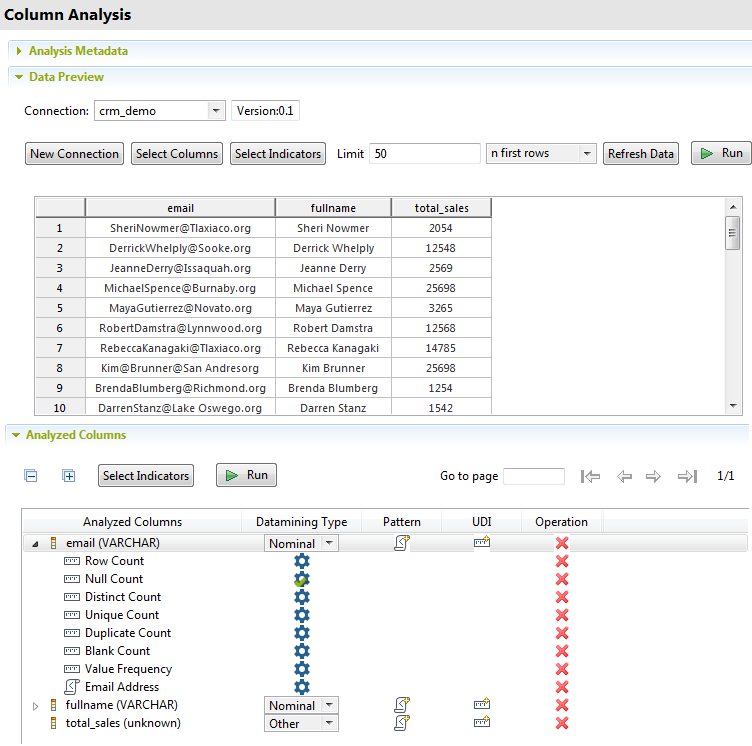
    This example analyzes full names, email addresses and sales figures.
  3. In the Data preview view, click Refresh Data.
    The data in the selected columns is displayed in the table.
  4. In the Data preview view, select the action you want to perform.
    • New Connection: open a wizard and create a connection to the data source from within the editor.

      The Connection field on top of this section lists all the connections created in Talend Studio.

    • Select Columns: open the Column Selection dialog box where you can select the columns to analyze or change the selection of the columns listed in the table. From the open dialog box, you can filter the table or column lists by using the Table filter or Column filter fields respectively.
    • Select Indicators: open the Indicator Selection dialog box where you can select the indicators to use for profiling columns.
    • n first rows or n random rows: list in the table N first data records from the selected columns or list N random records from the selected columns.
    • Refresh Data: display the data in the selected columns according to the criteria you set.
    • Run with sample data: run the analysis only on the sample dataset in the Limit field.
  5. In the Limit field, set the number for the data records you want to display in the table and use as sample data.
  6. In the Analyzed Columns section, use the arrows in the top right corner to open different pages in the view if you analyze large number of columns.
    You can also drag the columns to be analyzed directly from the DQ Repository tree view to the Analyzed Columns list.
    If one of the columns you want to analyze is a primary or a foreign key, its data mining type becomes automatically Nominal when you list it in the Analyzed Columns view.
    For more information, see Data mining types.
  7. If required, right-click any of the listed columns in the Analyzed Columns section and select Show in DQ Repository view to locate it in the database connection in the DQ Repository tree view.

Did this page help you?

If you find any issues with this page or its content – a typo, a missing step, or a technical error – let us know how we can improve!