
Deleting a record in a data container
Before you begin
About this task
Procedure
-
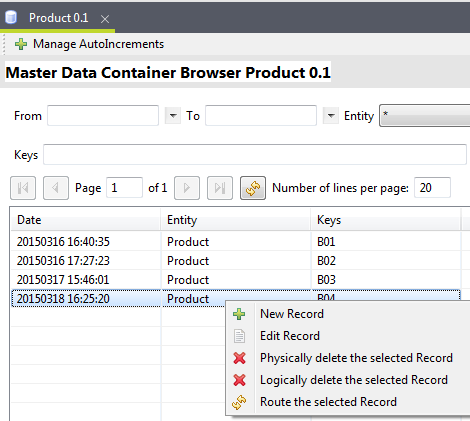
Right-click the record you want to delete permanently, and then click
Physically delete the selected record.
-
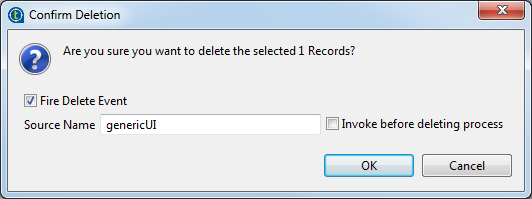
A dialog box pops up, asking you to confirm the deletion.
If needed, select the Fire Delete Event check box so that a delete event will be generated and written into UpdateReport. Next, in the Source Name field, define a name for the source which generates the delete event. You can also select the Invoke before deleting process check box to enable the verification of the delete event by a Before Deleting process.
What to do next
To remove a data record from the data record list, do the following:
-
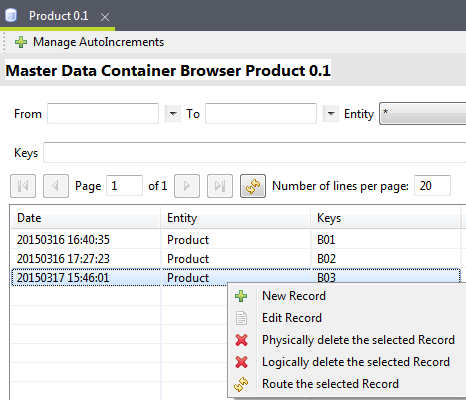
Right-click the record you want to remove from the data record list, and then click Logically delete the selected record.
-
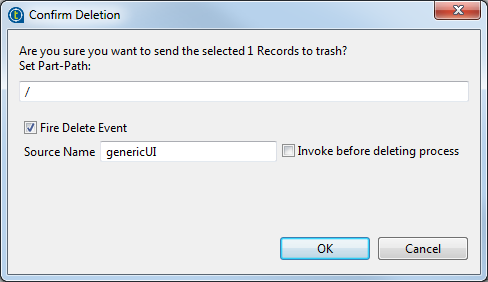
A dialog box pops up, asking you to confirm the deletion.
In the Set Part-Path field, give a path within the recycle bin, where the removed data record will be stored temporarily.
From the recycle bin, you can permanently delete data records or restore them to the data container they were deleted from.
Information noteNote: Currently, "/" is the default and only option for the Set Part-Path filed.If needed, select the Fire Delete Event check box so that a delete event will be generated and written into UpdateReport. Next, in the Source Name field, define a name for the source which generates the delete event. You can also select the Invoke before deleting process check box to enable the verification of the delete event by a Before Deleting process.
-
Click OK to validate your changes and confirm the deletion.
The data record will be removed from the list of data records and can be restored from the recycle bin later.
Did this page help you?
If you find any issues with this page or its content – a typo, a missing step, or a technical error – let us know how we can improve!