
Building Jobs
The Build Job feature allows you to deploy and execute a Job on any server, independent of Talend Studio.
However, executing Jobs in Talend Management Console requires you to publish the Job to Talend Cloud instead of building it.
About this task
By executing build scripts generated from the templates defined in Project Settings, the Build Job feature adds all of the files required to execute the Job to an archive, including the .bat and .sh along with any context-parameter files or other related files.
By default, when a Job is built, all the required jars are included in the .bat or .sh command. For a complex Job that involves many Jars, the number of characters in the batch command may exceed the limitation of command length on certain operating systems. To avoid failure of running the batch command due to this limitation, before building your Job, go to and then select the Add classpath jar in exported jobs check box to wrap the Jars in a classpath.jar file added to the built Job.
Procedure
-
In the Repository tree view,
right-click the Job you want to build, and select Build Job to
open the Build Job dialog box.
Information noteNote: You can show/hide a tree view of all created Jobs in Talend Studio directly from the Build Job dialog box by clicking the
 and the
  buttons respectively. The Jobs you earlier selected in the Talend Studio
tree view display with selected check boxes. This accessibility helps to modify
the selected items to be exported directly from the dialog box without having to
close it and go back to the Repository tree view in
Talend Studio
to do that.
buttons respectively. The Jobs you earlier selected in the Talend Studio
tree view display with selected check boxes. This accessibility helps to modify
the selected items to be exported directly from the dialog box without having to
close it and go back to the Repository tree view in
Talend Studio
to do that.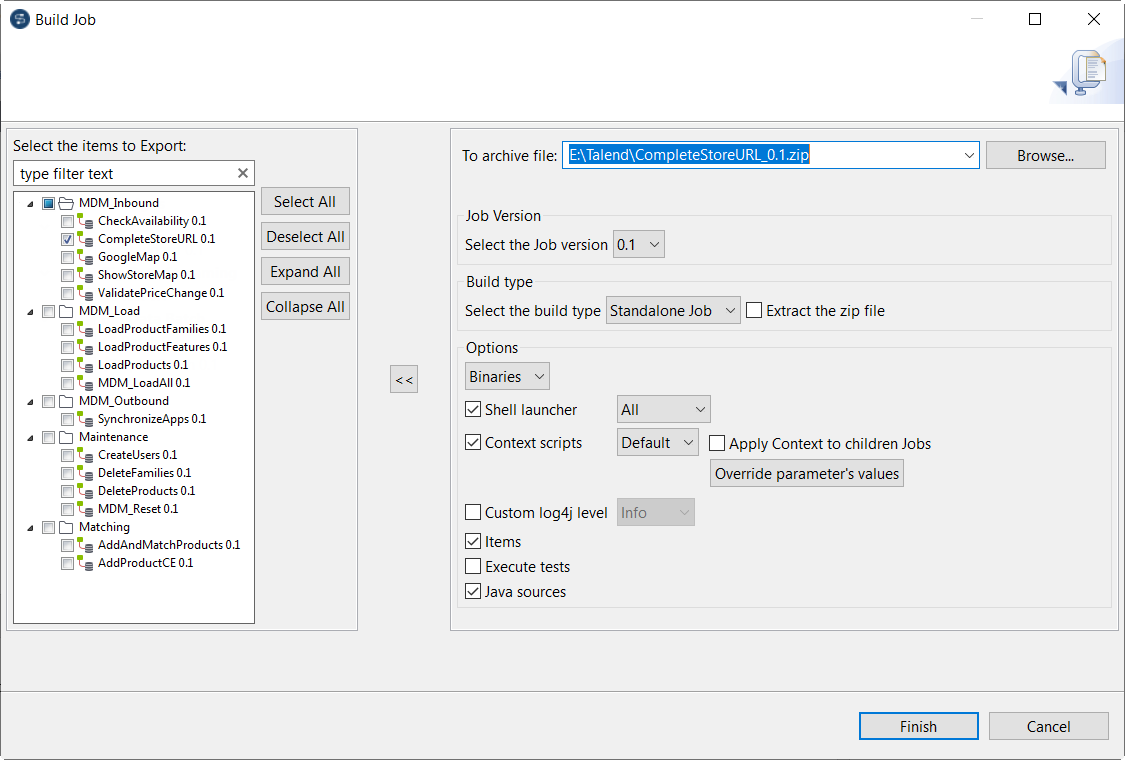
Results
A zipped file for the Jobs is created in the defined place.
Did this page help you?
If you find any issues with this page or its content – a typo, a missing step, or a technical error – let us know how we can improve!