
Creating a simple View
Procedure
-
In the MDM Repository tree view, right-click
View and select New from
the contextual menu.
The New View dialog box displays.
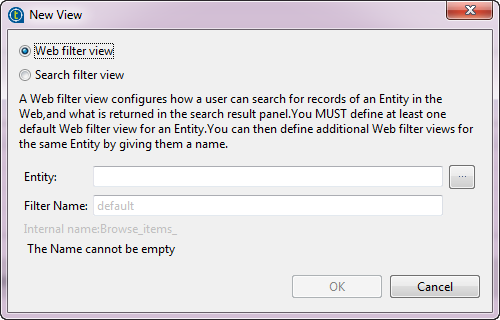 Information noteNote:
The simple View is concerned with only one specific entity, so its name must follow a specific pattern that includes the name of the entity: Browse_items_<name of the business entity>. The dialog box is displayed with the by-default text Browse_items. However, you can use the # character to create multiple views on the same entity. For example, two views on the Agency entity may have the following names: Browse_items_Agency and Browse_items_Agencynt#UK where the second View will give access only to agencies based in the United Kingdom.
For improved readability, in the MDM Repository view, Views are stored in subfolders by type and only the second part of the name is displayed.
-
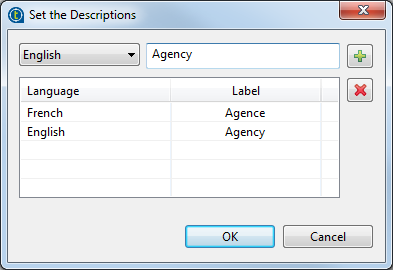
Click the three-dot button next to Description to
open a dialog box where you can add multilingual labels to the new
View.
-
From the list to the left, select a language and enter the corresponding
label in the field to the right.
Click the
 button to add the description to the Language/Label
list.Repeat the operation to add as many labels as needed and click OK to close the dialog box.All defined labels display in the Description field.
button to add the description to the Language/Label
list.Repeat the operation to add as many labels as needed and click OK to close the dialog box.All defined labels display in the Description field.
-
If needed, select one option from the Order by list
to configure how to sort the data records to be displayed using the View in
the Talend MDM Web UI.
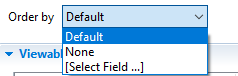
Order by options Option Description Default The data records will be displayed in the default order, that is, based on the primary key of the relevant entity in ascending order. None The data records will be displayed without any specific order. Select Field ... The data records will be displayed based on a selected field of the relevant entity in ascending or descending order.
This option allows you to open the Select Field dialog box where you can select the field based on which the data records will be sorted, and then select ASC or DESC from the list that is displayed after you select this option.
Note that the selected field must be a simple type field at the root level of the relevant entity, but cannot be a multi-occurrence field.
Information noteWarning: The performance of the web user interface or the component tMDMViewSearch using the view may be impacted if you choose to sort the data records to be displayed based on a specific field. -
If needed, select a layout from the Custom Layout
list to link the view with it.
 When the view is linked with a custom layout, pay attention to the following:
- If the custom layout is not deployed, a warning will be displayed and a default layout generated by the system automatically will be applied to the view in the web user interface.
- If the custom layout is deployed but a web user does not have permissions to the custom layout, a warning will be displayed and the default layout will be applied to the view in the web user interface.
- If the custom layout is deployed and a web user has permissions to both the view and the custom layout, the custom layout will be applied to the view in the web user interface.
When the view is not linked with a custom layout,- if no custom layout exists for the same entity, the default layout will be applied to the view in the web user interface.
- if several custom layouts exist for the same entity, the first available custom layout based on the user's role will be applied to the view in the web user interface.
For more information about how to design a custom layout, see Designing a custom layout.
Did this page help you?
If you find any issues with this page or its content – a typo, a missing step, or a technical error – let us know how we can improve!