
Creating a Welcome Action Process
A Welcome Action Process is a process designed in Talend Studio and can be manually launched by a business user from Talend MDM Web UI. It is not linked to a specific business entity.
You can design this Process to do any task you want on master data, for example adding a new record/entity in the MDM Hub, launching a Job to do some check or transformation on master data, etc. Both Welcome Action and Entity Action Processes can launch a Job to return a specific result in a new tab in the web interface.
The naming of the Welcome Action Process follows a specific pattern: Runnable#[name]; for example Runnable#AddNewRecord or Runnable#LaunchJob.
Before you begin
About this task
This example guides you through the steps of creating a Welcome Action Process that returns a result in Talend MDM Web UI. It calls a Job that provides the URL of a PDF file you want to display in the web interface. You can use the Job to display any type of content, for example Word documents or PDFs, images, web sites, etc.
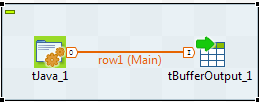
Start with creating the Job named ProduceURL in the Integration perspective of Talend Studio. A simple example of such a Job can be:
Procedure
-
Configure the tJava
component with the Java commands you want to execute.
This example will generate the URL for a PDF.
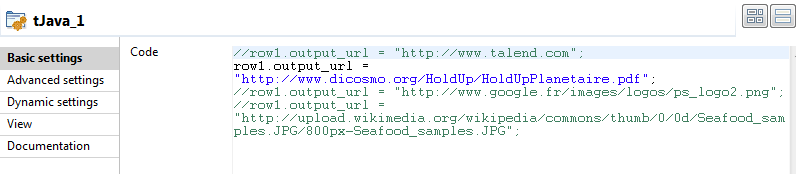 Information noteNote: The output_url is the output variable that is used to return the result in the web interface. You must always define this same variable as the output variable in the Process editor, as explained further below.
 -
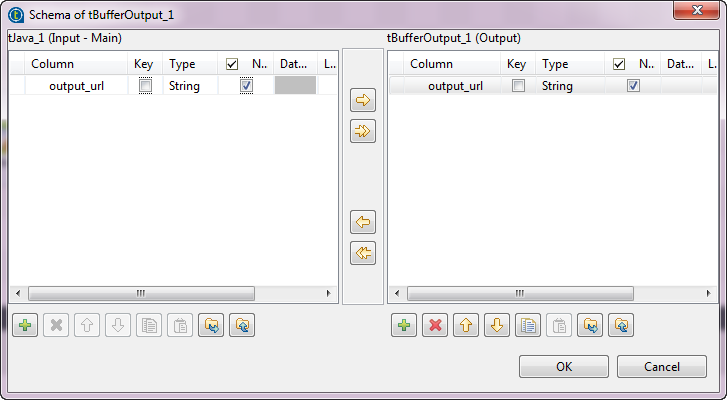
Configure the tBufferOutput component to buffer the URL defined in tJava and provide it to the output variable you
will use when you define the Welcome Action Process. Drop the column from
the tJava input schema to the
tBufferOutput schema.
What to do next
To create the Welcome Action Process that will launch the above Job to display a PDF in a new tab in the MDM web browser, do the following:
-
In the MDM Repository tree view, expand Event Management and then right-click Process and select New from the contextual menu.
The New Process dialog box displays.

-
Select the Create an Entity/ Welcome Action Process option, and then click Next.
-
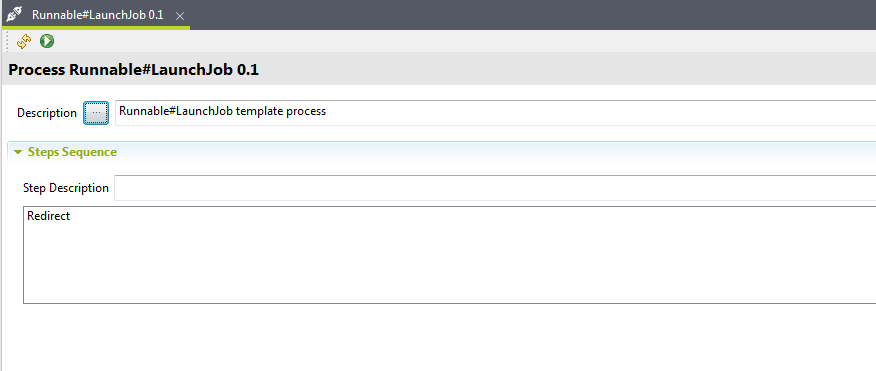
Select Create a Welcome Action and then, in the Optional Name field, enter LaunchJob.
This creates a Process with the name Runnable#LaunchJob.
-
Click Next twice to move through the following screens of the wizard, and then click Finish to close the dialog box.
An empty editor for the newly created Process opens in the workspace.
-
If required, click the ... button next to the Description field to open a dialog box where you can set multilingual descriptions of your Process.
This description will be listed as the standalone process name in the Welcome page in Talend MDM Web UI.
-
In the Step Description field, enter a name for the step you want to define in the created Process and then click the
 icon to add the step name
to the list that follows.
icon to add the step name
to the list that follows. -
If required, do the same to add a second step to do some other task.
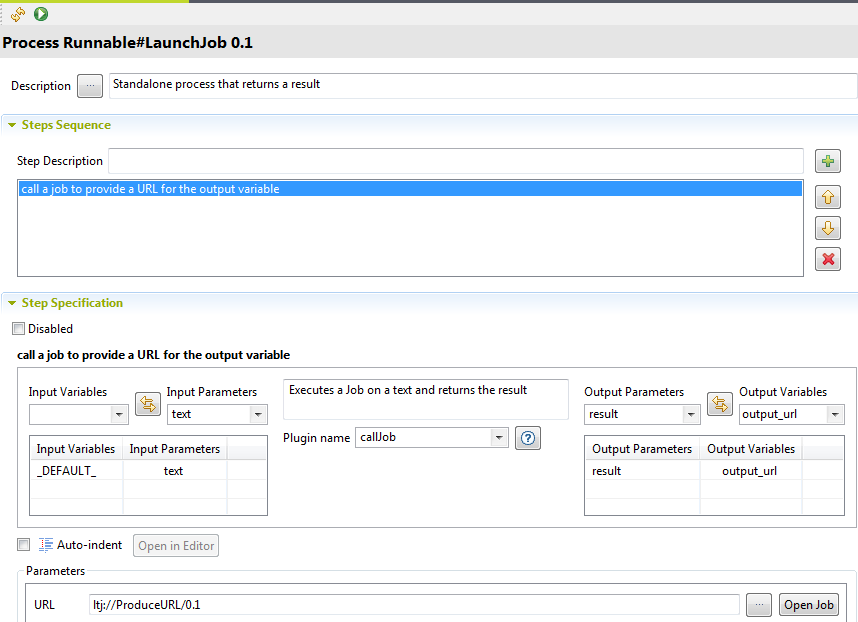
The Welcome Action Process you are going to create here has one step that triggers a Talend Job using the callJob plugin. This plugin consumes data in input parameters and produces a result in the output parameters. The result in this example is to display the content of a PDF in a new tab in the web interface. So the Process calls a Job that by turn provides the URL of the file in an output_url variable.
You need now to define the input and output parameters and variables for the listed step(s), only one in this example.
-
Select the step to display the Step Specification view in the editor. Here you can define the step input and output parameters and variables.
-
From the Plugin name list, select callJob.
Information noteNote: The icon displays a description of the plugin and details its parameters.
 -
As the callJob plugin is the first step, leave the input variable empty, select the text input, and click the
 button
to add them to the table.
button
to add them to the table. The MDM server starts the pipeline with a default variable called _DEFAULT_ .
Here you want to map variables to the input parameter of the plugin, and conversely map output parameter of a plugin to another variable.
-
Select the output parameter result and define the output variable, output_url, and then click the
button
to add them to the table. -
In the Parameters area, click the three-dot button to display a list of all Talend Jobs that have been deployed on the MDM server.
-
Select the Job you want to attach to the Process, ProduceURL in this example.
Information noteNote: If you have more than one step in your Process, you must define variables to hold the result of the first step. Then you send the variable to the input of the second step. Eventually, you define a "pipeline" where each step result is chained to the next step through a variable. For each step, you can select one of the by-default variables or one of the variables defined for the preceding plugin the Process you define.Information noteNote: You can disable the selected step in the editor at any time if you select the Disable check box. -
Save your modifications.
The Welcome Action Process is listed under the Process node in the MDM Repository tree view.
This same process is accessible from Talend MDM Web UI. An authorized business user can launch this Process and display the result from the Welcome page in the Web User Interface.
Did this page help you?
If you find any issues with this page or its content – a typo, a missing step, or a technical error – let us know how we can improve!