Outputting data from a file to a Joblet in a specific format - Cloud - 8.0

Talend Studio User Guide

Version
Cloud
8.0
Language
English
Product
Talend Big Data
Talend Big Data Platform
Talend Cloud
Talend Data Fabric
Talend Data Integration
Talend Data Management Platform
Talend Data Services Platform
Talend ESB
Talend MDM Platform
Talend Real-Time Big Data Platform
Module
Talend Studio
Content
Design and Development
Last publication date
2024-02-29

About this task

This template allows you to create a Job that retrieves data from a file and writes this data into a Joblet in a specific format.

Note:

The target Joblet you want to write data in must already exist and the metadata to be read have been created in the centralized repository when using the template.

To output data from a file to a Joblet, do the following:

Procedure

  1. In the Repository tree view of the Integration perspective, right-click Job Designs and select Create job from templates in the drop-down list. A Job creation wizard displays to help you defining the new Job main properties
    Job creation wizard.
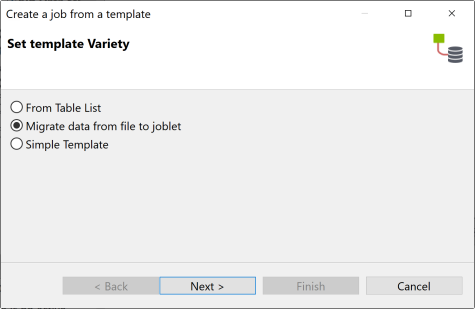
  2. Select the Migrate data from file to joblet option and click Next to open a new view on the wizard.
    Job creation wizard.
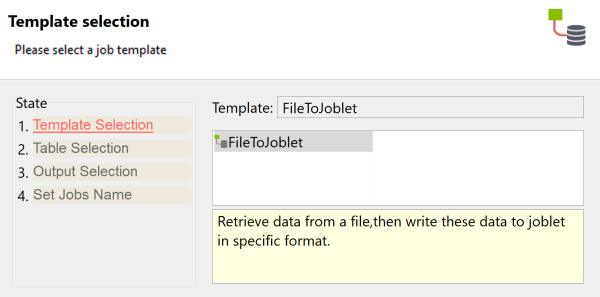
  3. Select the FileToJoblet template to create your Job and click Next.
    Job creation wizard.
  4. In the Select Schema to create area, select the metadata you want to use as parameters to retrieve and write the data into the target Joblet.
    This example uses a CSV file.
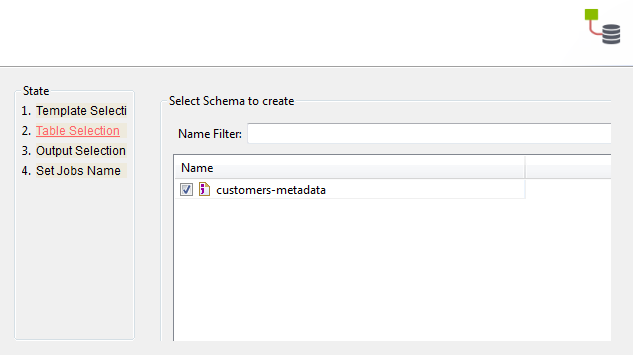
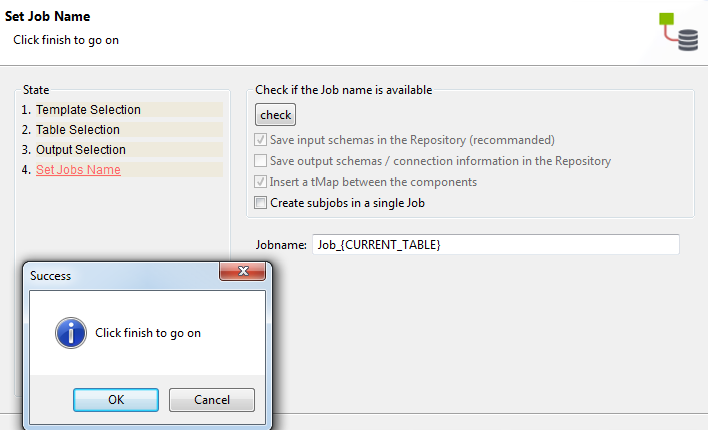
  5. Click Next to proceed.
    Job creation wizard.
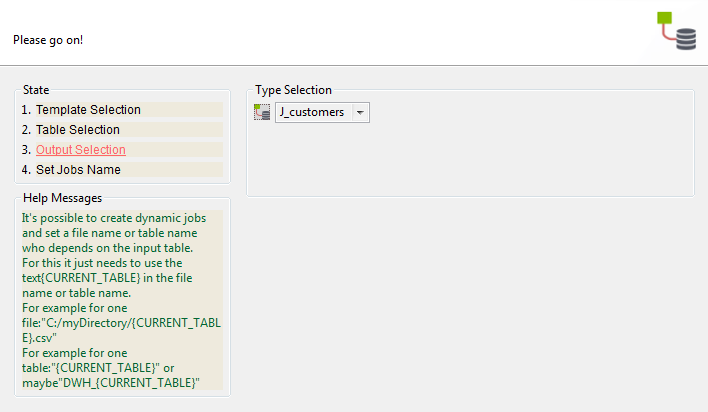
  6. In the Type Selection area, select the target Joblet you want to write the retrieved data in, and click Next to validate and open a new view on the wizard.
    Job creation wizard.
  7. In the Jobname field, type in what you want to add to complete the Job name. By default, the Job name is Job_{CURRENT_TABLE}, type in example to complete this name as Job_example_{CURRENT_TABLE}, and click check button to see whether the Job name to be used already exists or not. If it exists, you need type in another Job name in the Jobname field. If it does not, a Success dialog box pops up to prompt you to continue. Click OK.
    Warning: Do not replace or delete {CURRENT_TABLE} when you type in texts to complete the Job name.
  8. Select the Create subJobs in a single job check box if you have selected several metadata files to retrieve and write data in the target Joblet and meanwhile, you want to handle these files using subJobs in a single Job.
    Keep this check box cleared if you want to handle these files in several separate Jobs.

Results

Once the Job is created, you can modify the properties of each of the components in the Job according to your needs.