Publishing a Route or Data Service Job as a Spring Boot Microservice Docker image (deprecated) - Cloud - 8.0

Talend Studio User Guide

Version
Cloud
8.0
Language
English
Product
Talend Big Data
Talend Big Data Platform
Talend Cloud
Talend Data Fabric
Talend Data Integration
Talend Data Management Platform
Talend Data Services Platform
Talend ESB
Talend MDM Platform
Talend Real-Time Big Data Platform
Module
Talend Studio
Content
Design and Development
Last publication date
2024-02-29
Available in...

Cloud API Services Platform

Cloud Data Fabric

Data Fabric

Data Services Platform

MDM Platform

Real-Time Big Data Platform

Talend Studio allows you to publish your Routes and Data Service Jobs into a Docker registry.

This build type is deprecated from 8.0 R2024-02.

Procedure

  1. Open the Route or Job that you want to build as a Microservice (Spring-boot) Docker image in the design work space.
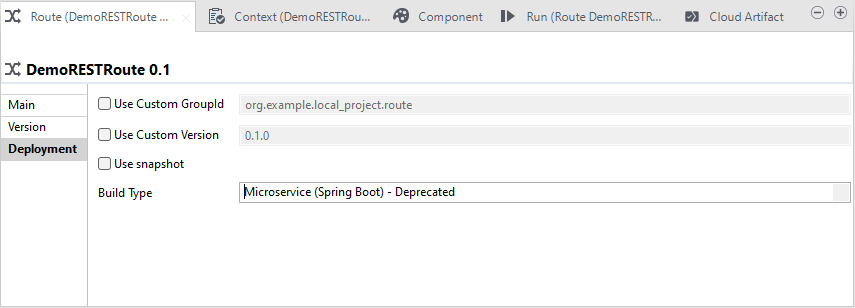
  2. In the Deployment view of the Job tab, from the Build Type list, select Microservice (Spring Boot). Save the Route or Job.
    Select the Microservice (Spring Boot) build type.
  3. In the Repository tree view, select the Route or Job item you want to publish into a Docker registry.
  4. Right-click it and select Publish in the menu.
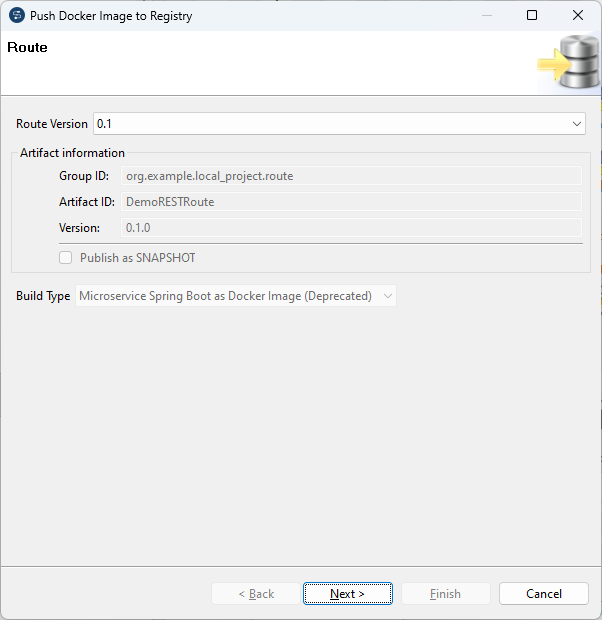
  5. In the Publish wizard, the Microservice Spring Boot as Docker Image build type is configured by default. Click Next.
    Publish wizard.
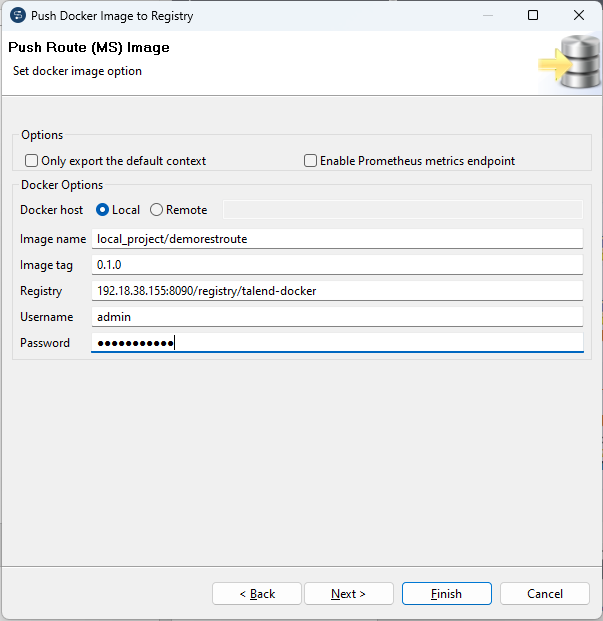
  6. Select the Only export the default context option to export only the default context used in the Route or Job.
    Push Route (MS) Image wizard
  7. Select the Only export default context check box to export only the default context used in the Route or Job.
  8. Select the Enable Prometheus metrics endpoint check box to build the Prometheus metrics endpoint into the Microservice to monitor the execution of the Job or Route, JVM memory, CPU consumption, and so on. By default, this feature bridges all the JMX attributes and values into Prometheus. For more information about Prometheus, see the Prometheus documentation.
  9. Select Local or specify a remote address based on your Docker engine installation.
    Warning: If you select the Remote option, make sure that Docker daemon is started with a remote port.
  10. Specify your Docker image name, and image tag.
    By default, the image name is derived from the project name and Route or Job name, and the image tag is derived from the version of the Route or Job. You can specify a new name and tag here or customize the default settings globally in Project Settings. For more information, see Customizing Docker images build settings.
    Warning: Underscore characters are not supported in Docker image names, therefore make sure the Docker image name value does not contain underscore characters.
  11. Specify your username and password.
  12. Click Finish to start publishing your Docker image to the specified Docker registry.