
Retrieving a Neo4j schema
About this task
In this step, the schema of interest is retrieved from the connected Neo4j database.
Procedure
-
In the Repository view, right-click the newly
created connection and select Retrieve Schema
from the contextual menu.
 The wizard opens a new view for schema generation based on a Cypher query.
 -
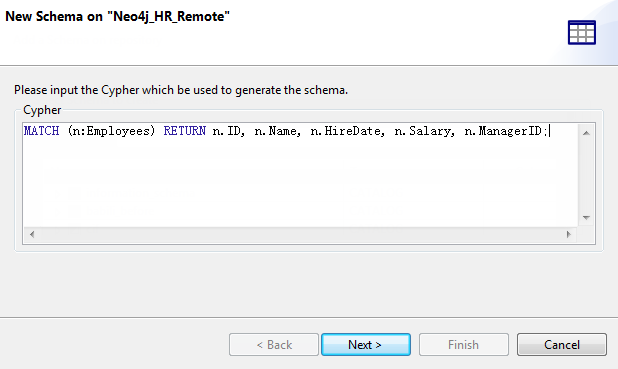
In the Cypher field, enter your Cypher query to match the nodes and retrieve
the properties of interest.
 Information noteWarning:
If your Cypher query includes strings, enclose your strings between single quotation marks instead of double ones, which will cause errors in Neo4j components dropped from your centralized metadata.
In this example, the following query is used to match nodes labeled Employees and retrieve their properties ID, Name, HireDate, Salary, and ManagerID as schema columns:MATCH (n:Employees) RETURN n.ID, n.Name, n.HireDate, n.Salary, n.ManagerID;If you want to retrieve all the properties of nodes labeled Employees in this example, you can enter a query like this:MATCH (n:Employees) RETURN n;or:MATCH (n:Employees) RETURN *; -
Click Next to proceed to the next step of the
wizard where you can edit the generated schema.
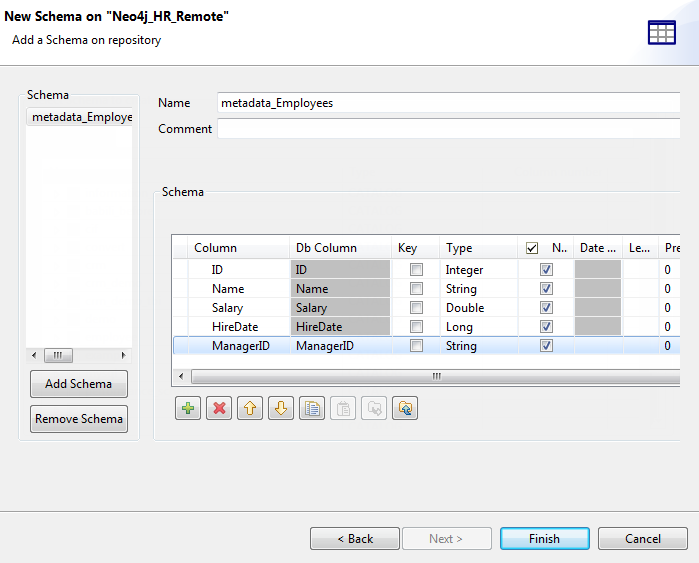 Modify the schema if needed. You can rename the schema, and customize the schema structure according to your needs in the Schema area.The tool bar allows you to add, remove, or move columns in your schema, or replace the schema with the schema defined in an XML file.To add a new schema, click the Add Schema button in the Schema panel, which creates an empty schema for you to define.To remove a schema, select the schema name in the Schema panel and click the Remove Schema button.
Did this page help you?
If you find any issues with this page or its content – a typo, a missing step, or a technical error – let us know how we can improve!