
Setting up the Job
Procedure
-
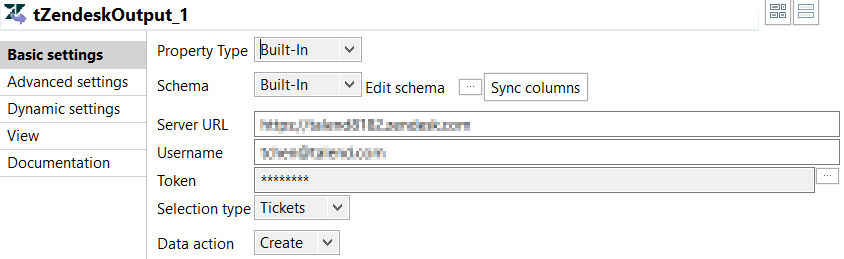
In the Basic settings view of the
tZendeskOutput component:
Did this page help you?
If you find any issues with this page or its content – a typo, a missing step, or a technical error – let us know how we can improve!