
Retrieving Microsoft Azure web applications, filtering them and creating gists
This scenario aims at helping you set up and use connectors in a pipeline. You are advised to adapt it to your environment and use case.
Before you begin
- You have created and registered Microsoft Azure applications.
- You have configured an OAuth 2.0 client credentials grant flow access.
- You have created a personal access token (PAT) in order to use the GitHub gist API.
Procedure
-
Fill in the connection properties and URL address of the server to be invoked as
described in HTTP Client properties, check the connection and
click Validate: In this example, the
https://graph.microsoft.com/v1.0/ service listing Microsoft
Azure apps is invoked.
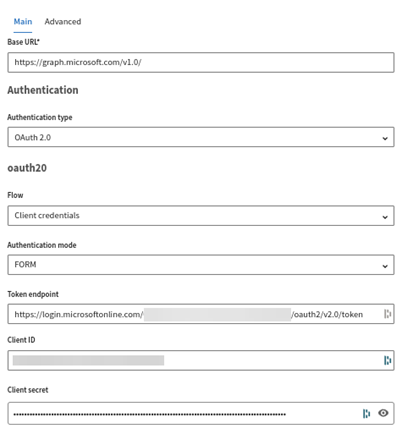
- Base URL: https://graph.microsoft.com/v1.0/
- Authentication type: Select OAuth 2.0.
- Flow: Select Client credentials.
- Authentication mode: Select FORM.
- Token endpoint: Enter https://login.microsoftonline.com/<tenant_id>/oauth2/v2.0/token.
- Client ID and Client secret: Enter the Azure web application ID and client secret.
- Additional parameters: Enter https://graph.microsoft.com/.default as the scope attribute.
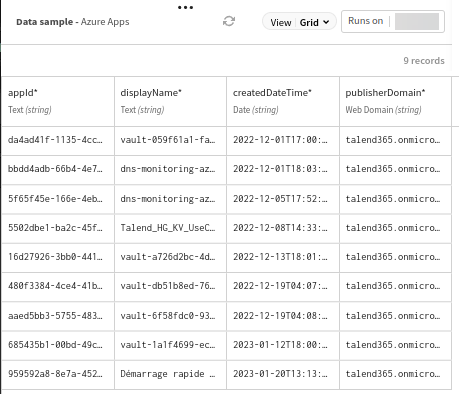
-
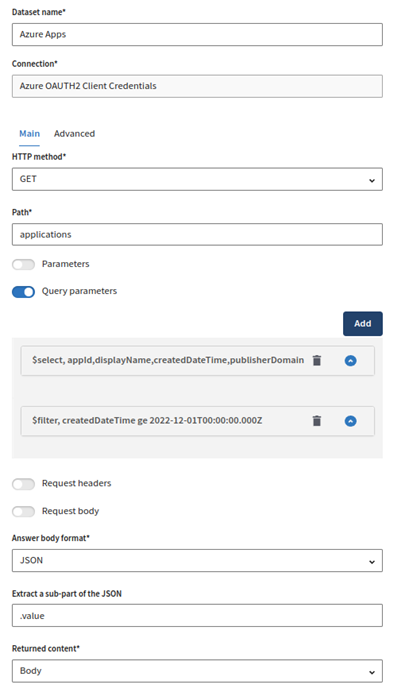
Fill in the required properties to invoke the service and click View
sample to see a preview of your dataset sample:
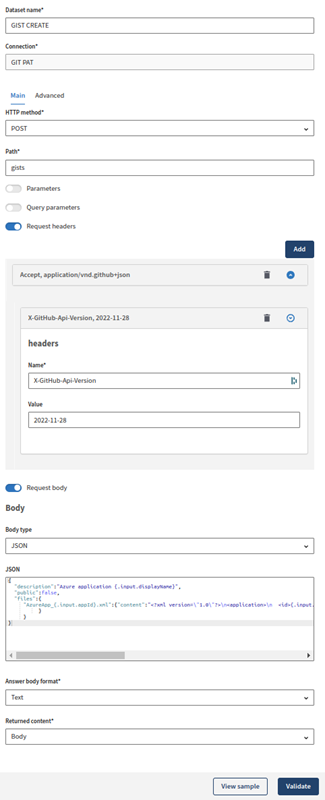
-
Fill in the connection properties and URL address of the server to be invoked as
described in HTTP Client properties, check the connection and
click Add dataset: In this example, the
https://api.github.com service is invoked.
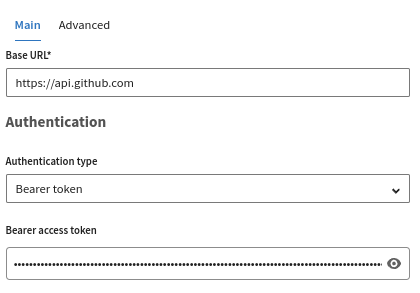
- Base URL: https://api.github.com
- Authentication type: Select Bearer token.
- Bearer Access token: Enter the personal access token you have previously created.
-
Fill in the required properties to invoke the service and click View
sample to see a preview of your dataset sample:
-
Click ADD SOURCE and select your source dataset,
Azure apps, in the panel that opens.
You can see a sample of the retrieved Microsoft Azure apps.
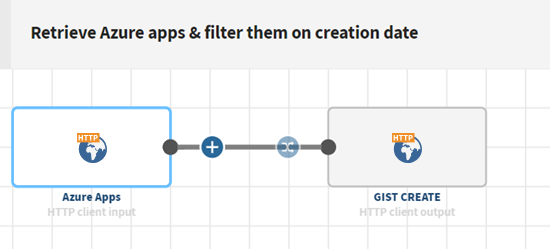
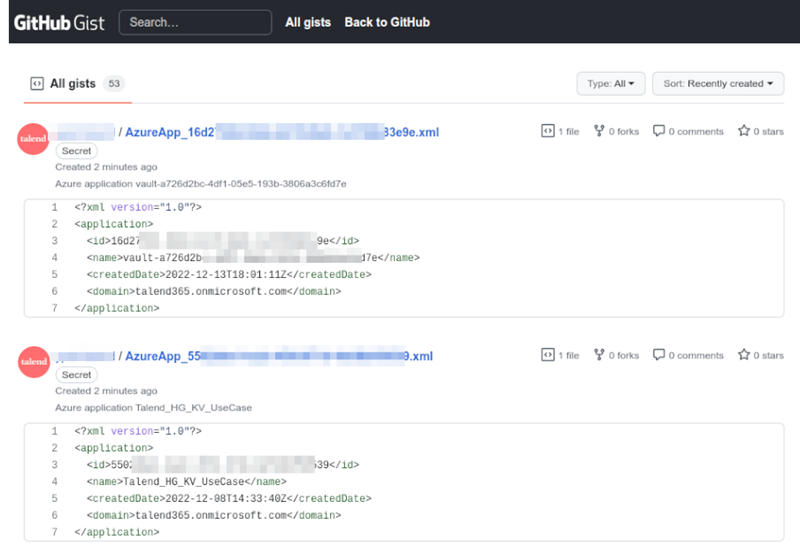
Results
Your pipeline is being executed, the Azure apps that were invoked from the Microsoft
Graph service have been filtered and sent to GitHub GIST where XML content for each
application has been created:
Did this page help you?
If you find any issues with this page or its content – a typo, a missing step, or a technical error – let us know how we can improve!