
Creating SP Connections
Procedure
-
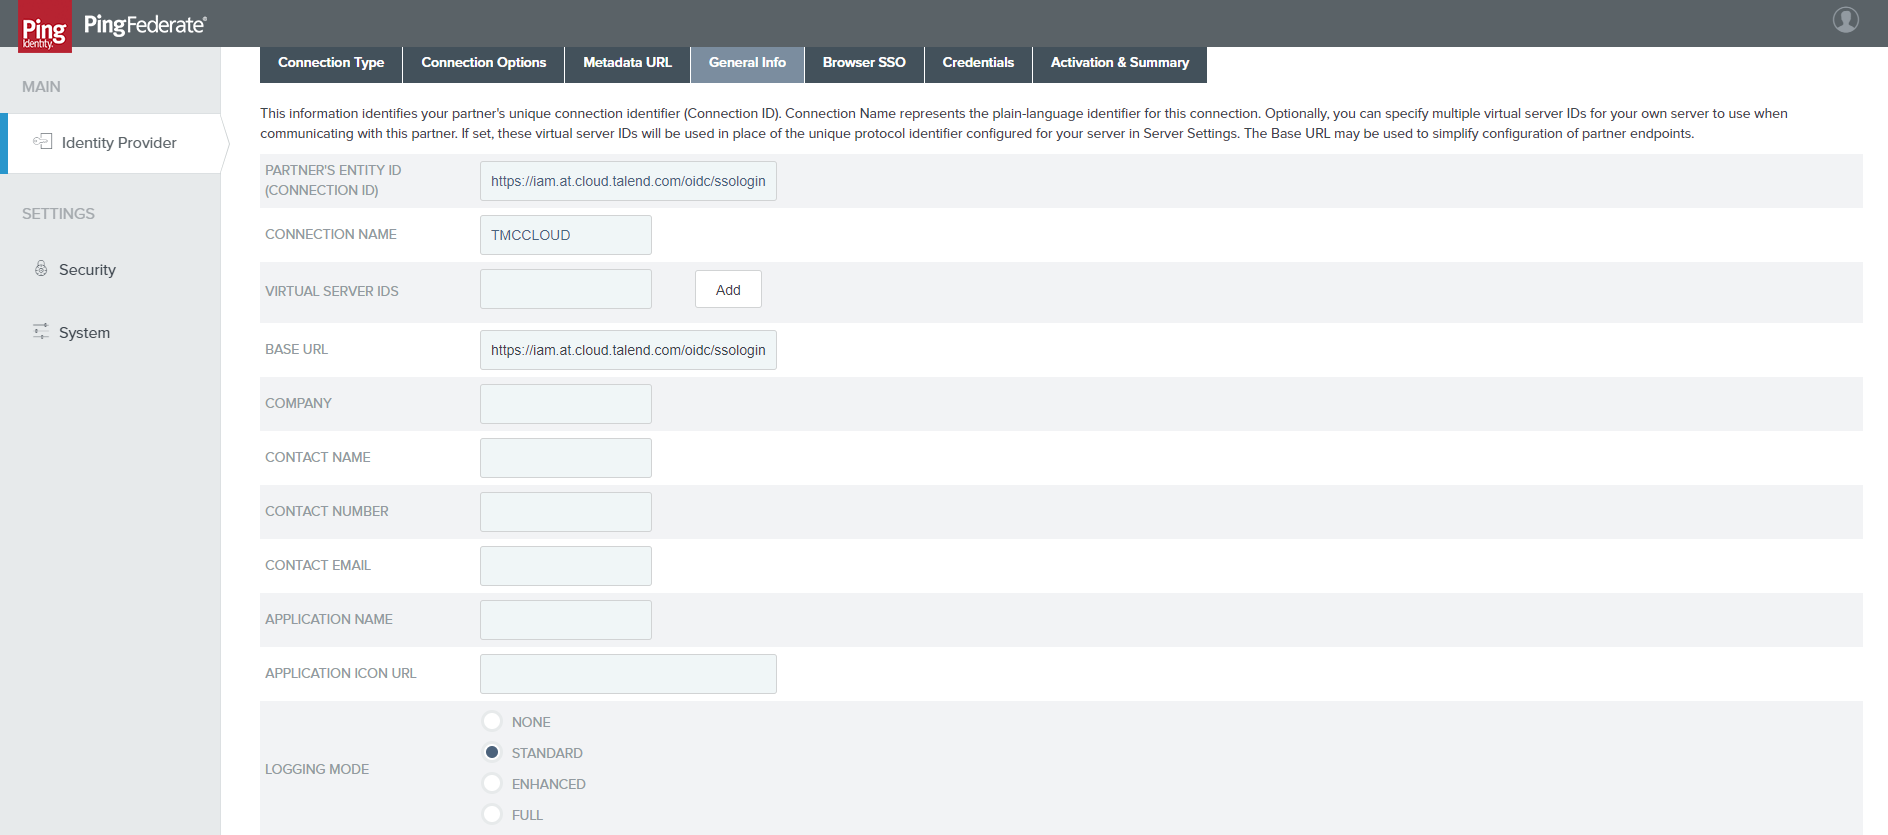
On the General Info tab, fill in the Partner's
Entity ID, Connection Name, and
Base URL fields, then click
Next.
Use your Talend Cloud SSO URL for the Partner's Entity ID and Base URL fields. This URL should read like https://iam.<env>.cloud.talend.com/oidc/ssologin, where <env> is the name of your Cloud region, for example:
- US data center: https://iam.us.cloud.talend.com/oidc/ssologin
- EU data center: https://iam.eu.cloud.talend.com/oidc/ssologin
- Asia-Pacific data center: https://iam.ap.cloud.talend.com/oidc/ssologin
When setting up SSO for multiple accounts (multiple tenants) on Talend Management Console, use their account IDs to define the unique entity ID of each account. For example, the entity ID for the AWS US region becomes https://iam.us.cloud.talend.com/oidc/ssologin/<your_account_ID>. Remember to perform the SSO setup individually for each tenant using their respective account IDs. This federates these tenants into a single SSO authentication system.Information noteNote: The account federation mentioned is exclusive to SSO authentication. The Talend Management Console objects, such as environments and workspaces, remain specific to each tenant and cannot be shared across tenancies.You can find the account ID on the Subscription page of your Talend Management Console.
Did this page help you?
If you find any issues with this page or its content – a typo, a missing step, or a technical error – let us know how we can improve!