Skip to main content Skip to complementary content
Close announcements banner

Step 4: Finalize the subscription in AS/400 journal mode

About this task

You must specify the table to which the subscriber wants to subscribe and then activate the subscription.

Procedure

  1. Right-click the schema that corresponds to the source table and select Add CDC. The Create Subscriber and Execute SQL Script dialog box displays. The long name and the short name of the source table are both displayed in this dialog box.
    Information noteWarning: The source table to be monitored should have a primary key so that the CDC system can identify the lines on which changes have been done. You cannot set up a CDC environment if the schema of your source table does not have a primary key.
    In this example, since the long name CUSTOMERS does not exceed 10 characters, the short name reads the same as the long name.
  2. In the Subscriber Name field, enter the name you want to give the subscriber. By default, the subscriber name is APP1.
  3. Click Execute and then Close.
    In the CDC Foundation folder, the change table schema and the associated view appear. A new record is added to the TSUBSCRIBERS table.
  4. From your AS/400 system:
    1. Create a new receiver:
      CRTJRNRCV JRNRCV(<source_library_name>/<receiver_name>)
    2. Create a new journal and attach the receiver created in the previous step:
      CRTJRN JRN(<source_library_name>/<journal_name>) JRNRCV(<source_library_name>/<receiver_name>)
    3. For the file to be monitored, start journaling changes into the journal created in the previous step:
      STRJRNPF FILE(<source_library_name>/<file_to_be_monitored>) JRN(<source_library_name>/<journal_name>) IMAGES(*BOTH)
    If the sequence number of the journal receiver reaches its maximum value later, you can increase the size of the receiver by executing the command CHGJRN JRN(<Journal_name>) JRNRCV(*GEN) RCVSIZOPT(*MAXOPT3) on your AS/400 system. For more information, see Change Journal (CHGJRN).
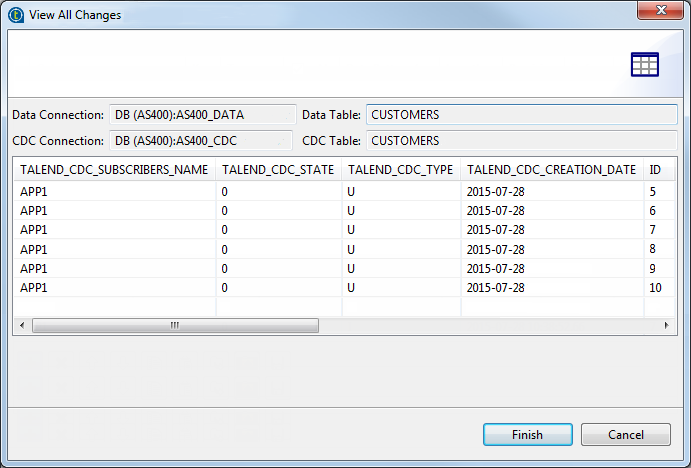
  5. To view any changes made to the data, right-click the relevant table in the Table schemas folder and select View All Changes to open the relevant dialog box.
    Overview of the View All Changes dialog box.
  6. Click Finish to close the dialog box.

Did this page help you?

If you find any issues with this page or its content – a typo, a missing step, or a technical error – let us know how we can improve!