Skip to main content Skip to complementary content
Close announcements banner

Enriching the ontology repository

About this task

This page of the wizard shows the selected concept and its related attributes. Also, a new line is added to the table: Enrich Action.

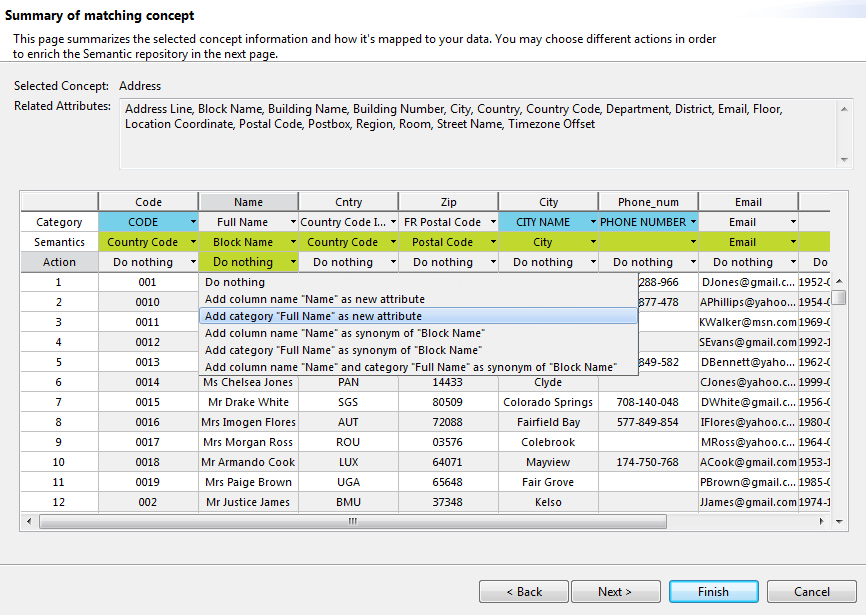
All what you define on columns in this page is used to enrich the ontology repository on the Elasticsearch server.

Overview of the Summary of matching concept step.

Procedure

  1. From the Semantic lists for each column, select a new attribute.
    Defining concepts and attributes for columns is important for the choice of indicators to be used on the columns even if you do not enrich the ontology repository with.
  2. From the Action lists for each column, select if you want to add the new attributes to the repository on the Elasticsearch server or how do you want to add them.
    Concepts in the repository will be enriched with synonyms and new attributes.
    The semantic list may be different from one column to the other depending on the content of Category and Semantics fields.
  3. Click Next and in the new window, check the Validated status column to make sure the actions you want to do on the ontology repository are valid.
    The status is represented as the following:
    • When the concept to add can be matched with concepts from the ontology but does not exist already in the ontology repository, then the status is valid.
    • When the concept to add can not be matched with concepts from the ontology, then the status is invalid with a warning icon.
    • When the concept to add can be matched with concepts from the ontology and already exist in the ontology repository, then the status is invalid with a red warning icon.
    You can always change your selection in the previous window or clear the check box of the action you want to cancel.
  4. Click Run enrichment to enrich the ontology repository with the selected attributes.
    Overview of the Semantic Repository Enrichment step.
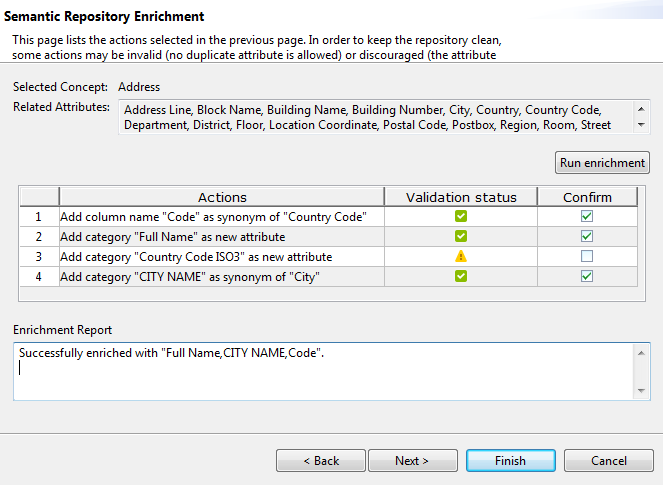
    The result view at the bottom of the wizard displays a message to confirm what has been added to the ontology repository.
  5. Click:
    • To create the table analysis with a default name, click Finish.
    • To open a page in the wizard where you can set analysis metadata, click Next.

Did this page help you?

If you find any issues with this page or its content – a typo, a missing step, or a technical error – let us know how we can improve!