Talend Artifact Repository 基于 Nexus。此步骤描述如何安装并配置 Talend 产品中内嵌的 Nexus 包。
步骤
-
将 Artifact-Repository-Nexus-VA.B.C.D-E 存档文件解压缩到专用文件夹中。
-
从 <ApplicationFolder>/bin 文件夹中,通过运行以下命令启动 Talend Artifact Repository 实例:
Nexus 在控制台中运行。
-
要将 Talend Artifact Repository 作为一项服务运行:
-
通过运行以下命令将 Nexus 安装为一项服务:
nexus.exe /install <name-of-service>
如果您没有提供名称,该服务将命名为 nexus。
-
通过运行以下命令启动 Nexus:
-
登录 Talend Artifact Repository Web 应用程序 (默认登录信息:admin/Talend123)。确保您有访问发布和快照存储库的相关权限。
在第一次连接之后,强烈建议更改默认管理员帐户的默认用户名和密码。
-
更改 admin 用户的默认用户名和密码:
-
在 Talend Artifact Repository Web 应用程序的左侧面板中,选择 。
-
右键单击 admin 用户并选择 Set Password (设置密码)。
-
输入 admin 用户的新密码。
-
将存储库 talend-custom-libs-release 和 talend-custom-libs-snapshot 的浏览权限授予用户 talend-updates-admin。
-
在 Talend Artifact Repository Web 应用程序的左侧面板中,选择 。
-
在右面板顶部点击打开 Create Role (创建角色)视图。
-
创建角色 nx-view-custom-libs-browse 并向其分配权限 nx-repository-view-maven2-talend-custom-libs-release-browse 和 nx-repository-view-maven2-talend-custom-libs-snapshot-browse。
-
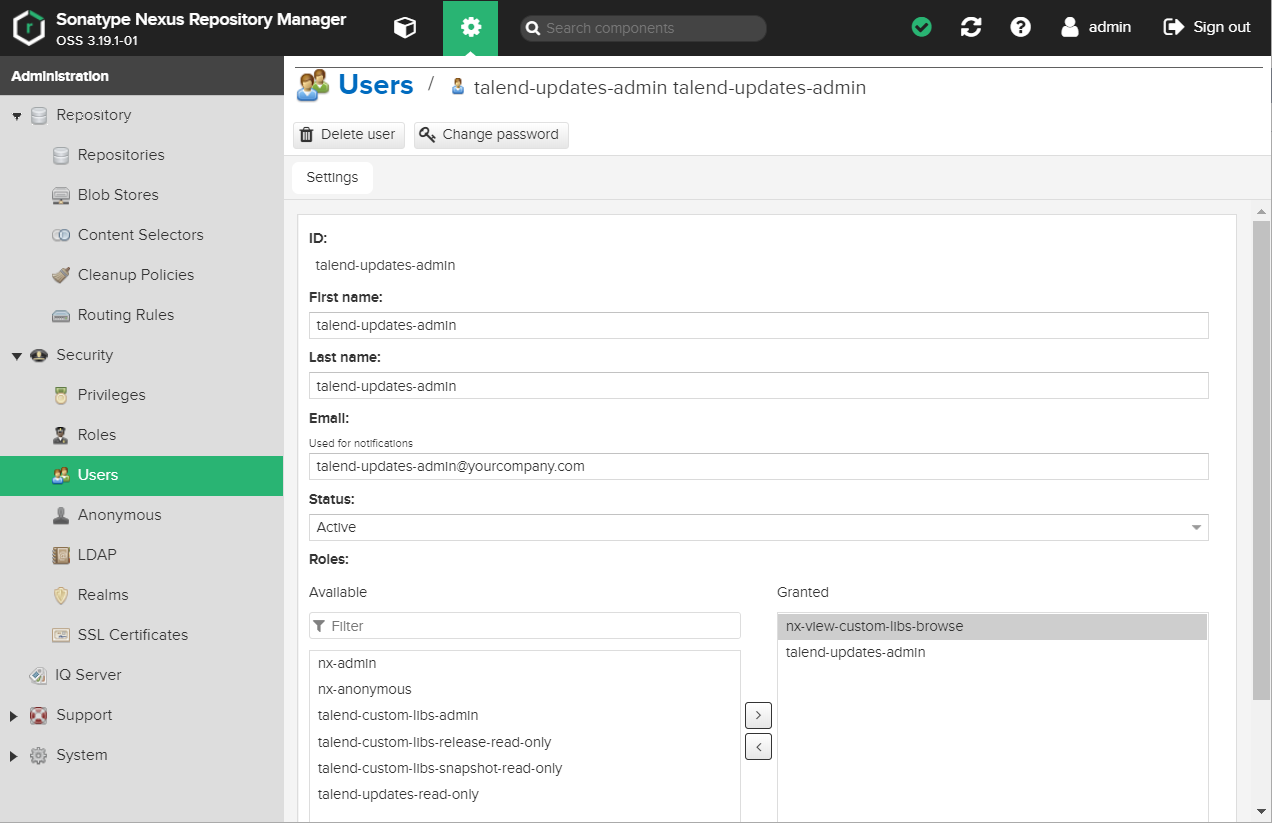
在 Talend Artifact Repository Web 应用程序的左侧面板中,选择 。
-
单击用户 talend-updates-admin 打开其详细信息视图。
-
将新建角色 nx-view-custom-libs-browse 分配给用户,以便捷该用户。
-
在 Curl 或 Postman 中执行以下命令,以验证分配给用户 talend-updates-admin 的权限,其中 <password> 代表用户密码,<nexus_url> 代表 Talend Artifact Repository Web 应用程序的 URL。
# Search talend-custom-libs-release
curl -k -u "talend-updates-admin:<password>" "<nexus_url>/service/rest/v1/search?repository=talend-custom-libs-release&group=xml-apis"

# Search talend-custom-libs-snapshot
curl -k -u "talend-updates-admin:<password>" "<nexus_url>/service/rest/v1/search?repository=talend-custom-libs-snapshot&group=org.talend.libraries"
结果中应返回相应的项。