Skip to main content Skip to complementary content

Building access to BigQuery

Procedure

  1. In the Dataset field of the Component view, enter the dataset you need to transfer data 
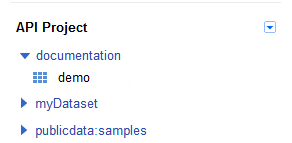
in. In this scenario, it is documentation.
    This dataset must exist in BigQuery. The following figure shows the dataset used by this scenario.
  2. In the Table field, enter the name of the table you need to write data in, for example, UScustomer.
  3. In the Action on data field, select the action. In this example, select Truncate to empty the contents, if there are any, of target table and to repopulate it with the transferred data.
  4. In the Authentication area, add the authentication information. In most cases, the Service account mode is more straight-forward and easy to handle.
    Authentication mode Description
    Service account Authenticate using a Google account that is associated with your Google Cloud Platform project.

    When selecting this mode, the Service account credentials file field is displayed. In this field, enter the path to the credentials file created for the service account to be used. This file must be stored in the machine in which your Talend Job is actually launched and executed.

    For further information about how to create a Google service account and obtain the credentials file, see Getting Started with Authentication from the Google documentation.

    OAuth 2.0 Authenticate the access using OAuth credentials. When selecting this mode, the parameters to be defined in the Basic settings view are Client ID, Client secret and Authorization code.
    1. Navigate to the Google APIs Console in your web browser to access the Google project hosting the BigQuery and the Cloud Storage services you need to use.
    2. Click the API Access tab to open its view.
    3. In the Component view of the Studio, paste Client ID, Client secret and Project ID from the API Access tab view to the corresponding fields, respectively.

      In the Advanced settings tab, see the file path in the token properties File Name field. The Studio automatically generates this file during the first successful login and stores all future successful logins in it.

    4. In the Run view of the Studio, click Run to execute this Job. The execution will pause at a given moment to print out in the console the URL address used to get the authorization code.
    5. Navigate to this address in your web browser and copy the authorization code displayed.
    6. In the Component view of tBigQueryOutput, paste the authorization code in the Authorization Code field.
  5. If you have been using the OAuth 2.0 authentication mode, in the Action on data field, select the action to be performed on your data. In this example, select Truncate to empty the contents, if there are any, of target table and to repopulate it with the transferred data. If your are using Service account, ignore this step.
    If the table to be used does not exist in BigQuery, select Create the table if it doesn't exist.

Did this page help you?

If you find any issues with this page or its content – a typo, a missing step, or a technical error – let us know how we can improve!