-
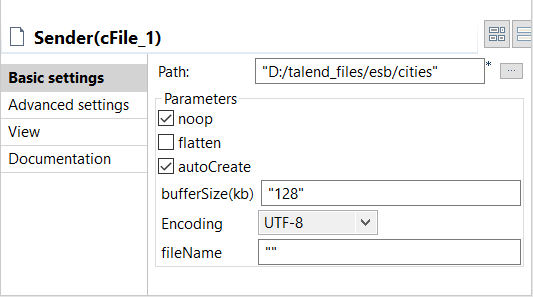
Double-click the cFile component, which
is labelled Sender, to display its Basic settings view in the Component tab.
-
In the Path field, fill in or browse to the path to the
folder that holds the source files Beijing.xml, London.xml,
Paris.xml, and Washington.xml.
From the Encoding list, select the
encoding type of your source files. Leave the other parameters as they
are.
-
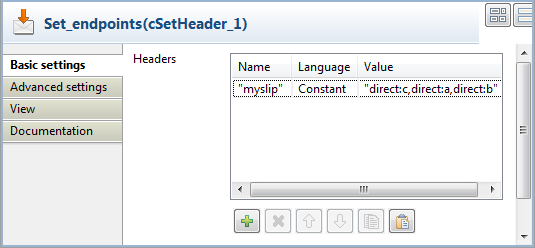
Double-click the cSetHeader component,
which is labelled Set_endpoints, to
display its Basic settings view in the
Component tab.
-
Click [+] to add a row to the Headers table.
In the Name field, type in the name of
the header you want to add to each message.
In this use case, we simply use mySlip, which is the
default value filled in the Header name
field of the cRoutingSlip component.
-
From the Language list box, select the Constant or Simple, and in the Value
field, type in the URIs you wish the message to be routed consecutively to,
separated by a comma, which is the default value of the URI delimiter field of the cRoutingSlip component.
In this use case, we want the message to be routed first to endpoint
c, then to endpoint a, and
finally to endpoint b.
-
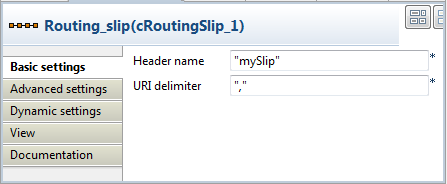
Double-click the cRoutingSlip component,
which is labelled Routing_slip, to
display its Basic settings view in the
Component tab, and define the message
header in the Header name field and the URI
delimiter in the URI delimiter field.
In this use case, we simply use the default settings.
-
Double-click the cMessagingEndpoint
component labelled Endpoint_a to display its Basic settings view in the Component tab, and type in the URI in the URI field for the destination of your messages.
Here, we want to use this component to retrieve the message routed to the
URI direct:a.
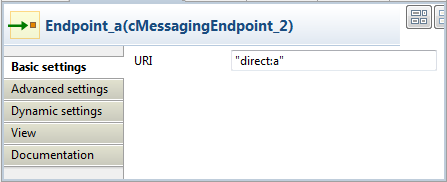
Repeat this step to set the endpoint URIs in the other cMessagingEndpoint components:
direct:b and direct:c
respectively.
-
Double-click the cProcessor component,
which is labelled Monitor_a, to display
its Basic settings view in the Component tab, and customize the code so that the
console will display information the way you wish.
Here, we want to use this component to monitor the messages routed to the
connected endpoint a and display the file name, so we
customize the code accordingly, as follows:
System.out.println("Message received on endpoint a: "+
exchange.getIn().getHeader("CamelFileName"));
Repeat this step to customize the code for the other two cProcessor components, for messages routed to the
connected endpoints b and c
respectively.
System.out.println("Message received on endpoint b: "+
exchange.getIn().getHeader("CamelFileName"));
System.out.println("Message received on endpoint c: "+
exchange.getIn().getHeader("CamelFileName"));
-
Press Ctrl+S to save your Route.