
Configuring the components
Procedure
-
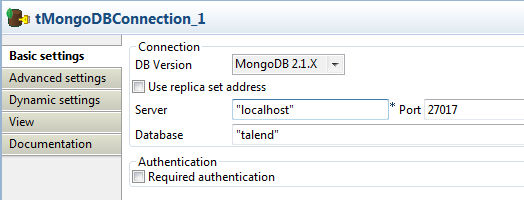
Double-click tMongoDBConnection to open
its Basic settings view.
-
Double-click tFixedFlowInput to open its
Basic settings view.
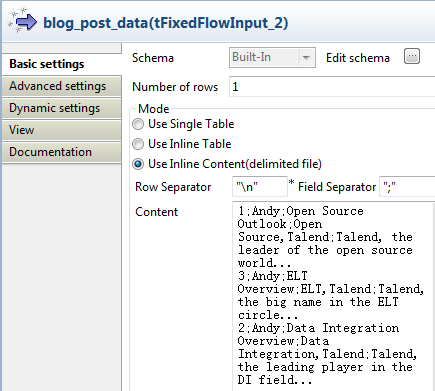 Select Use Inline Content (delimited file) in the Mode area.In the Content field, enter the data to write to the MongoDB database, for example:
1;Andy;Open Source Outlook;Open Source,Talend;Talend, the leader of the open source world... 3;Andy;ELT Overview;ELT,Talend;Talend, the big name in the ELT circle... 2;Andy;Data Integration Overview;Data Integration,Talend;Talend, the leading player in the DI field... -
Double-click tMongoDBOutput to open its
Basic settings view.
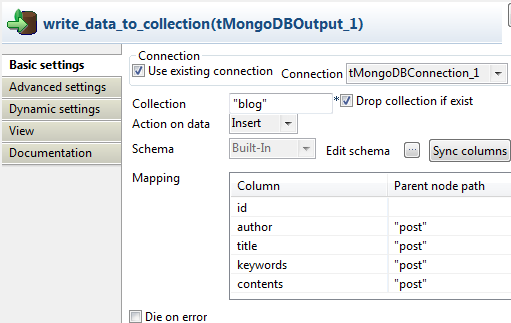 Select the Use existing connection and Drop collection if exist check boxes.In the Collection field, enter the name of the collection, namely blog.
 -
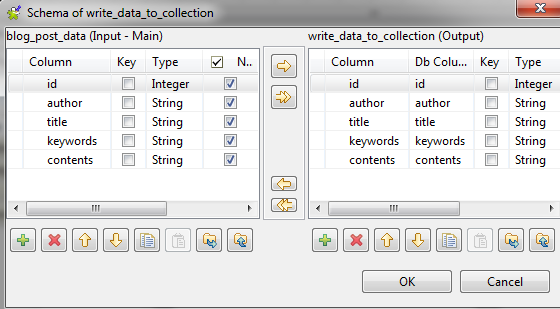
Click the [...] button next to Edit schema to open the schema editor.
-
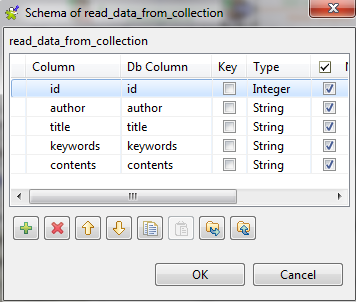
Click the [+] button to add five columns
in the right part, namely id, author, title, keywords and
contents, with the type as Integer and String respectively.
Click
 to copy all the columns to the input table.Click Ok to close the editor.
 -
Double-click tMongoDBInput to open its
Basic settings view.
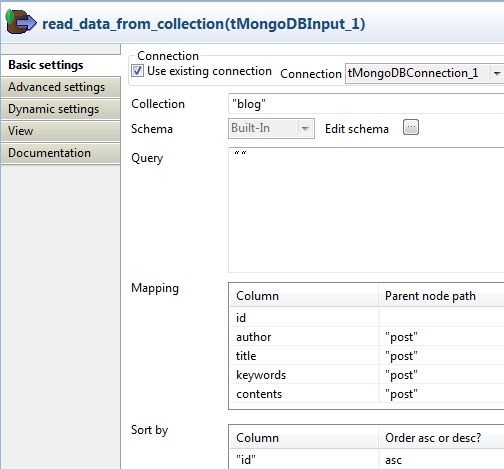 Select the Use existing connection check box.In the Collection field, enter the name of the collection, namely blog.
 -
Click the [...] button next to Edit schema to open the schema editor.
Did this page help you?
If you find any issues with this page or its content – a typo, a missing step, or a technical error – let us know how we can improve!