Skip to main content Skip to complementary content

Configuring the HDFS components to work with Azure Data Lake Storage

Procedure

  1. Double-click tFixedFlowInput to open its Component view to provide sample data to the Job.

    The sample data to be used contains only one row with two column: id and name.

  2. Click the [...] button next to Edit schema to open the schema editor.
  3. Click the [+] button to add the two columns and rename them to id and name.
  4. Click OK to close the schema editor and validate the schema.
  5. In the Mode area, select Use single table.

    The id and the name columns automatically appear in the Value table and you can enter the values you want within double quotation marks in the Value column for the two schema values.

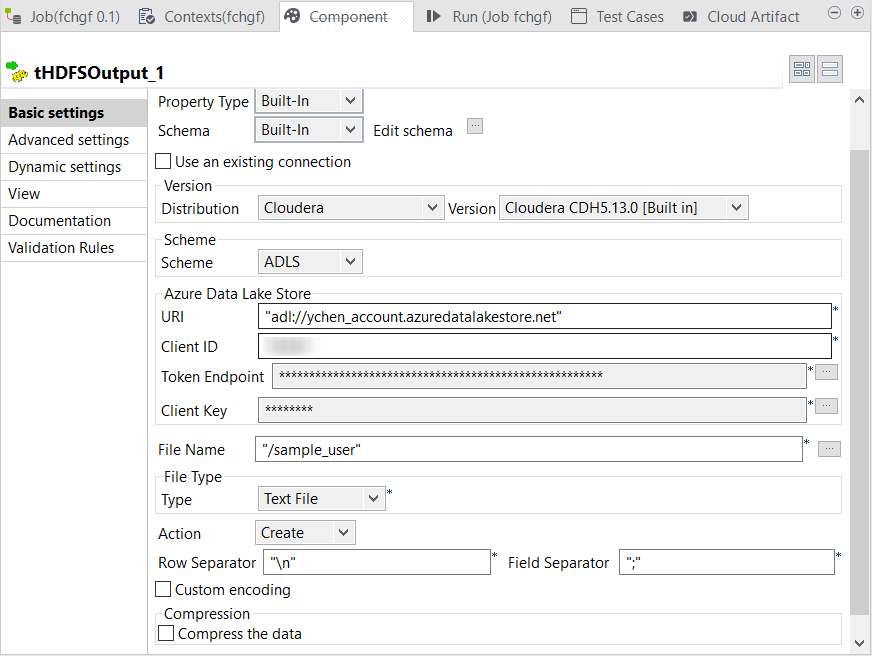
  6. Double-click tHDFSOutput to open its Component view.

    Example

  7. In the Version area, select Hortonworks or Cloudera depending on the distribution you are using. In the Standard framework, only these two distributions with ADLS are supported by the HDFS components.
  8. From the Scheme drop-down list, select ADLS. The ADLS related parameters appear in the Component view.
  9. In the URI field, enter the NameNode service of your application. The location of this service is actually the address of your Data Lake Store.

    For example, if your Data Lake Storage name is data_lake_store_name, the NameNode URI to be used is adl://data_lake_store_name.azuredatalakestore.net.

  10. In the Client ID and the Client key fields, enter, respectively, the authentication ID and the authentication key generated upon the registration of the application that the current Job you are developing uses to access Azure Data Lake Storage.

    Ensure that the application to be used has appropriate permissions to access Azure Data Lake. You can check this on the Required permissions view of this application on Azure. For further information, see Azure documentation Assign the Azure AD application to the Azure Data Lake Storage account file or folder.

    This application must be the one to which you assigned permissions to access your Azure Data Lake Storage in the previous step.

  11. In the Token endpoint field, copy-paste the OAuth 2.0 token endpoint that you can obtain from the Endpoints list accessible on the App registrations page on your Azure portal.
  12. In the File name field, enter the directory to be used to store the sample data on Azure Data Lake Storage.
  13. From the Action drop-down list, select Create if the directory to be used does not exist yet on Azure Data Lake Storage; if this folder already exists, select Overwrite.
  14. Do the same configuration for tHDFSInput.
  15. Press F6 to run your Job.

Did this page help you?

If you find any issues with this page or its content – a typo, a missing step, or a technical error – let us know how we can improve!