
Reading, transforming, and writing data in NetSuite
Procedure
-
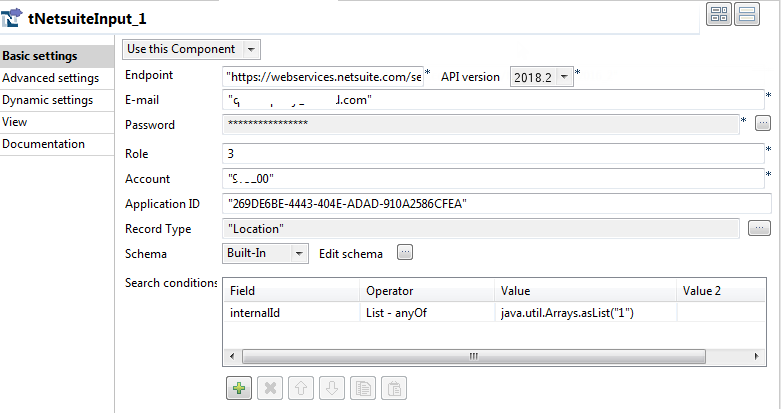
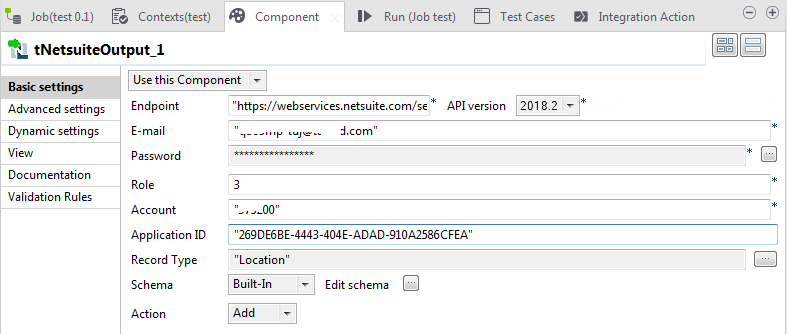
Select the NetSuite component you want to use from the
Version drop-down list and click
Apply.
In this scenario, NetSuite Deprecated is selected.
-
Select the NetSuite component you want to use from the
Version drop-down list and click
Apply.
In this scenario, NetSuite Deprecated is selected.
-
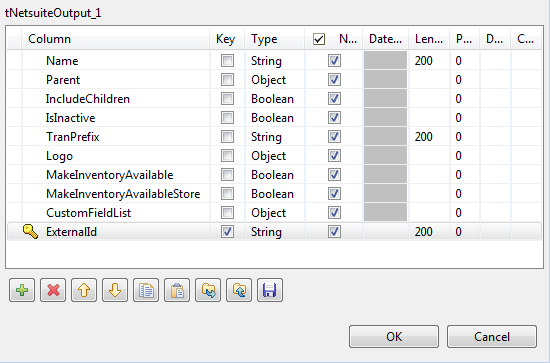
Click the [...] button
next to Edit schema to open the schema
editor. You can see the schema has already been prefilled. Keep only the columns
that are relevant to your operation and delete others. In this example, keep the
column Name, Parent, IncludeChildren, IsInactive, TranPrefix, Logo, MakeInventoryAvailable, MakeInventoryAvailableStore, CustomFieldList,
and ExternalId.
-
Double-click tMap to
open its Map Editor and configure data
flow mappings.
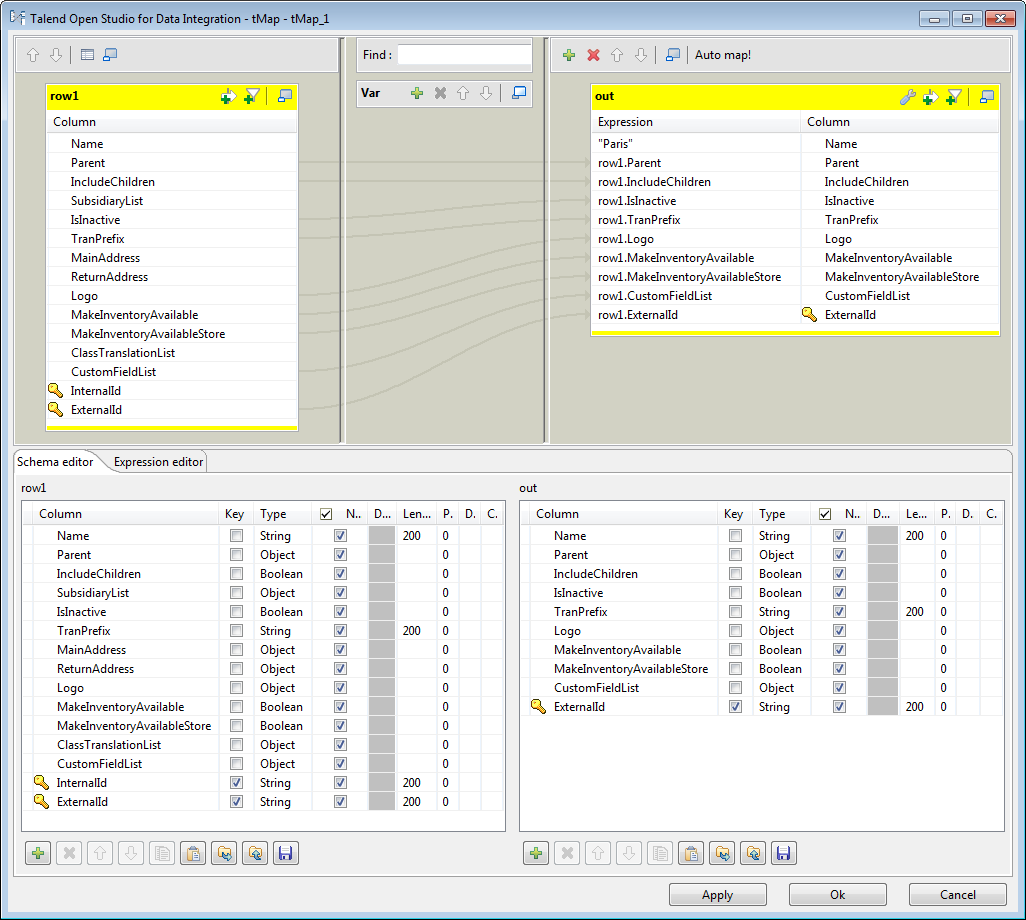
- In the out output table, set the value of the Name column by entering "Paris" in the corresponding Expression column field.
- Drag and drop the Parent column in the row1 input table onto the Expression column of the corresponding row in the out output table.
- Do the same to drag and drop other columns IncludeChildren, IsInactive, TranPrefix, Logo, MakeInventoryAvailable, MakeInventoryAvailableStore, CustomFieldList, and ExternalId in the row1 input table onto the Expression column of the corresponding row in the out output table.
Did this page help you?
If you find any issues with this page or its content – a typo, a missing step, or a technical error – let us know how we can improve!