Skip to main content Skip to complementary content

Configuring data input

Procedure

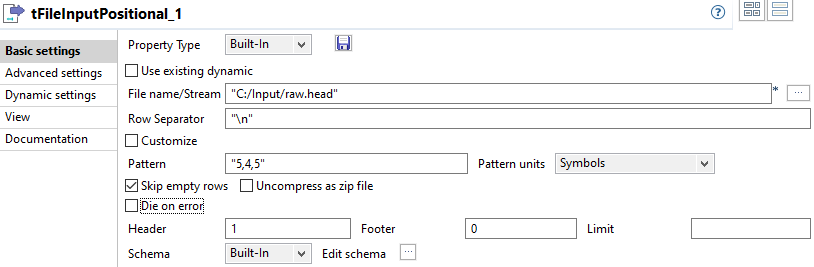
  1. Double-click the tFileInputPositional component to show its Basic settings view and define its properties.
  2. Define the Job Property type if needed. For this scenario, we use the built-in Property type.
    As opposed to the Repository, this means that the Property type is set for this station only.
  3. Fill in a path to the input file in the File Name field. This field is mandatory.
  4. Define the Row separator identifying the end of a row if needed, by default, a carriage return.
  5. If required, select the Use byte length as the cardinality check box to enable the support of double-byte character.
  6. Define the Pattern to delimit fields in a row. The pattern is a series of length values corresponding to the values of your input files. The values should be entered between quotes, and separated by a comma. Make sure the values you enter match the schema defined.
  7. Fill in the Header, Footer and Limit fields according to your input file structure and your need. In this scenario, we only need to skip the first row when reading the input file. To do this, fill the Header field with 1 and leave the other fields as they are.
  8. Next to Schema, select Repository if the input schema is stored in the Repository. In this use case, we use a Built-In input schema to define the data to pass on to the tFileOutputXML component.
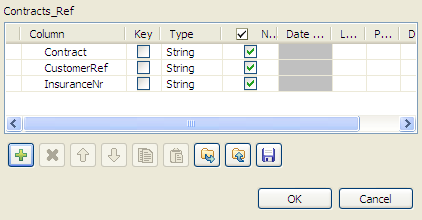
  9. You can load and/or edit the schema via the Edit Schema function. For this schema, define three columns, respectively Contract, CustomerRef and InsuranceNr matching the structure of the input file. Then, click OK to close the Schema dialog box and propagate the changes.

Did this page help you?

If you find any issues with this page or its content – a typo, a missing step, or a technical error – let us know how we can improve!