
How to import/export Document templates
The import/export feature allows you to export one or more document templates from Talend DQ Portal and to import them into a different Talend DQ Portal installation.
There can be many different reasons for an export operation but some typical cases can be backups, upgrade to a new platform version and deploy of document templates from a development environment to a production environment.
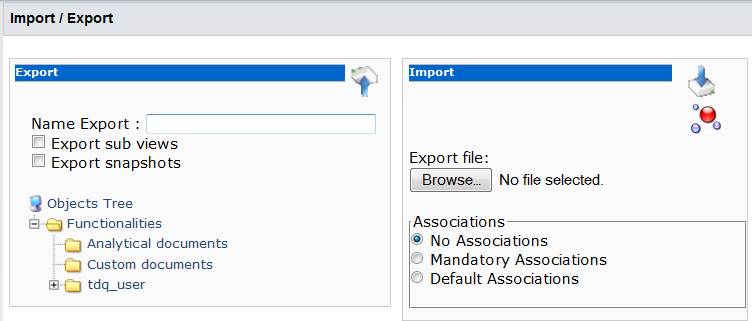
You can access the import/export view by clicking the Import/Export item in the Repository Management menu. Once you access the page, you can see the export and import forms on the left and right sides respectively.
-
You have accessed Talend DQ Portal as an administrator.
-
At least one document template has been created.
To export a document template from your current environment, do the following:
-
On the toolbar, click the
 icon and select Import/Export
page.
icon and select Import/Export
page.The corresponding page is displayed.
-
In the Export panel and in the Objects Tree, browse to the document template you want to export and select its check box.

-
In the Name Export field, enter a name for the exported document template.
-
Select the Export sub views and Export snapshots check boxes if you want to export the corresponding items with the selected document template.
-
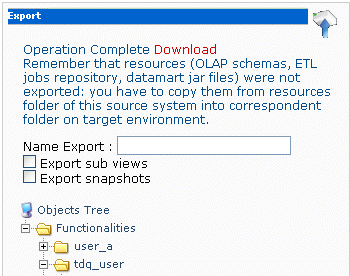
Click the export icon in the upper right corner of the Export panel.
A progress information message is displayed and then the export result message appears prompting you to complement the export operation manually.
The exported document is saved in your current environment.
-
Click Download to open the exported document or save it in a path according to your needs in order to import it later into a target environment.
To import a document template into your current environment, do the following:
-
On the toolbar, click the
icon and select Import/Export
page.The corresponding page is displayed.
-
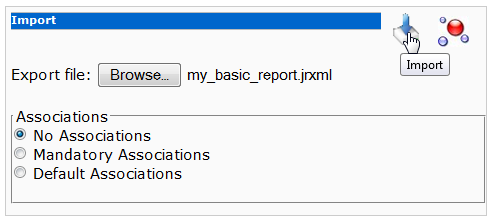
In the Import panel, browse to the document template zip file to set its path in the Export file field.
-
From the Association list, select one of the available association modes whether you want to import any files associated with the document template.
You can click the
 icon in the upper right corner of the Import panel in order to attach any new associated file to the document
you want to import.
icon in the upper right corner of the Import panel in order to attach any new associated file to the document
you want to import. -
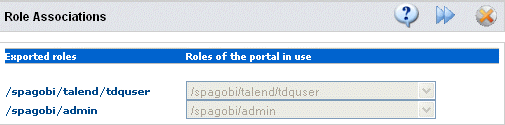
Click the import icon in the upper right corner of the Import panel.
A new page is displayed listing the roles associated with the imported document template and those already in use in the current environment.
-
Click the
 button to open a new page that lists engine
associations.
button to open a new page that lists engine
associations. -
From the engine list, select the engine you want to associate with the imported document template.
-
Click the
button to open a new page that lists data source
associations. -
From the data source list, select the data source you want to associate with the imported document template.
-
Click the
button to open a new page that lists metadata conflicts, if
any, between all the above imported items and those already in use in the current
environment. -
Click the
button to go back to the Import/export page.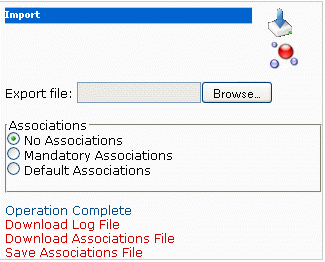
-
If required, click any of the red links listed as a result of the import operation to carry on the indicated operation.
Did this page help you?
If you find any issues with this page or its content – a typo, a missing step, or a technical error – let us know how we can improve!