
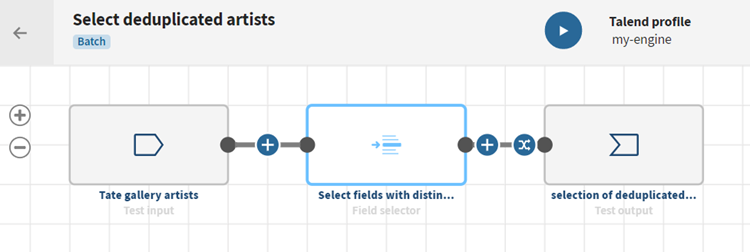
Selecting records of deduplicated Tate gallery artists
Before you begin
-
You have previously added the dataset holding your source data.
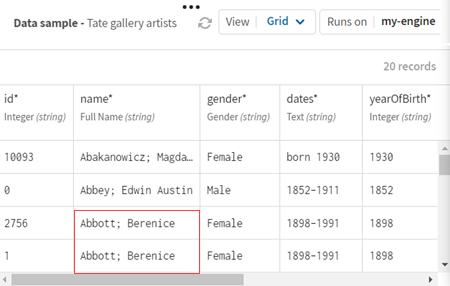
Download and extract the file: field_selector-artists.zip. It contains a dataset of artists of the Tate galleries in London (including their name, date of birth, URL of their Tate page, etc.) with some duplicate names.
-
You also have created the connection and the related dataset that will hold the processed data.
Here, a file stored on a Test connection.
Procedure
-
Click ADD SOURCE to open the panel allowing you to select
your source data, here a list of Tate artists with some duplicates.
-
Click
 and add a Field selector processor to the pipeline.
The configuration panel opens.
and add a Field selector processor to the pipeline.
The configuration panel opens.
-
Click the Edit icon in the Simple
mode to open the Select fields window:
-
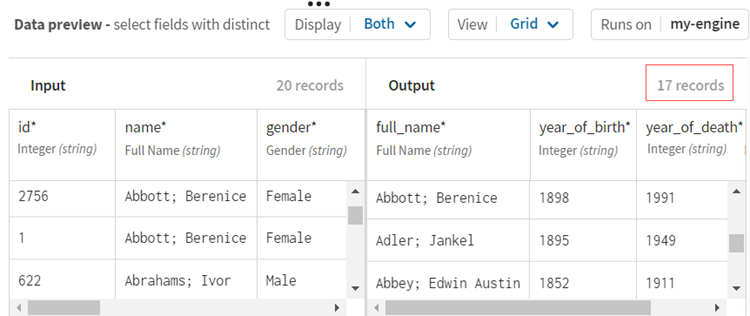
Select yearOfDeath in the Input
list and enter year_of_death in the
Output list, as you want to select and rename the
fields related to the artist years of death.

-
Select yearOfDeath in the Input
list and enter year_of_death in the
Output list, as you want to select and rename the
fields related to the artist years of death.
-
Click Save to
save your configuration.
Look at the preview of the processor to compare your data before and after the select and distinct operations. The artists names are deduplicated and only the fields with different values are returned.
Results
Your pipeline is being executed, the data is reorganized according to the conditions you have stated and the output is sent to the target system you have indicated.
Did this page help you?
If you find any issues with this page or its content – a typo, a missing step, or a technical error – let us know how we can improve!