Skip to main content Skip to complementary content

Creating customized forms for workflow tasks

Whenever a data steward accesses Talend MDM Web UI to approve a workflow task assigned to him/her, the task details display in an automatically generated form "default form". However, there is a way to design a customized form instead of this auto-generated form.

From the BPM perspective in Talend Studio, you can create a customized form for any workflow task that needs human intervention. Later when the data steward accesses the auto-generated form of this task in Talend MDM Web UI, he/she can jump to the customized web application generated with the form defined in the BPM perspective. For further information, see Talend MDM Web UI User Guide.

Before you begin

You have already connected to the MDM server from Talend Studio. At least one workflow has been created.

About this task

The following procedure of creating a customized form for a workflow task is documented based on the MDM demo project.

Procedure

  1. Open the workflow in the BPM perspective of Talend Studio.
  2. Select a step that requires human intervention, Price Request in this example.
    General information about the selected step is displayed in the General panel.
  3. Go to the Execution panel, click the Form tab, and select the UI Designer option.
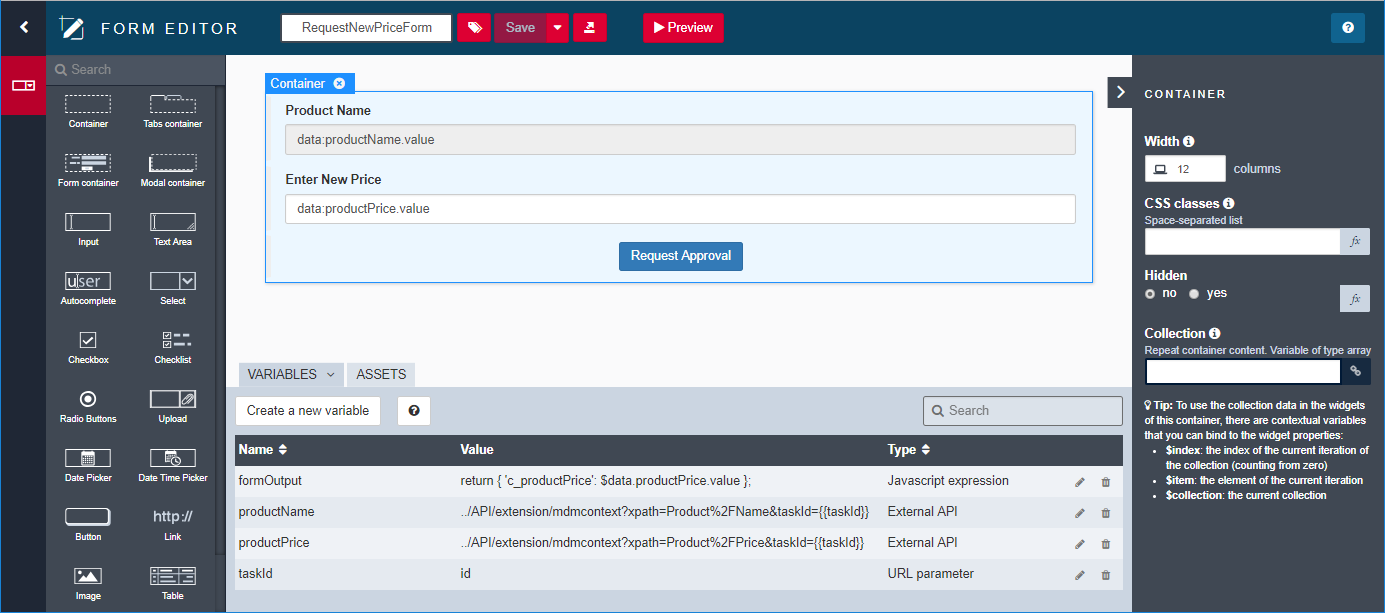
  4. Click Create a new form... at the bottom of the Target form drop-down list, and the form editor is opened in the browser, which allows you to define the customized form with relevant widgets.
  5. If required, modify the form name in the text field at the top of the page, RequestNewPriceForm in this example.
  6. If required, click the form information button next to the form name field and in the pop-up dialog box, specify the metadata information of the form in the corresponding fields.
  7. In the VARIABLES area, specify the variables you need to use in the customized form. In this example, the following four variables are added:
    • formOutput: to return the new product price to the workflow. The type is Javascript expression and the value is return {'c_productPrice': $data.productPrice.value};.
    • productName: to retrieve the value of the product name from MDM. It is an external API type variable with the value set to the mdm_context API URL ../API/extension/mdmcontext?xpath=Product%2FName&taskId={{taskId}}, where Product%2FName represents the xPath of the product name element and %2F is the HTML URL encoding value of the character /.
    • productPrice: to retrieve the value of the product price from MDM. It is an external API type variable with the value set to the mdm_context API URL ../API/extension/mdmcontext?xpath=Product%2FPrice&taskId={{taskId}}, where Product%2FPrice represents the xPath of the product price element and %2F is the HTML URL encoding value of the character /.
    • taskId: to get the ID of the task. It is a URL parameter type variable.
  8. In the Container area, add as many widgets as required. In this example, only the product name and the product price will be shown in the customized form, and the following two fields are added:
    • Product Name: a read-only input widget with the productName variable value productName.value.
    • Enter New Price: a writable input widget with the productPrice variable value productPrice.value.

    For more information about how to define a customized form, see How to design a customized form using the workflow UI form designer for an MDM workflow task (deprecated).

  9. Save your customized form and then close it to go back to your workflow.
    Note that there is no explicit deployment action for a custom form. Rather, you deploy a custom form at the same time as you deploy the workflow to which it is linked.

Results

After you define and deploy the customized form for a workflow task, when a data steward or business user access Talend MDM Web UI, the workflow task will be displayed with the customized form.

Did this page help you?

If you find any issues with this page or its content – a typo, a missing step, or a technical error – let us know how we can improve!