Skip to main content Skip to complementary content

Creating Java user-defined indicators

You can create your own personalized Java indicators.

Management processes for Java user-defined indicators are the same as those for system indicators.

You can also import a ready-to-use Java user-defined indicator from the Exchange folder in the DQ Repository tree view. This Java user-defined indicator connects to the mail server and checks if the email exists.

Defining the custom indicator

Procedure

  1. In the DQ Repository tree view, expand Libraries > Indicators.
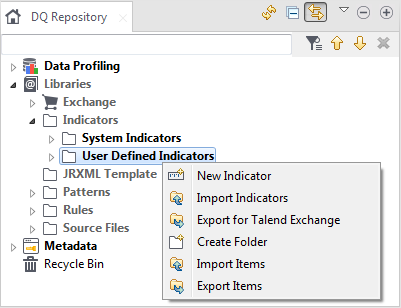
  2. Right-click User Defined Indicators.
    Contextual menu of the User Defined Indicators node.
  3. Select New Indicator from the contextual menu.
    The New Indicator wizard is displayed.
  4. In the Name field, enter a name for the Java indicator you want to create.
    Information noteImportant:

    Do not use the following special characters in the item names: ~ ! ` # ^ * & \\ / ? : ; \ , . ( ) ¥ ' " « » < >

    These characters are all replaced with "_" in the file system and you may end up creating duplicate items.

  5. Optional: Set other metadata (Purpose, Description and Author) in the corresponding fields and click Finish.
    The indicator editor opens displaying the metadata of the user-defined indicator.
    Overview of the Indicator Metadata, Indicator Category, and Indicator Definition sections.

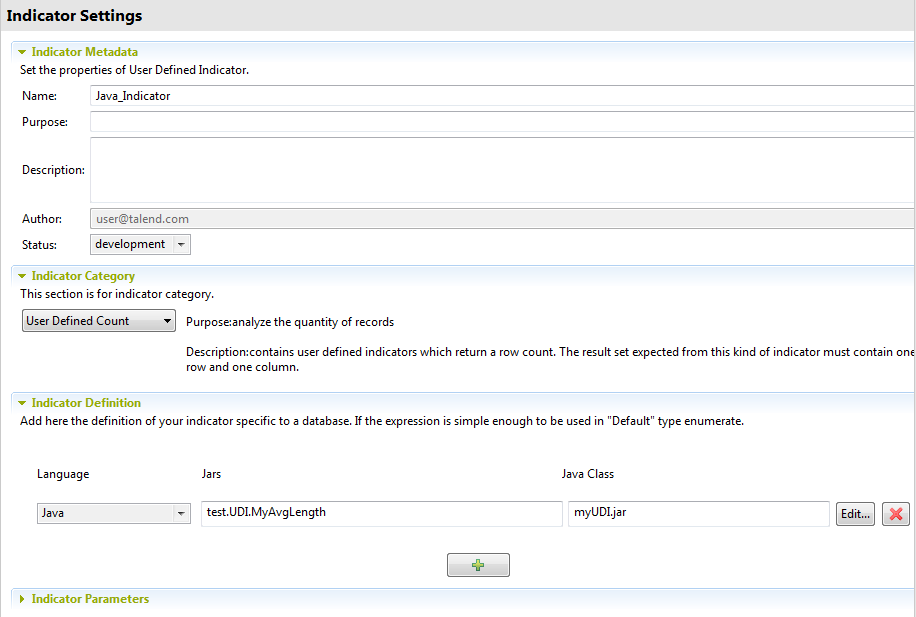
Setting the definition and category of the custom indicator

Before you begin

You have selected the Profiling perspective.

Procedure

  1. Click Indicator Category and select from the list a category for the Java indicator.
    The selected category determines the columns expected in the result set of the analysis that uses this indicator.
    The table below explains available categories.
    Indicator category Description Expected query results
    User Defined Match Evaluates the number of data matching a condition. The result set should have one row and two columns. The first column contains the number of values that match and the second column the total count.
    User Defined Frequency Evaluates the frequency of records using user-defined indicators for each distinct record. The result set should have 0 or more rows and two columns. The first column contains a value and the second the frequency (count) of this value.
    User Defined Real Value Evaluates real functions of data. The result set should have one row and one column that contain a real value.
    User Defined Count Analyzes the quantity of records and returns a row count. The result set should have one row and one column that contain the row count.
  2. Click Indicator Definition and then click the [+] button.
  3. From the Database list, select Java.
  4. Enter the Java class in the Java Class field.
    Information noteNote: Make sure that the class name includes the package path, if this string parameter is not correctly specified, an error message will display when you try to save the Java user-defined indicator.
  5. Select the Java archive holding the Java class:
    1. Click the Edit... button. The UDI Selector dialog box opens.
    2. In the Select libraries view, select the check box of the archive holding the Java class and then select the class in the bottom panel of the wizard.
    3. Click OK.

      The dialog box is closed and the Java archive is displayed in the indicator editor.

      You can add or delete Java archives from the Manage Libraries view of this dialog box.

      For more information on creating a Java archive, see Creating a Java archive for the user-defined indicator.

  6. Click Indicator Parameters to open the view where you can define parameters to retrieve parameter values while coding the Java indicator.
    Overview of the Indicator Parameters section.
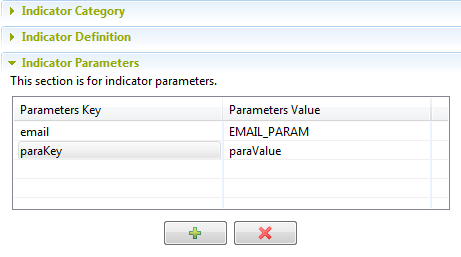
    You can retrieve parameter values with a code similar to this one that retrieves the parameter of EMAIL_PARAM:
    // Check prerequisite
            IndicatorParameters param = this.getParameters();
            if (param == null) {
                log.error("No parameter set in the user defined indicator " + this.getName()); //$NON-NLS-1$
                return false;
            }
            Domain indicatorValidDomain = param.getIndicatorValidDomain();
            if (indicatorValidDomain == null) {
                log.error("No parameter set in the user defined indicator " + this.getName()); //$NON-NLS-1$
                return false;
            }
    
            // else retrieve email from parameter
            EList<JavaUDIIndicatorParameter> javaUDIIndicatorParameter = indicatorValidDomain.getJavaUDIIndicatorParameter();
            for (JavaUDIIndicatorParameter p : javaUDIIndicatorParameter) {
                if (EMAIL_PARAM.equalsIgnoreCase(p.getKey())) {
    For a more detailed sample of the use of parameters in a Java user-defined indicator, check the available documentation.
  7. Click the [+] button at the bottom of the table and define in the new line the parameter key and value.
    You can edit these default parameters or even add new parameters any time you use the indicator in a column analysis. To do this, click the indicator option icon in the analysis editor to open a dialog box where you can edit the default parameters according to your needs or add new parameters.
  8. Click the save icon on top of the editor.
    The indicator is listed under the User Defined Indicators folder in the DQ Repository tree view. You can use this indicator to analyzed columns through a simple drag-and-drop operation from the DQ Repository tree view to the columns listed in the editor.

Creating a Java archive for the user-defined indicator

Before creating a Java archive for the user defined indicator, you must define, in Eclipse, the target platform against which the workspace plugins will be compiled and tested.

Before you begin

You have selected the Profiling perspective.

Procedure

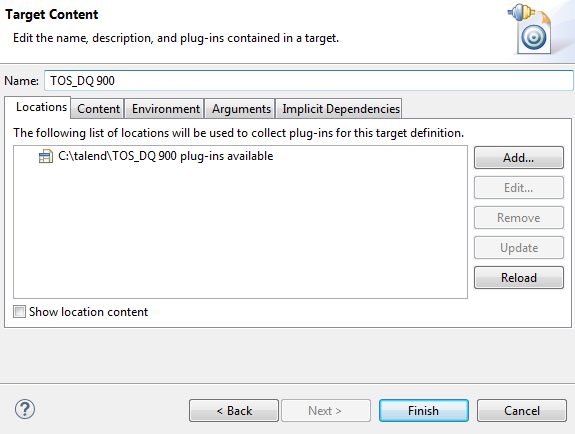
  1. Define the target platform:
    1. In Eclipse, select Preferences to display the Preferences window.
    2. Expand Plug-in Development, select Target Platform and click Add... to open a view where you can create the target definition.
    3. Select the Nothing: Start with an empty target definition option and click Next.
    4. In the Name field, enter a name for the new target definition and click Next.
    5. Select Installation from the Add Content list and click Next.
    6. Use the Browse... button to set the path of the installation directory and click Next.
      Location of the Browse... button.

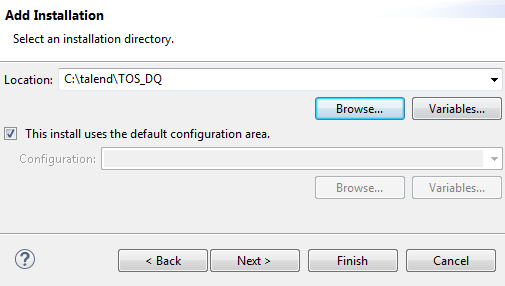
      The new target definition is displayed in the location list.

      The new target definition is listed in the Locations tab.
    7. Click Finish to close the dialog box.
  2. Create a Java archive for the user defined indicator
    1. In Eclipse, check out the project from Git.

      In this Java project, you can find four Java classes that correspond to the four indicator categories listed in the Indicator Category view in the indicator editor.

      Example of the four Java classes from the Java project.

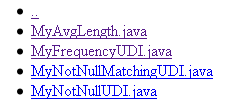
      Each one of these Java classes extends the UserDefIndicatorImpl indicator. The figure below illustrates an example using the MyAvgLength Java class.

      package test.udi;
      
      import org.talend.dataquality.indicators.sql.impl.UserDefIndicatorImpl;
      
      /**
       * @author mzhao
       * 
       * A very simple example of a java implementation of a user defined indicator. This indicator returns a user defined
       * real value. It implements the minimum number of required methods.
       */
      public class MyAvgLength extends UserDefIndicatorImpl {
      
          private double length = 0;
      
          @Override
          public boolean reset() {
              super.reset();
              length = 0;
              return true;
          }
      
          @Override
          public boolean handle(Object data) {
              super.handle(data);
              // an indicator which computes the average text length on data which are more than 2 characters (this means that
              // text values with less than 2 characters are not taken into account).
              int dataLength = (data != null) ? data.toString().length() : 0;
              if (dataLength > 2) {
                  length += dataLength;
              }
              return true;
          }
      
          /*
           * (non-Javadoc)
           * 
           * @see org.talend.dataquality.indicators.impl.IndicatorImpl#finalizeComputation()
           */
          @Override
          public boolean finalizeComputation() {
              value = String.valueOf(this.length / (this.getCount() - this.getNullCount()));
              return super.finalizeComputation();
          }
      
      }
    2. Modify the code of the methods that follow each @Override according to your needs.
    3. Optional: Use the following methods in your code to retrieve the indicator parameters:
      Method Description
      Indicator.getParameter() Returns an IndicatorParameters object
      IndicatorParameters.getIndicatorValidDomain() Returns a Domain object
      Domain.getJavaUDIIndicatorParameter() Returns a list of JavaUDIIndicatorParameter that stores each key/value pair that defines the parameter
    4. Save your modifications.
    5. Using Eclipse, export this new Java archive.

Results

The Java archive is now ready to be attached to any Java indicator you want to create in the Profiling perspective.

Did this page help you?

If you find any issues with this page or its content – a typo, a missing step, or a technical error – please let us know!