Skip to main content Skip to complementary content

Profiling an ADLS Databricks file via Hive

From the Profiling perspective of Talend Studio, you can generate a column analysis on an ADLS Databricks file through Hive.

A JDBC connection is required to connect to Hive on Databricks.
  1. Download the JDBC driver and add it to Talend Studio.
  2. Create a JDBC connection to the ADLS cluster.
  3. Create a column analysis with simple indicators on the table and columns.

You can then modify the analysis settings and add other indicators as needed. You can also create other analyses later on this ADLS file by using the same Hive table.

Downloading the JDBC driver and adding it to Talend Studio

The JDBC driver is a jar file that you need to create a JDBC connection.

Procedure

  1. Go to the Databricks drivers download page and register.
  2. Download the JDBC driver.
  3. Go to Talend Studio.
  4. In the menu bar, click Window > Show view....
  5. In the Show view dialog box, start typing Modules.
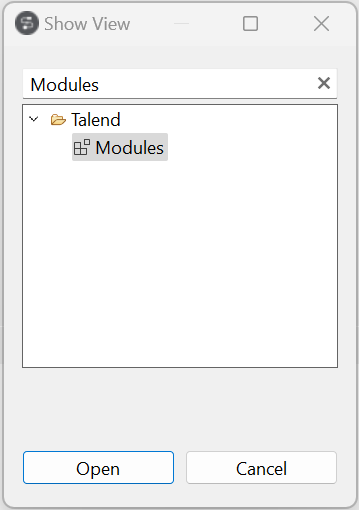
  6. Under Talend, select Modules and click Open.
    Modules from the Show view window.
  7. In the Modules view, click Import external jars.
  8. Browse to the jar file and click Open.

Results

You see the JDBC driver in the modules list.

Connecting to an ADLS Databricks Gen2 file

You need to create an external table and set up a parameter to profile an ADLS Databricks Gen2 file.

Before you begin

You have created an external table. For more information, see Microsoft Azure documentation.

To create an external table, you can also use the tAzureFSConfiguration and tJava components.

About this task

This procedure is specific to ADLS Databricks Gen2.

Procedure

  1. On the Configuration tab of your Databricks cluster page, expand the Advanced options.
  2. In the Spark tab, add the following Spark properties: spark.hadoop.fs.azure.account.key.<storage_account>.dfs.core.windows.net <key>

    This key is associated with the storage account to be used. You can find it in the Access keys blade of this storage account. Two keys are available for each account and by default, either of them can be used for this access.

    Ensure that the account to be used has the appropriate read/write rights and permissions.

Creating a connection to an ADLS Databricks cluster

Before you begin

About this task

To connect to a Databricks cluster on Amazon S3, follow this procedure Adding S3 specific properties to access the S3 system from Databricks.

Procedure

  1. In the DQ Repository tree view, expand Metadata and right-click DB Connections.
  2. Click Create DB connection.
    The Database Connection wizard is displayed.
  3. Enter a name and click Next. The other fields are optional.
  4. Select JDBC as the DB Type.
  5. In the JDBC URL field, enter the URL of your ADLS Databricks cluster. To get the URL:
    1. Go to Azure Databricks.
    2. In the clusters list, click the cluster to which you want to connect.
    3. Expand the Advanced Options section and select the JDBC/ODBC tab.
    4. Copy the content of the JDBC URL field. The URL format is jdbc:spark://<server-hostname>:<port>/default;transportMode=http;ssl=1;httpPath=<http-path>;AuthMech=3.
      Information noteNote: To encrypt the token in a safer way, it is recommended to enter the UID and PWD parameters in the Database Connection wizard of Talend Studio.
  6. Go back to the Database Connection wizard.
  7. Paste the JDBC URL.
  8. Add the JDBC driver to the Drivers list:
    1. Click the [+] button. A new line is added to the list.
    2. Click the […] button next to the new line. The Module dialog box is displayed.
    3. In the Platform list, select the JDBC driver and click OK. You are back to the Database Connection wizard.
  9. Click Select class name next to the Driver Class field and select com.simba.spark.jdbc4.Driver.
  10. Enter the User Id and Password.
  11. In Mapping file, select Mapping Hive.
  12. Click Test Connection.
    • If the test is successful, click Finish to close the wizard.
    • If the test fails, verify the configuration.

Creating a profiling analysis on an ADLS Databricks file via Hive

After creating a connection to an ADLS Databricks cluster via Hive, you can create a profiling analysis on a specific file.

Before you begin

Procedure

  1. In the DQ Repository tree view, expand Metadata > DB Connections > the JDBC connection > Tables.
  2. In the Columns folder, select the columns you want to analyze and right-click them.
    Information noteTip: To create an analysis on all columns, right-click the table name.
  3. Hover over Column Analysis and select the analysis type you need.
    The Create New Analysis wizard is displayed.
  4. Enter a name and click Finish. The other fields are optional.
    A new analysis on the selected ADLS files is automatically created and opened in the analysis editor. Depending on the analysis type you have selected, the indicators are automatically assigned for columns.

    The analysis applies to the Hive table, but computes statistics on the data from the ADLS by using the External table mechanism. External tables keep data in the original file outside of Hive. If the ADLS file you selected to analyze is deleted, the analysis will not be able to run anymore.

  5. If needed:
    • Modify the columns to be analyzed: In the Data Preview tab, click Select Columns.
    • Add more indicators or new patterns to the columns: In the Analyzed Columns tab, click Select Indicators.
  6. Run the analysis to display the results in the Analysis Results view in the editor.

What to do next

You can create a report on this analysis. See Creating a report on specific analyses.

Did this page help you?

If you find any issues with this page or its content – a typo, a missing step, or a technical error – please let us know!