
Setting privileges to Roles
Procedure
-
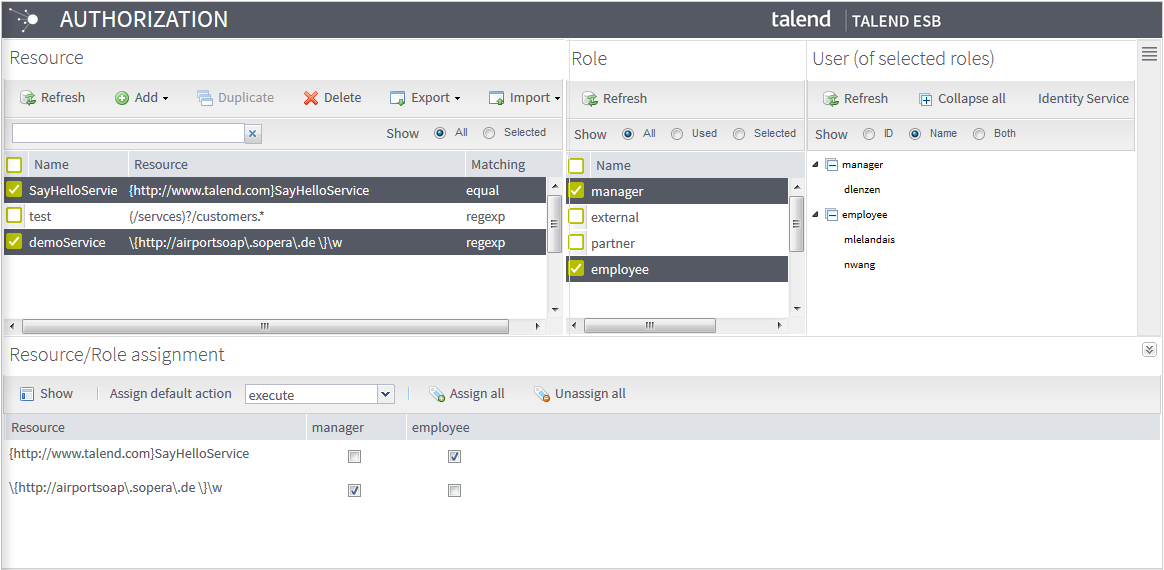
Select the Resources and Roles that you want to set assignments in the
Resource panel and Role panel respectively.
Example
-
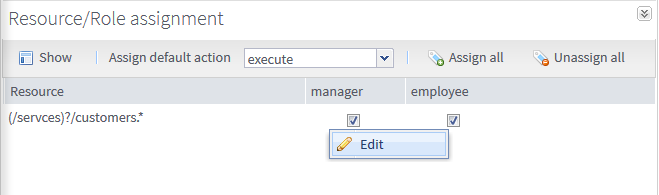
Once an assignment is set, you can edit it by right-clicking the
corresponding check box in the assignment table and click Edit.
Example
 The Resource/Role assignment dialog box appears allowing you to change permissions.
Example
 The corresponding Role and Resource is shown in the Basic tab of the dialog box. The actions available for SOAP and REST services are listed separately. Select or clear the check boxes as needed to change the assignment to the Role. Click Save to validate the change or Cancel to cancel it.Information noteWarning: You can not unset all actions to a Role in the Resource/Role assignment dialog box. There should be at least one action selected before you can save it.Information noteWarning: When you clear a permission check box for a pair of Resource and Role in the assignment table, you remove all actions assigned to the Role, not just the shown default action.
Example
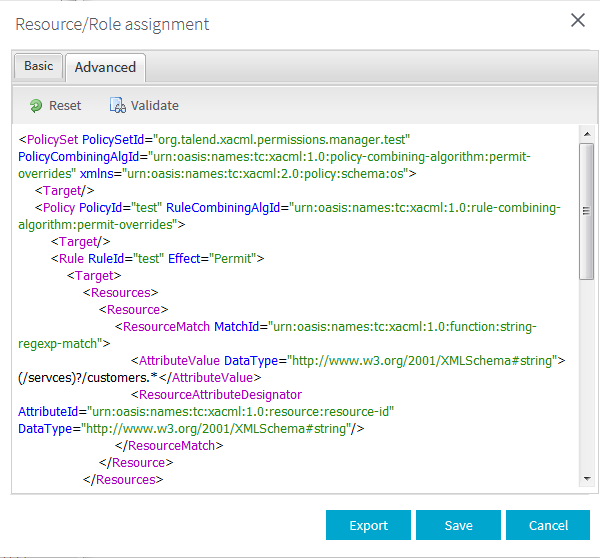 In the Advanced tab of the dialog box, the underlying XACML Permission Policy is shown. You can edit the policy by changing the effect, actions, algorithm and so on. Click the Validate button to validate the policy. Click Reset to go back to the original policy. For more information about XACML used by ESB Authorization, see XACML standard. Click Save to save your changes or Cancel to cancel it.You can also export this assignment to an XML file by clicking the Export button. The Web browser will prompt you to open or save the assignment depending on your Web browser configuration. For more information about how to export assignments, see Exporting assignments.
Did this page help you?
If you find any issues with this page or its content – a typo, a missing step, or a technical error – let us know how we can improve!